How to Configure Firebase in iOS and Collect Data that Allows You to Optimize the App?

Finishing a mobile app and launching it in the App Store is a big deal, but our work is not done yet.
The product still needs to be developed, changed and improved. To do this, we need various information. How many people use the app every day? What do they do in it? Which screens are viewed the least? These are only some of the questions worth asking.
This is when Firebase comes to the rescue – a platform that gives developers scalable infrastructure, multiple tools, and services. From this guide, you’ll learn step-by-step how to implement Firebase Analytics for iOS.
What is Firebase?
Firebase is a platform for building web and mobile apps. It offers many tools and services related to app development, monitoring stability, and analytics.
It enables automatic error reporting in real time, monitoring app performance, and collecting data about how people use the app, among others.
This platform also helps you identify priorities and fix the most common bugs based on their impact on real users. Both developers and marketers use Firebase. Moreover, its API allows sync with other tools and data storage on the Firebase cloud.
What is Google Analytics for Firebase?
Google Analytics for Firebase (a.k.a. Firebase Analytics) is a module that makes it possible to collect information about the app. It measures traffic and monitors users’ behavior in mobile apps. With this tool, you will check users’ activity at different time of day, their demographics, gender, average session time, and much more. Such data comes in handy, especially in the Product Discovery stage.
Firebase Analytics enables free, unlimited reporting of up to 500 different events. SDK intercepts them automatically. Additionally, you can define your own custom events to measure things that are especially important in your project.
Data analysis with Google Analytics for Firebase allows you to check the efficiency of your activities. With this tool, you will gather data about the effectiveness of your ad campaigns, popularity of your products, or client’s preferences on different markets.
It all directly impacts increasing sales and growing app recognition.
So, if you want to know your clients better, you should definitely configure Firebase and Google Analytics.
How to create a project in Firebase?
The Firebase project is a top-level element. How should you configure it?
Start with adding your web, iOS, or Android app to the project. Next, you can add SDK Firebase packages to an unlimited number of products, such as Analytics, Cloud Firestore, Performance monitoring, or Remote config.
Firebase console
The first step is to create your Firebase account. Go to the Firebase website and click Get started.
Google Firebase’s start screen (screenshot source: https://firebase.google.com/).
Next, type your Google account’s log-in data. If you don’t have the account yet, create it.
After logging in, you will see a welcome screen.
Creating a new project
Click Create project.
Then, a window will appear in which you must set a project name and accept Firebase’s terms. Next, click Continue.
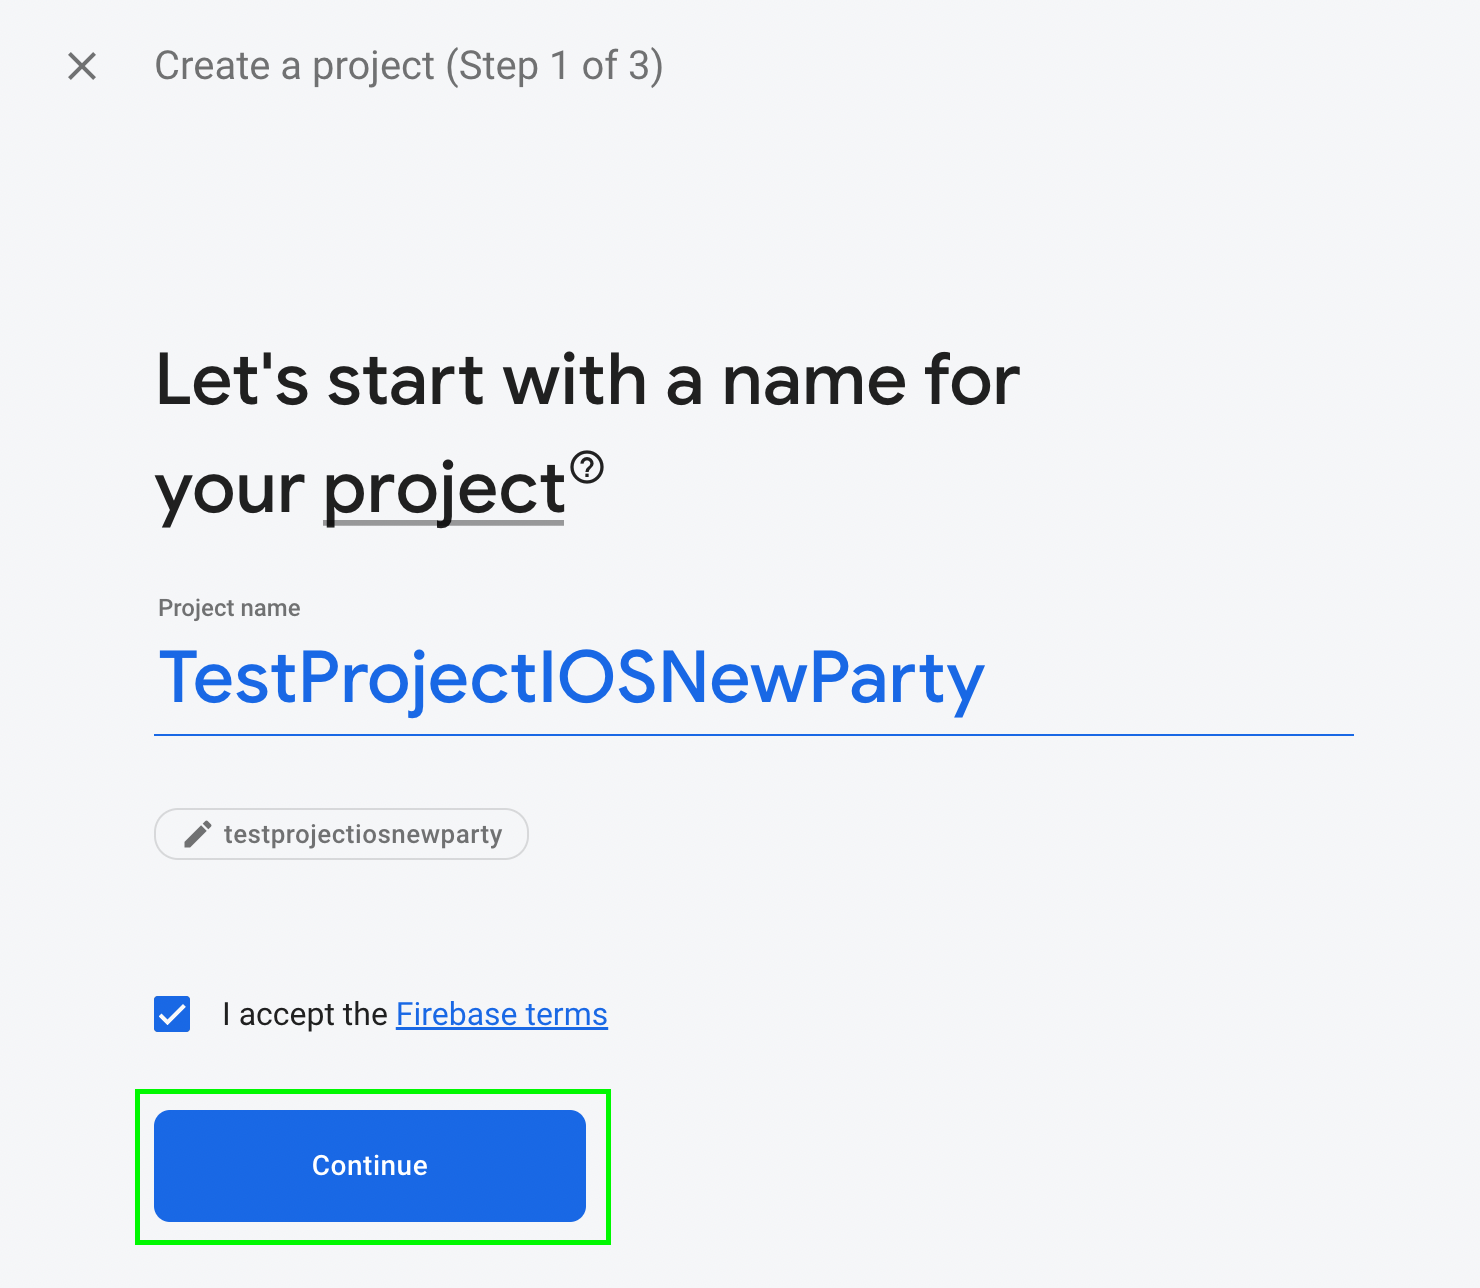
Adding project name in Firebase (screenshot source: https://firebase.google.com/).
In the second step, Firebase will offer you to add Google Analytics to your project. Click Continue.
The last thing to do is to set a location for your analytics. Remember that this doesn’t mean that data will be related only to this one region. Google wants to know the country of your organization or where you live. Accept the terms of data sharing and click Create project.
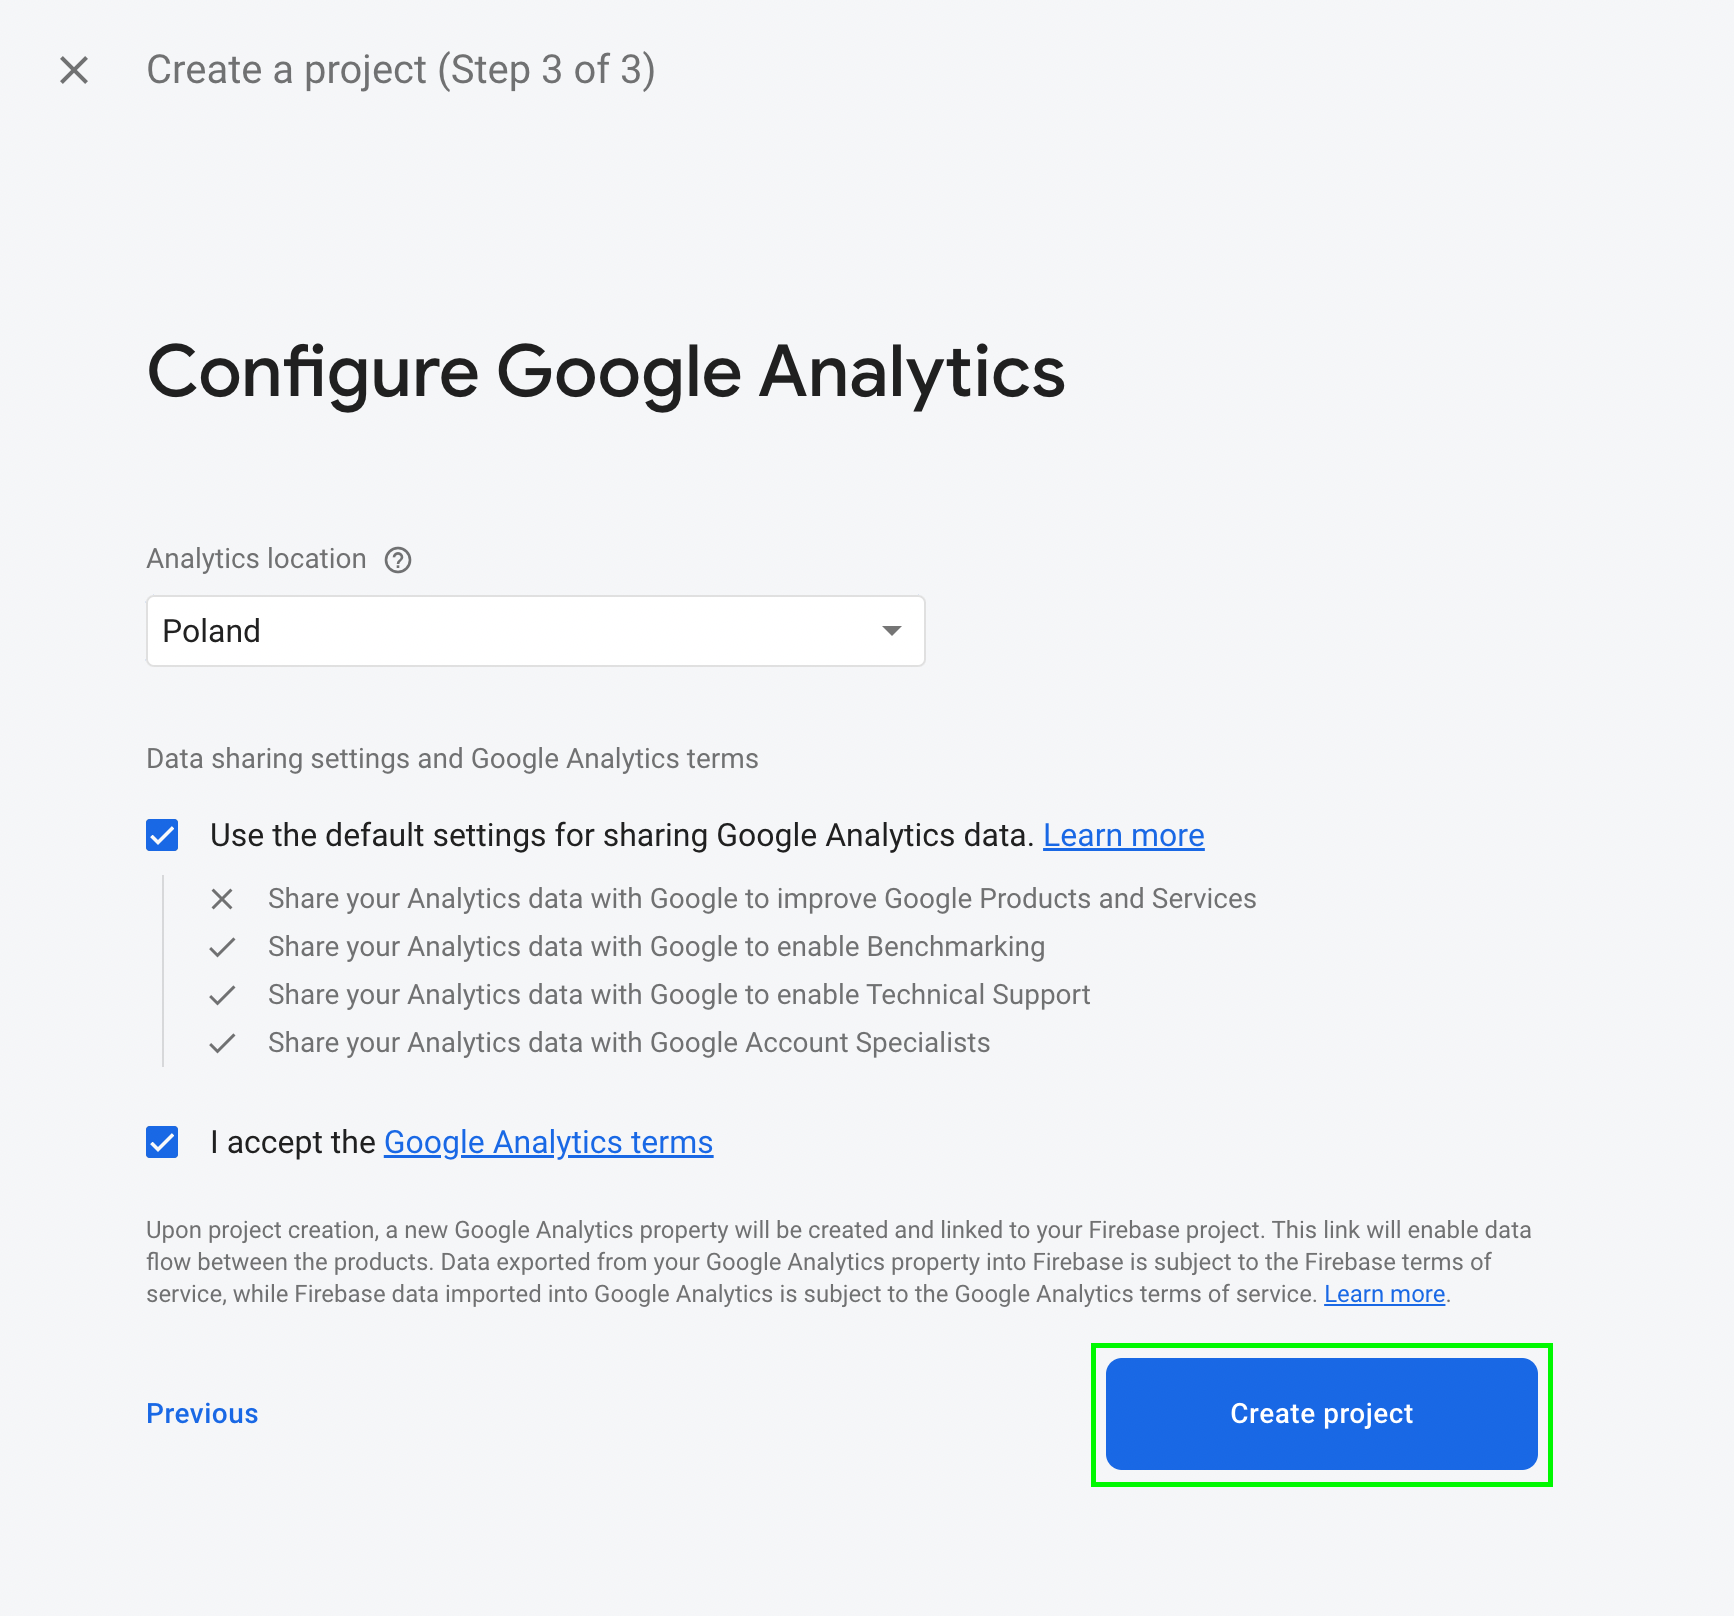
Google Analytics configuration in Firebase (screenshot source: https://firebase.google.com/).
When the project is ready, click Continue.
Adding a new app to Firebase
Now, you probably see a container for Firebase services dedicated to your project – this is a Firebase Dashboard where you will manage your tools. Click the iOS icon to add Firebase to your app.
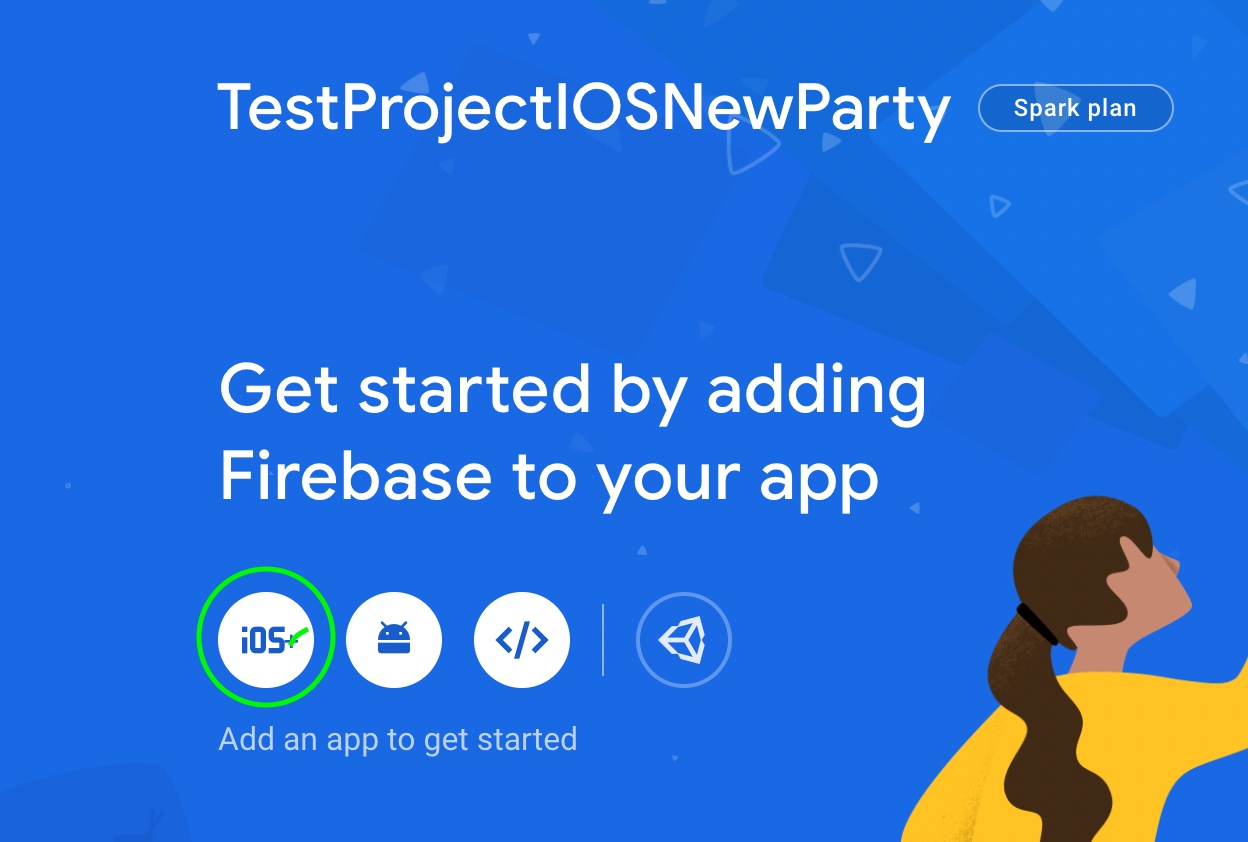
Adding Firebase to an iOS app (screenshot source: https://firebase.google.com/).
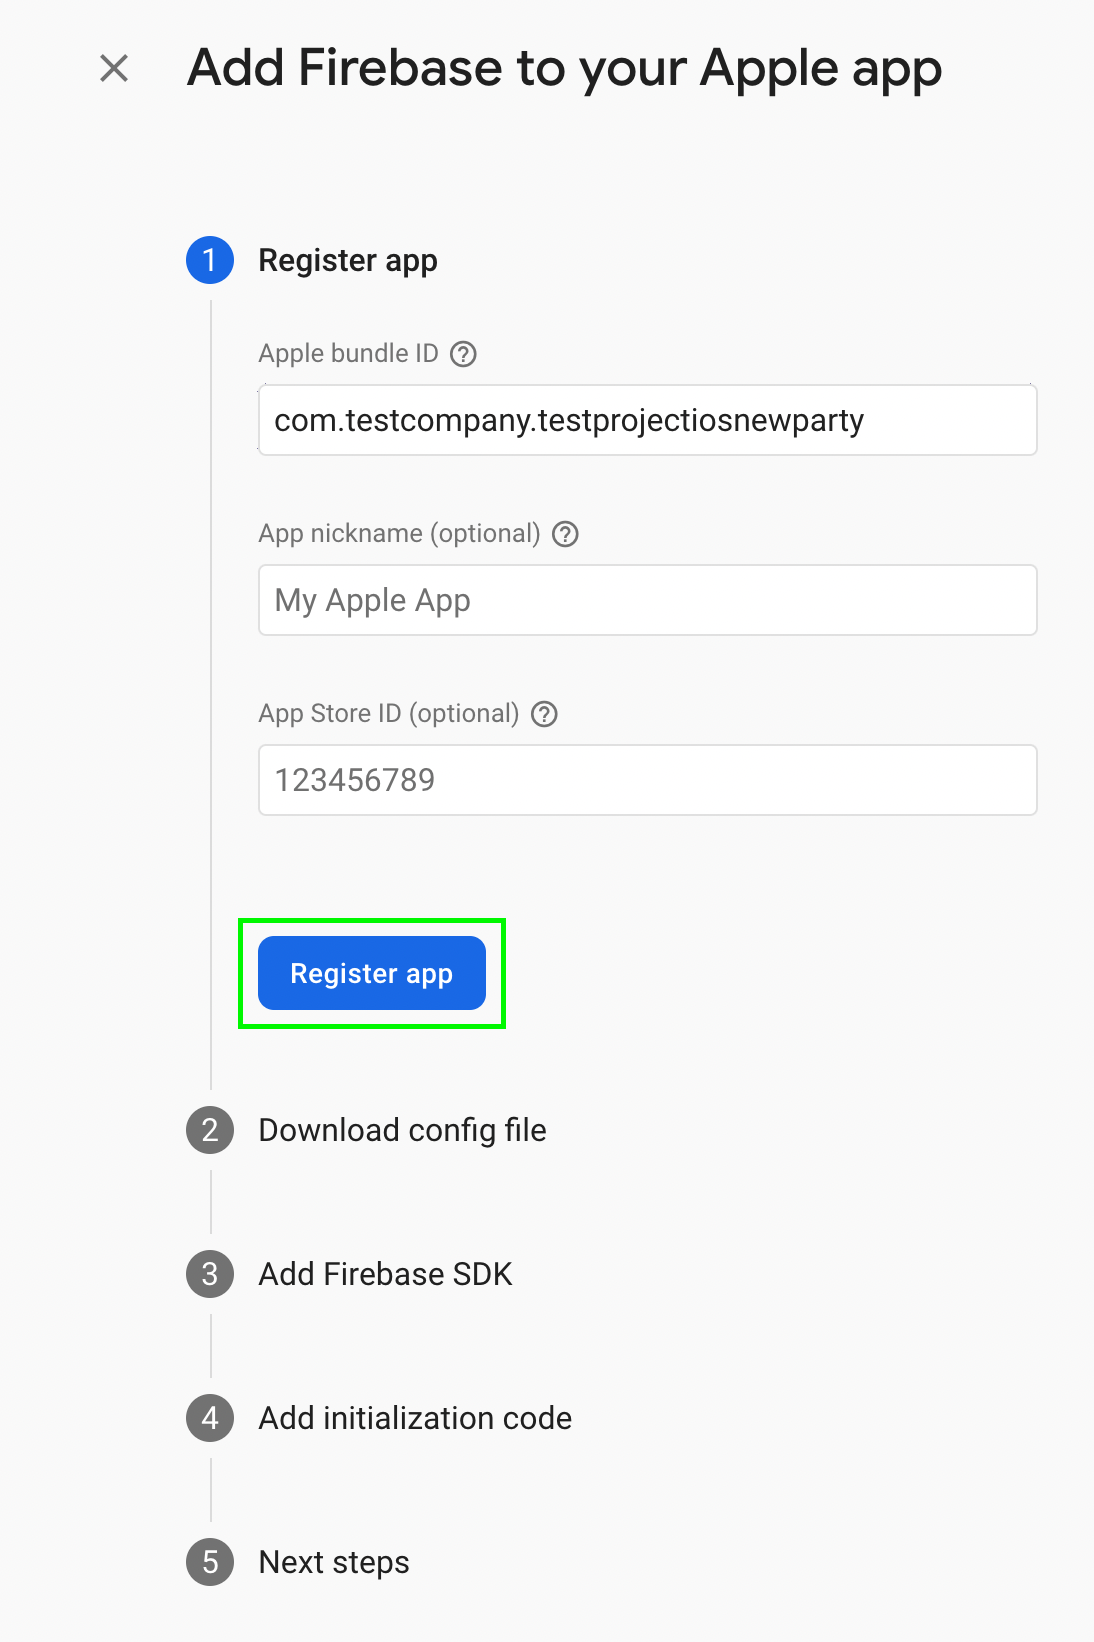
Type in the iOS bundle ID. Optionally, you can also add the app’s nickname and App Store ID. What does Firebase ask for exactly?
- App nickname—If you set this parameter, the Firebase console will use it to represent this app. The nickname isn’t visible to users.
- App Store ID—You’ll find it in the app’s URL address. In the example given in the registration process, you can see an ID number: 123456789. This is the App Store’s ID assigned to this address: https://itunes.apple.com/us/app/yourapp/id123456789.
Ready? Click the Register app.
Adding Firebase to an iOS app. Step nr 1. Screenshot source: https://firebase.google.com/.
How to integrate Firebase Analytics with an iOS app?
To ensure the services work correctly, you need a GoogleService-Info.plist file. This is the Apple Firebase platform’s config file. You can download it when configuring the app in the Firebase console.
Later, you need to add it to the Xcode project (all you have to do is move it to the selected folder). If needed, check the Copy elements option, and then press the Next button on the Firebase configuration page.

Adding Firebase to an iOS app. Step nr 2. Screenshot source: https://firebase.google.com/.
Adding Firebase SDK to a project
You can add Firebase SDK to a project in several ways.
1. Swift Package Manager
This tool manages Swift code distribution. SPM is integrated with the Swift compilation system to automate the process of downloading, compiling, and connecting dependencies. Package Manager is included in Swift 3.0 and newer versions.
Adding Firebase SDK (screenshot source: https://firebase.google.com/).
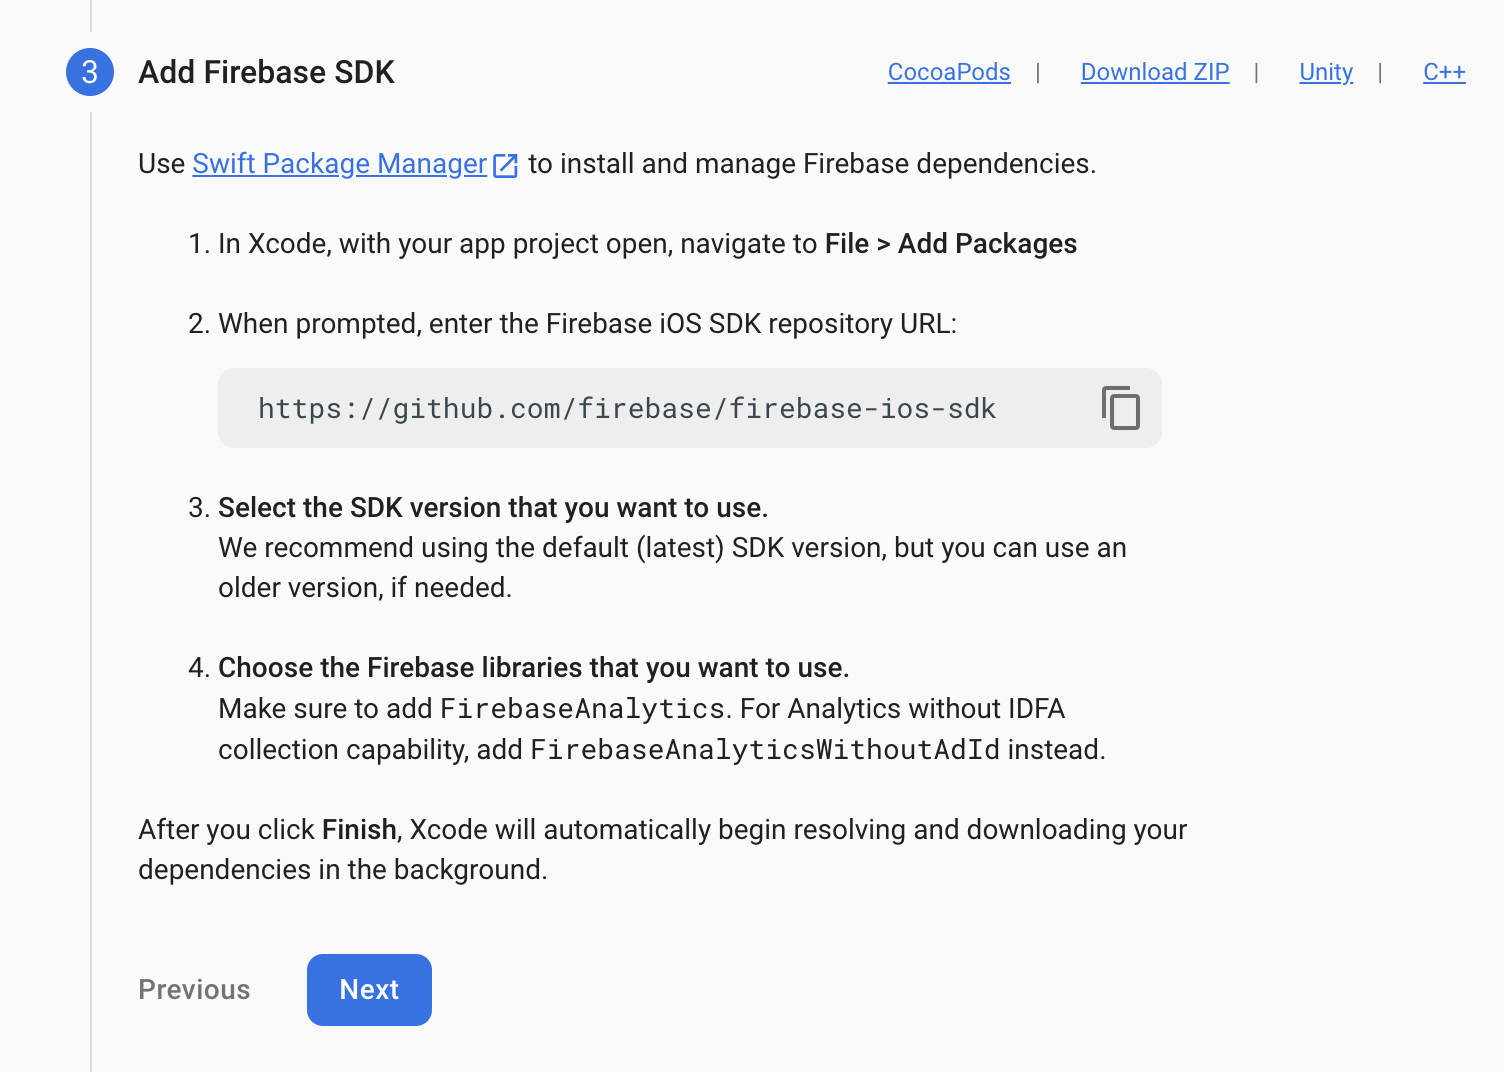
To add Firebase with Swift Package Manager, open Xcode and go to File ▸ Add Packages:
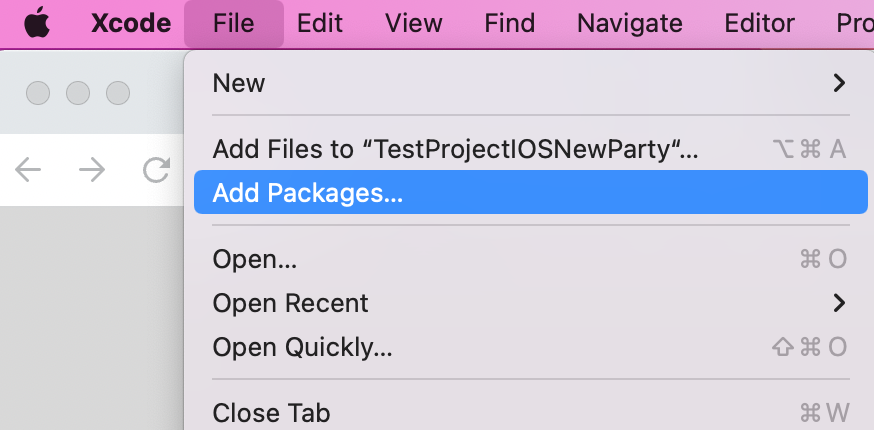
Source: Xcode
In the new window, type the URL address of the package repository. Copy and paste this link: https://github.com/firebase/firebase-ios-sdk, and then press Add Package.
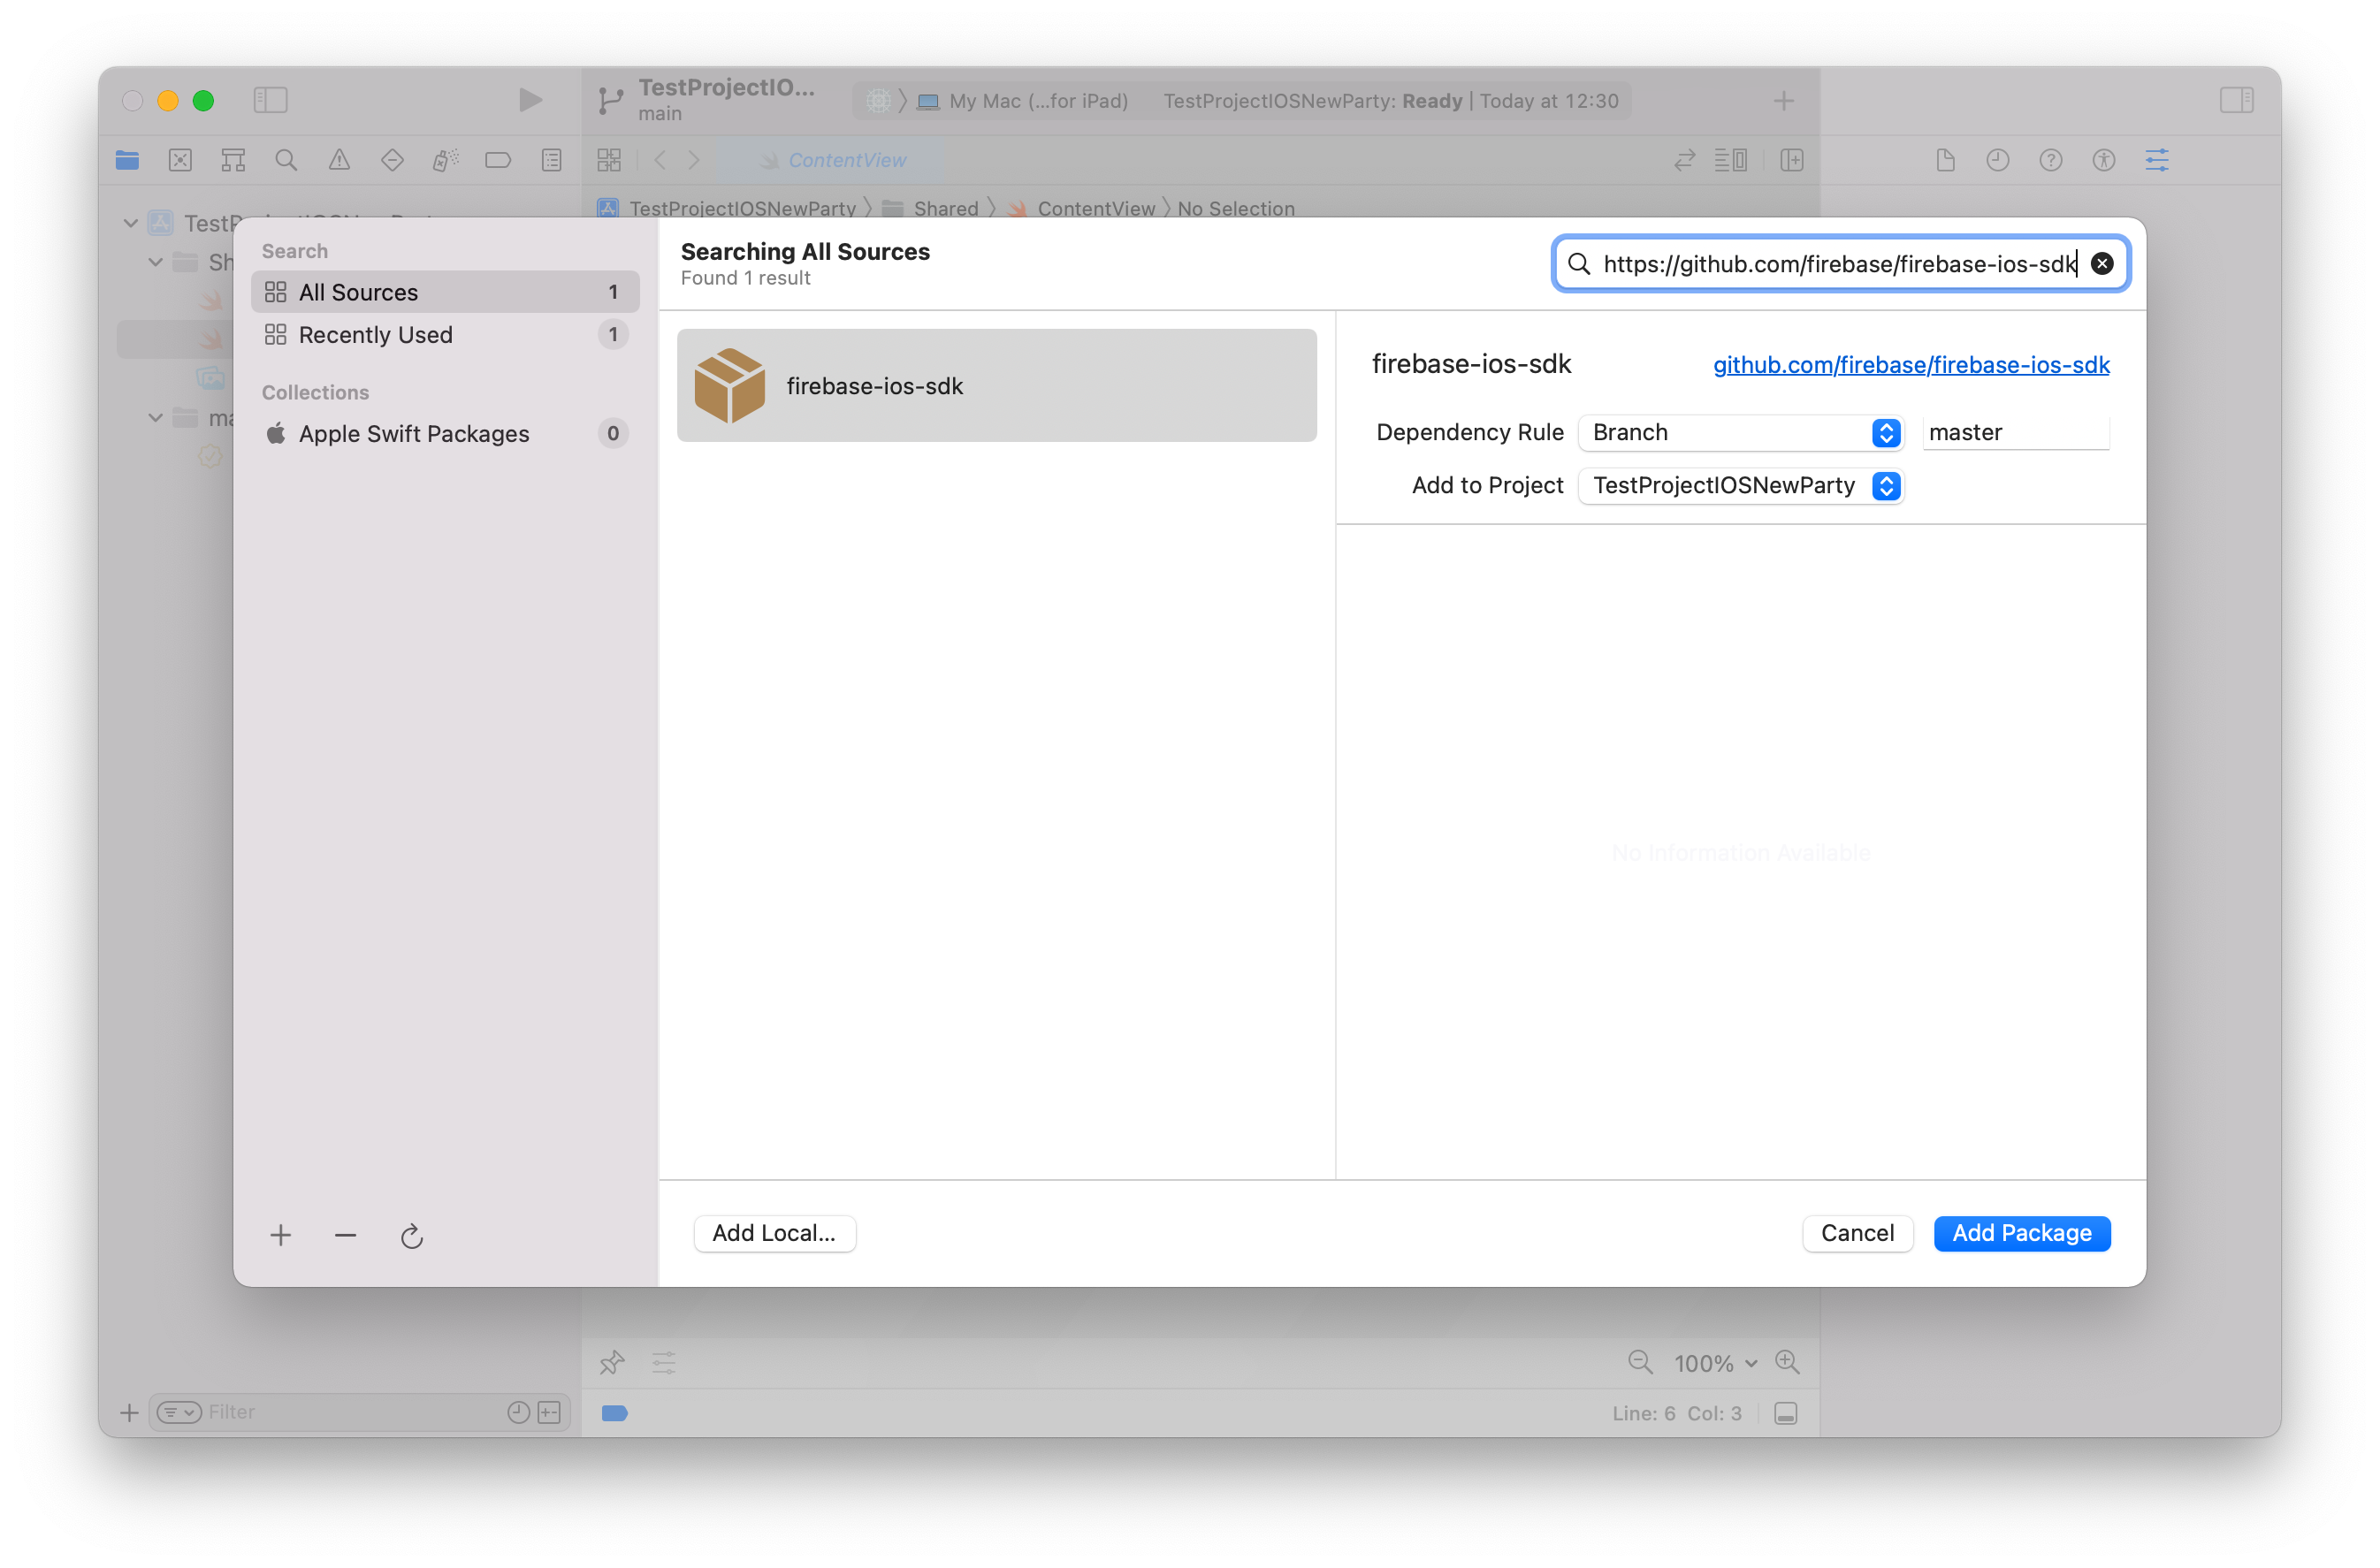
Source: Xcode
When Swift Package Manager downloads all the available libraries, you’ll see the view below, which includes all of Firebase’s services. Check the FirebaseAnalytics library and click Add Package.
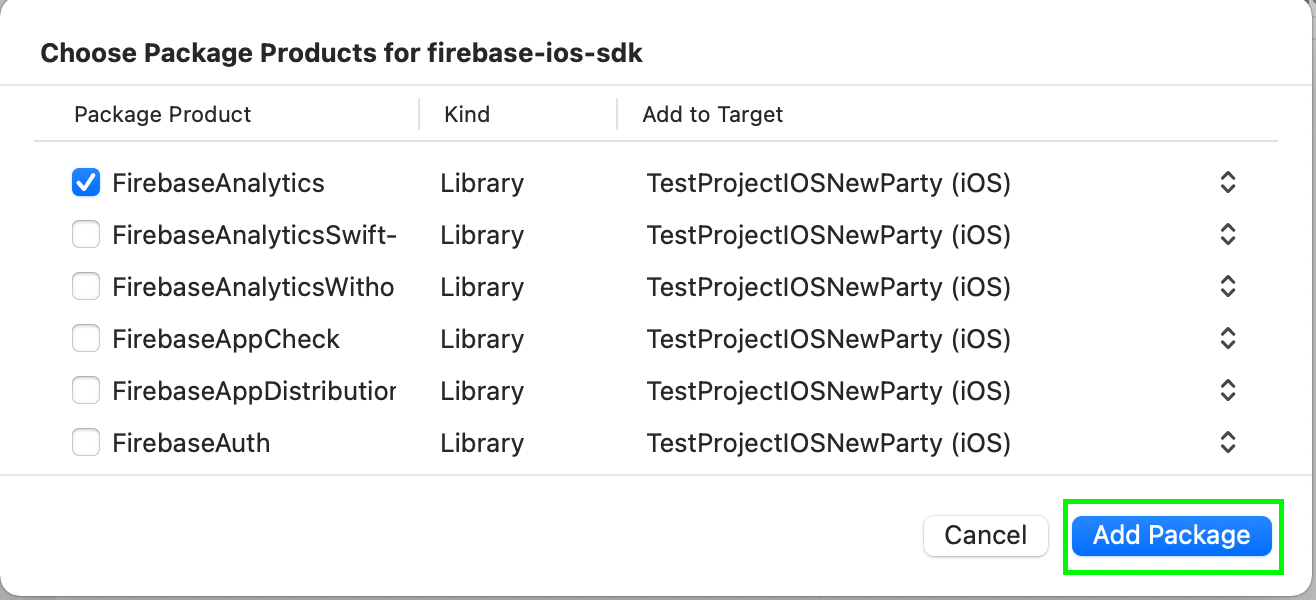
Adding Firebase Analytics package.
Swift Package Manager will do the rest. In the end, you can see in the Xcode project that the dependencies package had been added.
2. CocoaPods
You can also add Firebase SDK with CocoaPods. It’s a dependency manager on the app’s level that works with Objective-C, Swift, and many other programming languages. It offers third-party code distribution and enables automatic integration with Xcode projects.
The distribution of Firebase’s CocoaPods requires Xcode (at least version 12.5) and CocoaPods (at least version 1.10.0).
The installation alone is simple. You only need to add the right library to Podfile in a project. In this case, it will be the FirebaseAnalytics library, version 8.8.0.
Instructions
1. Add code under ‘FirebaseAnalytics’, ‘8.8.0’.
# Uncomment this line to define a global platform for your project
platform :ios, '13.4'
inhibit_all_warnings!
use_frameworks!

def shared_pods
  use_frameworks!

  pod 'FirebaseAnalytics', '8.8.0'
end

target 'TestProjectIOSNewParty' do
  shared_pods
end
2. Install a new library by adding pod install --repo-update in a Terminal. This way, you can add Firebase Dependencies.
3. After adding FirebaseAnalytics to your project, return to the Firebase console and press Next.
Initiating Firebase in Xcode
Now, you need to connect to Firebase after the app’s launch. To do this, you have to open Xcode. Then, in the AppDelegate class, add the following code at the end of a method seen below: FirebaseApp.configure() and a Firebase library import. It initiates the Firebase code.

Adding initializing code (screenshot source: https://firebase.google.com/).
When you are finished, return to the Firebase console. Choose the Next button and proceed to the last step — click Go to console.
And that’s it. Congratulations! You’ve successfully configured your project in the Firebase console.
Events in Firebase Analytics
You’ve created a project in the console and placed an iOS app in it. The only code you’ve added to Xcode initiates the Firebase library. Nevertheless, the platform has already collected some data. Why?
The Firebase system is based on sending events, and Analytics automatically registers some of them. Every event has its name sent as a String and optional parameters of the [String: Any] type.

Automatically collected events – this kind of event is triggered by the basic interactions with your app.
By default, Analytics collects the following parameters for every event (including custom events):
- language – it sets up a language used by the app
- screen_view – this event is triggered when the screen changes to a new one
- ad_click – an event that takes place when users tap an ad
- first_open – an event triggered when users open the app for the first time
You can find more information and a complete list of parameters in the Firebase documentation.
Predefined events
Another type – initially defined events. If you add them to your mobile app, they help you measure additional features and behavior and also generate more useful reports. Such events aren’t collected automatically because the context is vital in their case. You can check the recommended events and choose the best ones for your project.
Example
We may use the view_item_list event as an example. You need to send it along with an array parameter: items. It includes the list of elements that are displayed to a user.
Analytics.logEvent(AnalyticsEventViewItemList, parameters: [

AnalyticsParameterListID: “id”,

AnalyticsParameterListName: “name”,

AnalyticsParameterItems: [Item]

])
To register the events use logEvent(_:parameters:)method.
Here, you register a predefined event called AnalyticsEventViewItemList that consists of several parameters:
- AnalyticsParameterItemListID – an ID of a list with elements presented to a user
- AnalyticsParameterItemListName – name of a list
- AnalyticsParameterItems – elements of a list (
Itemmust includeitem_idanditem_name, but it may also include other optional parameters)
What happens when you add the code above? When a user runs into this list of elements, Firebase will register these events, and you can check them on a console.
Custom events
You may need to register an event that hasn’t been defined earlier. Luckily, it’s not a problem—custom events are here to help.
For example, if you develop a game, you can add events that will inform you when players achieve a particular goal.
To register them, you use the same method you used in the previous example: logEvent(_:parameters:). However, this time, you add your own name to the event and choose the parameters that you want to send. You can also add their names and select their type.
Example
Analytics.logEvent(“image_search_camera_click”, parameters: nil)


Analytics.logEvent(“swipe_to_product”, parameters: [

AnalyticsParameterCurrency: “EUR”,

swipe_direction: “swipe_left”

])
In the first example, you can see:
- “image_search_camera_click” – the name of an event that you’ve added yourself
- parameters: nil – there are no parameters, which means that in this case, you only want to know if the event has taken place at all
In the second example, you can see:
- “swipe_to_produkt” – your name of an event
- AnalyticsParameterCurrency – predefined parameter that says in what currency should the price of the product be displayed
- “swipe_direction” – custom parameter with your name
Events in Firebase are very flexible:
- You can use predefined events and create your own.
- You can mix together predefined parameters and those you’ve added yourself.
Remember that names of events and parameters should be short and describe your assumptions well.
Event manager
A good way to add analytics to a project is to use the Manager to handle all the events. In that case, all analytics will be placed in such a manager. This will allow you to make changes only in one place and make it easier to control the resources.
Manager’s template
Your manager will be a class. Let’s call it AnalyticsHelper. The code below presents a template that could be edited and extended according to your needs.
final class AnalyticsHelper {
    private class func event(with type: AnalyticsEvent, parameters: [String: Any]? = nil) {
        Analytics.logEvent(type.name, parameters: parameters)
    }

    private class func analyticsProduct(id: String, name: String, category: String, price: Double) -> [String: Any] {
        var parameters = [AnalyticsParameterKey.Product.itemID.name: id,
                          AnalyticsParameterKey.Product.itemName.name: name,
                          AnalyticsParameterKey.Product.itemCategory.name: category,
                          AnalyticsParameterKey.Product.price.name: price] as [String : Any]

        return parameters
    }
}

extension AnalyticsHelper {
    class func selectProductEvent(category: AnalyticsCategoryParameter.Category, product: AnalyticProduct, userType: ProfileType) {
        let parameters: [String : Any] = [
            AnalyticsParameterKey.SelectProduct.listId.name: category.name,
            AnalyticsParameterKey.SelectProduct.listName.name: category.name,
            AnalyticsParameterKey.SelectProduct.userType.name: userType.name,
            AnalyticsParameterKey.SelectProduct.items.name: [analyticsProduct(id: product.itemId, name: product.itemName, category: product.itemCategory, price: product.itemPrice)]
        ]

        event(with: .selectItem, parameters: parameters)
    }
}

extension AnalyticsHelper {
    class func widgetClickedEvent(categoryName: String) {
        event(with: .widgetClicked, parameters: [AnalyticsParameterKey.SearchWidget.categoryName.name: categoryName])
    }

    class func widgetNoResultsEvent(searchPhase: String) {
        event(with: .widgetNoResults, parameters: [AnalyticsParameterKey.SearchWidget.searchPhase.name: searchPhase])
    }
}

extension AnalyticsHelper {
    class func swipeProductEvent() {
        event(with: .swipeProduct)

    }
}
In the example above, you can see two methods:
- private class func event(with type: AnalyticsEvent, parameters: [String: Any]?) – this method uses the type parameter with the name of a given event and another one that says what parameters you want to send and whether you want to send any of them at all.
- private class func analyticsProduct(id: String, name: String, category: String, price: Double) -> [String: Any] – this method creates the Item object. The array of these objects is one of the required parameters that you must send in some predefined events. You can adjust the Item’s content to fit your needs.
Subsequent extensions correspond with concrete events. Each of these methods is a class method (this way, you get a method that belongs to a class instead of a class instance):
- class func selectProductEvent(category: AnalyticsCategoryParameter.Category, product: AnalyticProduct, userType: ProfileType) – predefined event, AnalyticsEventSelectItem, with parameters that are both predefined and custom
- class func widgetClickedEvent(categoryName: String) and class func widgetNoResultsEvent(searchPhase: String) – custom events with a custom parameter
- class func swipeProductEvent() – a custom event with no parameters
Support file for Manager
What are AnalyticsEvent and AnalyticsParameterKey types? These are enums. They store names and their parameters in an organized way. With earlier defined names, there’s no risk that you will make a typo and send a completely different event.
Create a new file called AnalyticsEnums.
import FirebaseAnalytics

enum AnalyticsEvent {
    case selectItem
    case widgetClicked
    case widgetNoResults
    case swipeProduct

    var name: String {
        switch self {
        case .selectItem:
            return AnalyticsEventSelectItem
        case .widgetClicked:
            return "widget_click"
        case .widgetNotResult:
            return "widget_not_resuly"
        case .swipeProduct:
            return "swipe_product"
        }
    }
}

enum AnalyticsParameterKey {
    enum Product {
        case itemCategory
        case itemID
        case itemName
        case price

        var name: String {
            switch self {
            case .itemCategory:
                return AnalyticsParameterItemCategory
            case .itemID:
                return AnalyticsParameterItemID
            case .itemName:
                return AnalyticsParameterItemName
            case .price:
                return AnalyticsParameterPrice
            }
        }
    }

    enum SelectProduct {
        case listId
        case listName
        case userType
        case items


        var name: String {
            switch self {
            case .listId:
                return AnalyticsParameterItemListID
            case .listName:
                return AnalyticsParameterItemListName
            case .items:
                return AnalyticsParameterItems
            case .userType:
                return "user_type"
            }
        }
    }

    enum SearchWidget {
        case categoryName
        case searchPhase

        var name: String {
            switch self {
            case .categoryName:
                return "cat_name"
            case .searchPhase:
                return "search_phrase"
            }
        }
    }
}
All events have their own name here. Every group has a separate enum in which names of their parameters can be found. It allows you to manage the analytics from one place and protects you from making a mistake because you only add sent values – the names of parameters are predetermined.
Usage in code
It’s easy to use in code. For example, look at the .swipeProduct event:
    func pageViewController (_ pageViewController: UIPageViewController, didFinishAnimating finished: Bool, previousViewControllers: [UIViewController], transitionCompleted completed: Bool) {
         AnalyticsHelper.swipeProductEvent()
    }
In a place where you want to register an event, you trigger a chosen method of the AnalyticsHelper class. The example of triggering a .widgetClicked event:
 func categorySelected(index: Int, query: String) {
        let selectedCategory = categories[index]
        guard let slug = selectedCategory.slug.first else { return }

        AnalyticsHelper.widgetClickedEvent(categoryName: selectedCategory.titleToDisplay)
        let response = categoryOpenProductsListResponse(slug: slug query: getQuery(query: query))
        output.openList(response)
    }
You can use this method in a currently used ViewController or – depending on the architecture – in a freely selected place. This is possible because you can use the AnalyticsHelper class instead of its instance.

Implementing Google Analytics for Firebase isn’t time-consuming, which is another reason it’s worth considering. Data analysis can be a valuable source of information for developers, UX researchers, and marketers, among others. When these insights are properly used, we can create even better digital products.
Find out more: