The implementation of a module or a feature is an important phase of the software development process, but it’s not the only one. When a new element is added to the app, you need to test it to check if it works properly.
Although this stage mostly involves developers and testers, product owners also play an important role in it. It’s up to them to choose what kind of tests must be conducted. Small internal tests will be enough? Or maybe it’s better to run manual tests and engage a lot of people?
No matter which option will you choose, TestFlight is going to help you. That’s the reason why you need to know how to use this platform and easily manage the tasks related to Quality Assurance.
Testing the mobile apps – what do you need to know?
QA specialists check the app and focus on its functionality, efficiency, and optimization. You can test the entire software or the selected elements. The goal is always to detect the errors in a system.
It’s a good practice to give specialists only singular features to test instead of sending them a huge app bundle with a lot of functions. Why? It allows them to meticulously check the selected element.
But there’s a catch. This way you send builds frequently, and they usually must be delivered to many people. To make this process easier, you need to use external testing platforms or a native Apple solution called TestFlight.
This tool allows you to control who has tested the app, how many crashes there were on the particular build, and what feedback the testers have send.
To make the most out of it, it’s best to know what possibilities TestFlight offers and what permissions should particular users have.
What is TestFlight and how does it help us test the software?
TestFlight is Apple’s platform that enables sending users’ testing versions of apps as part of the iOS Developer Program.
Registered users with specific permissions can distribute iOS apps to internal and external testers who then can send their feedback about the app.
Additionally, TestFlight SDK allows you to receive remote logs, crash reports, and testers’ opinions.
Basic information about TestFlight
- This solution is free and its purpose is to conduct beta testing on the apps.
- The platform makes it possible to test apps on many mobile devices without having to register them.
- It works with such systems as iOS, iPadOS, macOS, tvOS, watchOS, and iMessage.
- It automatically updates the content, so testers always have access to the latest versions.
- This tool enables testing up to 100 apps at the same time and each one can handle many builds. The builds remain active for 90 days from the day they have been sent.
- TestFlight facilitates the installation of the beta versions because there’s no need to manage neither devices’ UDID nor the provisioning profiles.
- It’s essential to know what roles should each tester have on TestFlight. Giving too many permissions to the wrong person can result in a fallout.
Types of users and their permissions
To begin your journey with TestFlight, first, the developer needs to send the build to the testing platform. Then you have to add testers to the project. Depending on your needs, you can add internal or external testers.
Who is the internal tester?
It’s a member of your team in App Store Connect who has one of the following roles:
- administrator
- app manager
- developer
- marketing specialist
Marketing specialist is a user with the smallest number of permissions, among all the roles. So, if you don’t know what role should you give to a tester, choose this one. In this case, Apple doesn’t need to verify the beta app before sending it to testers.
You can find out more about the roles and permissions here.
Principles of adding internal testers
- You can add up to 100 internal testers.
- Every member of the team can test the app on up to 30 Apple devices.
- All internal testers receive notifications about a new build as soon as the processing in App Store Connect comes to an end. It’s automatic and doesn’t require any additional actions.
Who is the external tester?
Everyone who wants to test the app and doesn’t belong to the team. Before the external tester will be able to start checking the app, Apple needs to verify it. Such users don’t have access to your App Store Connect account. They can only download and install the app.
Principles of adding external testers
- There’s a limitation of 10 000 external testers per app.
- You can add the external testers via e-mail.
- Testers can be divided into groups. It facilitates the management and helps you control who has received access to the latest version of the app.
External testers receive the notification when Apple finishes the beta test. Every new build released for testing will be checked by Apple again. In that case, the verification stage often takes less time than reviewing but there are exceptions to this rule.
Adding new members to the team
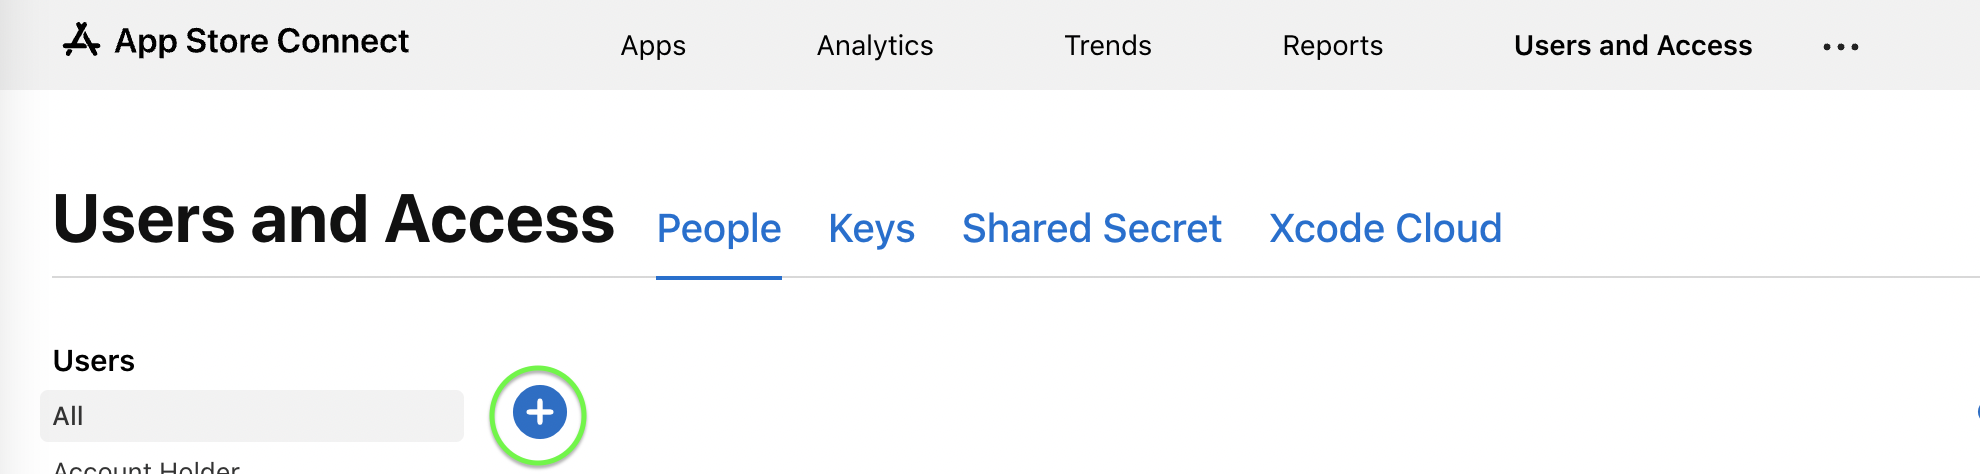
If you want to add the internal testers to TestFlight, you need to invite them to the team. Go to the Users and Access section in App Store Connect. It is available from the screen that you’ve seen after logging in.
Remember that you must know the email address of the tester. It’s best when it’s connected to the Apple ID. If that person doesn’t have this ID yet, the email you’ve provided will become one. After completing this task, click +.
Source: TestFlight
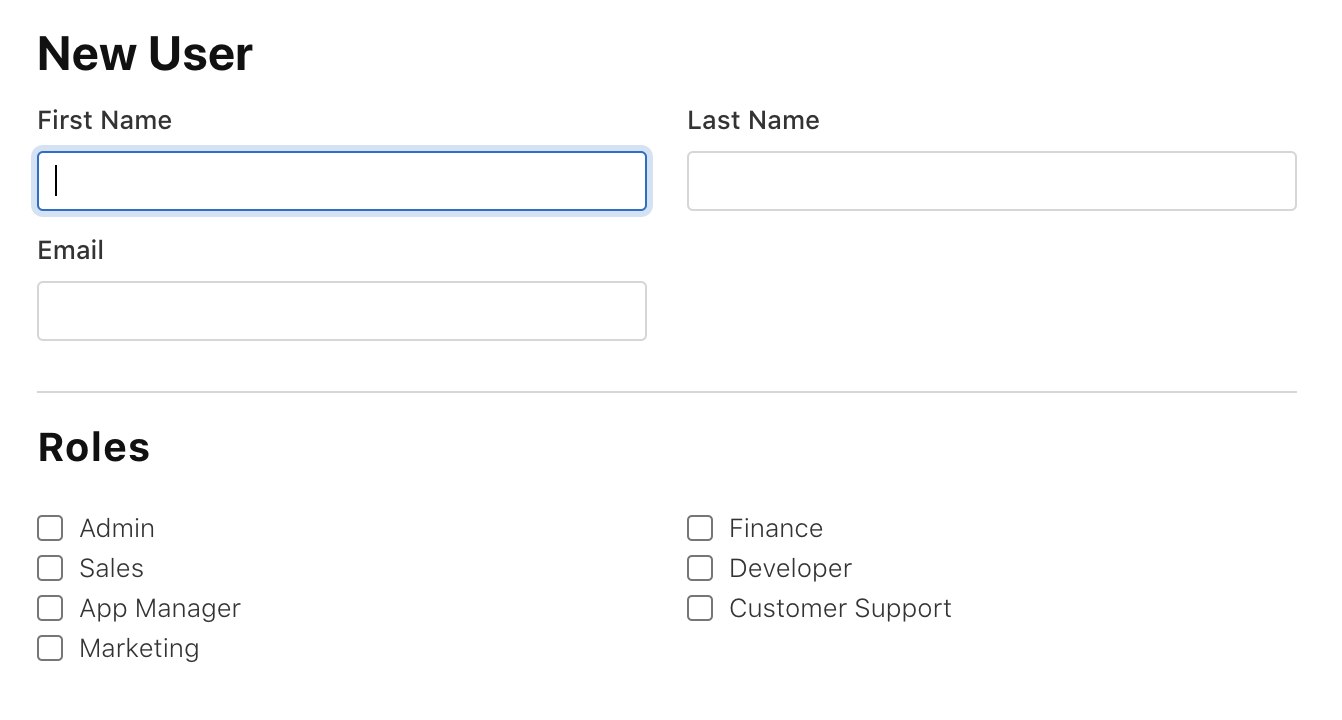
In the next view, enter the information about the user and assign him or her the right role.
People who have the following roles are allowed to be added as testers: admins, developers, marketing specialists, and app managers.
Source: TestFlight
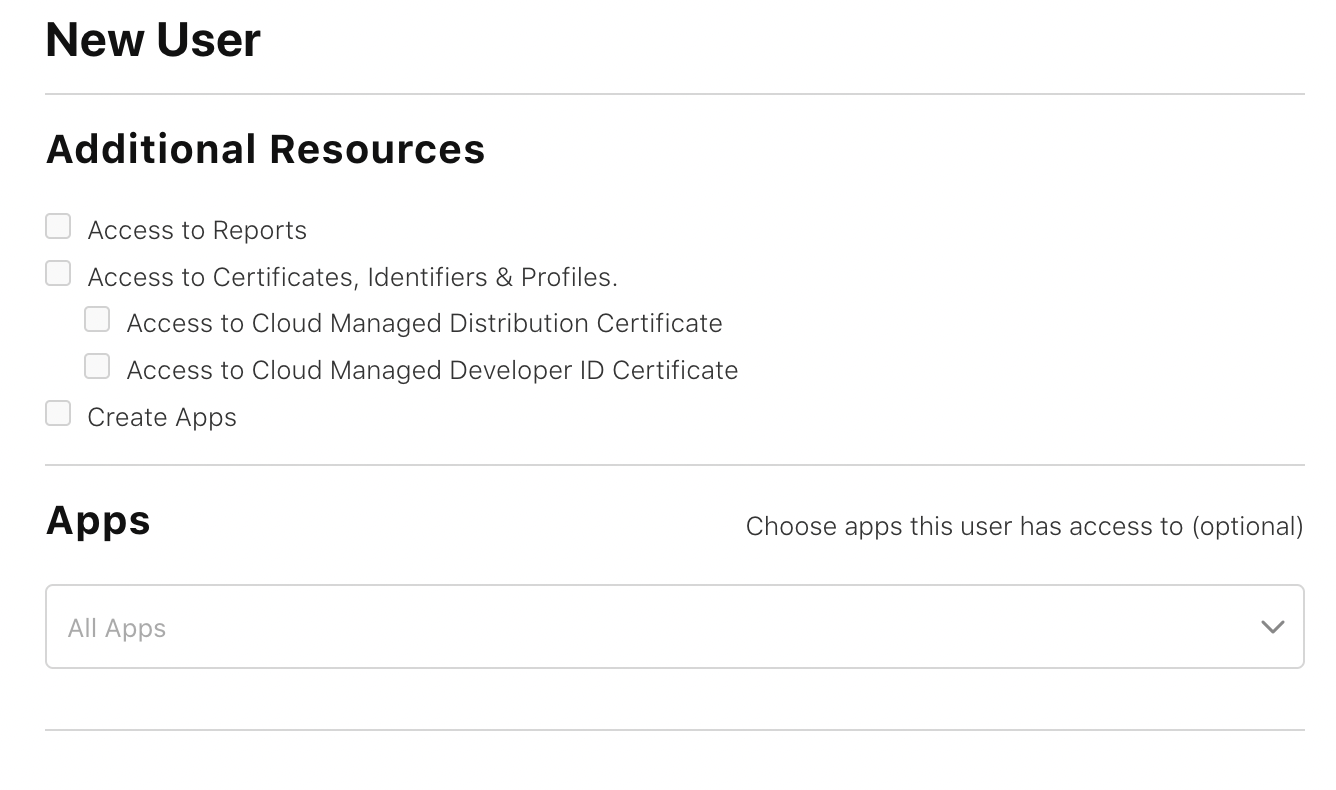
Check what app this tester should have access to. Alternatively, you can stay with the default option and give this person access to all the apps.
Source: TestFlight
Keep in mind that if the email you enter is not associated with the Apple ID, the internal testers must create such IDs themselves. Only then they will be able to accept the invitation and start testing your app.
Adding a person to your team on App Store Connect is the first step. Step two is to change its status to an internal tester of the app.
Managing testers’ work
Internal testers
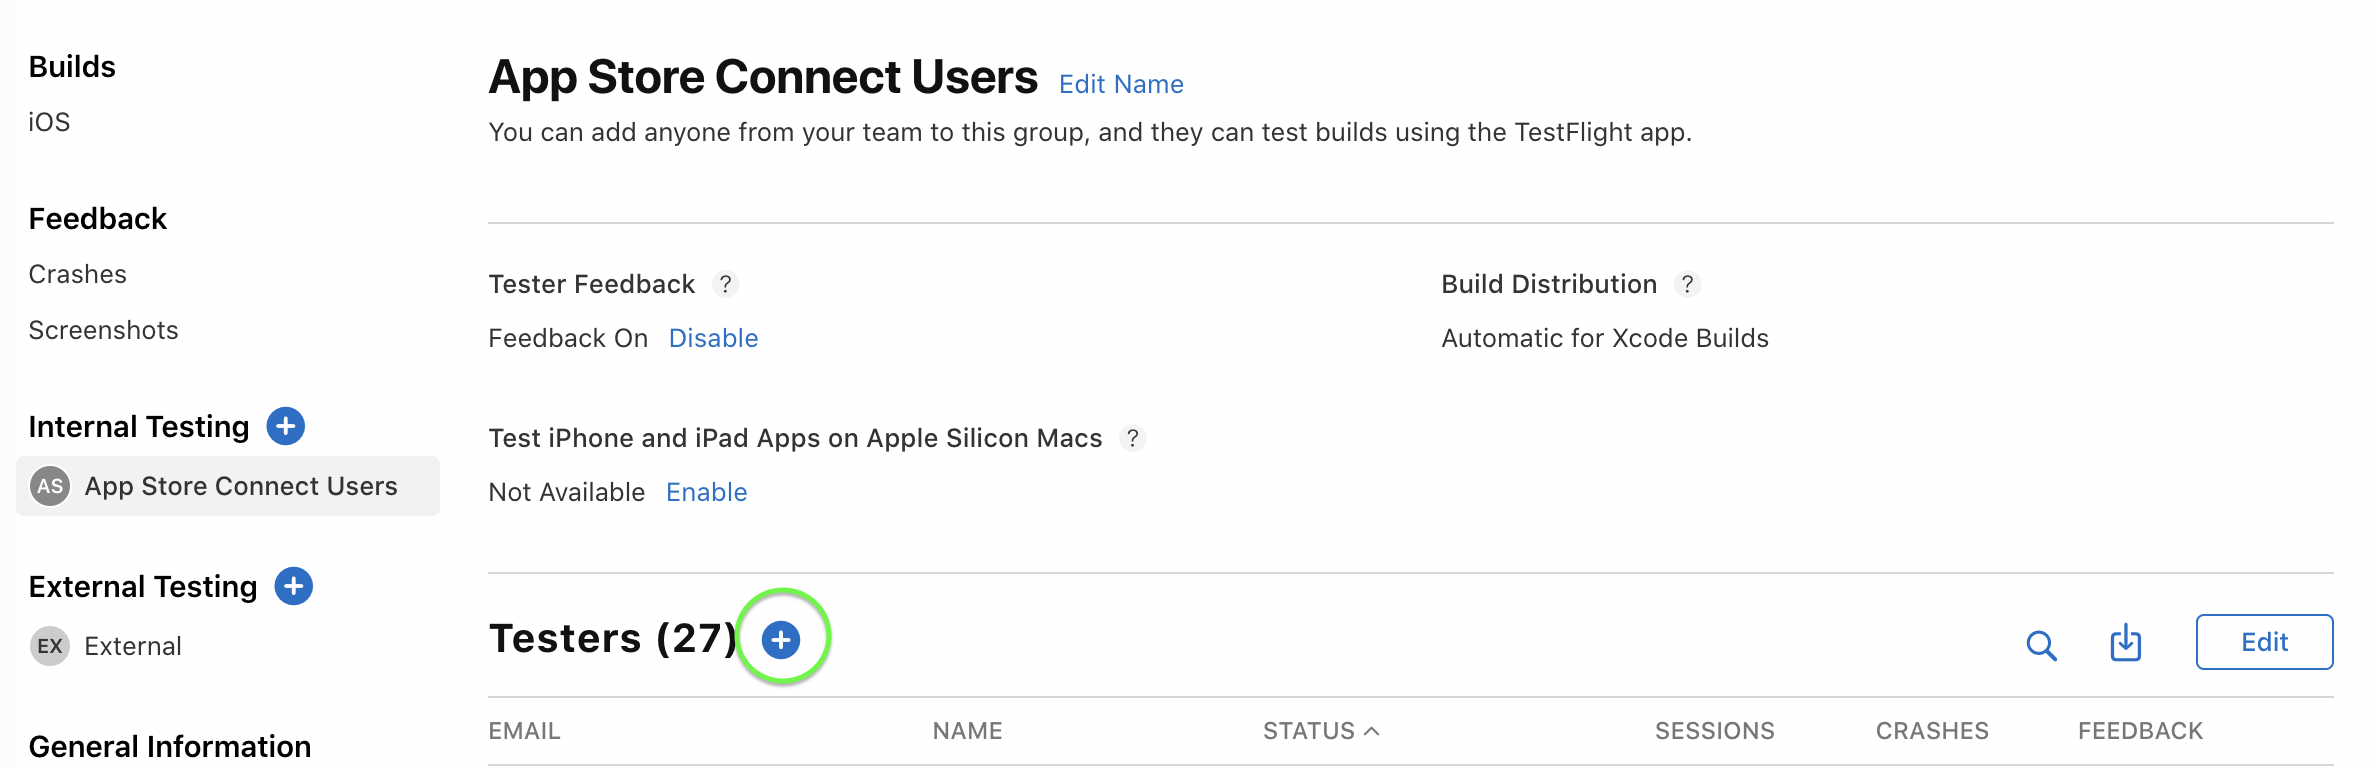
To add a member as an internal tester, move to the My apps section. It’s available on the screen displayed after the first log-in. Next, select one of your apps and go to the TestFlight tab.
Here, in the Builds section, you’ll see a list of available versions of the app along with the builds that you have sent to App Store Connect.
In the menu on the left, there’s the App Store Connect Users section where there’s a list of internal testers. This is where you can add new people. Click the + button to add the tester from the team members list.
Source: TestFlight
Selected users will receive an e-mail with the link to download the app and install it via TestFlight.
From now on, these testers will be receiving notifications about the new builds uploaded on App Store Connect.
External testers
To add the testers outside of your team, you must enter all the required information about the beta app and the information about the review.
In order to do this, go to the TestFlight tab, and from the menu on the left choose the Test Information section. Then enter the following data:
- Beta App Description – a short description of the app’s features.
- Feedback Email – testers will send their reviews to this address.
- Marketing URL – the URL address with information about the app you add.
- Privacy Policy URL – the link that leads to the privacy policy of your company.
- Contact information
- Beta App Review Information – additional information about your app that might be helpful in the testing process.
- Sign-in Information – the user name and password that allows logging into your app.
Next, select Add external testers from the menu on the left. You’ll be asked to create a new testing group. In this example, I call it External. You can freely manage the number of the groups by adding different testers to it.
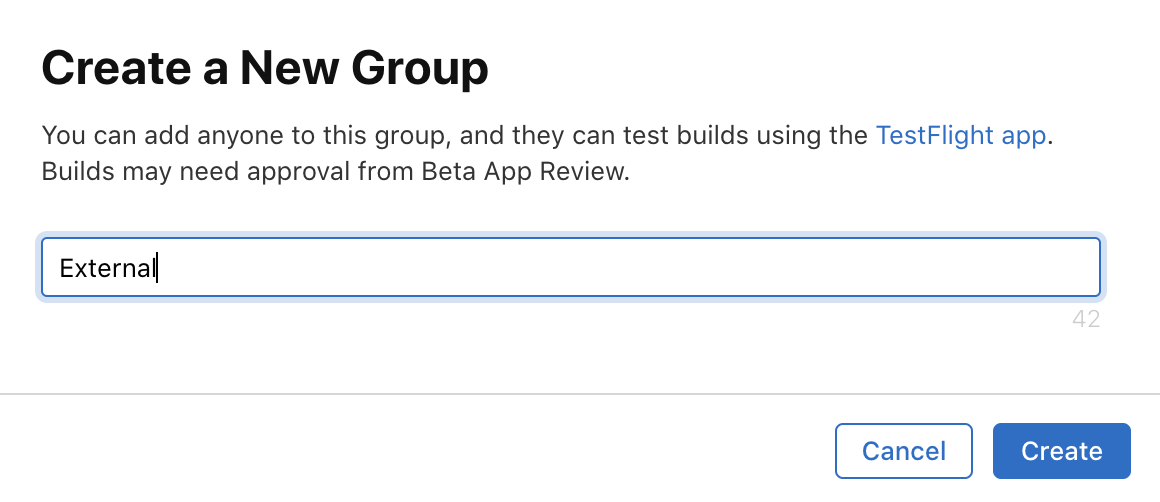
Source: TestFlight
After creating the group, add the external testers and click +.
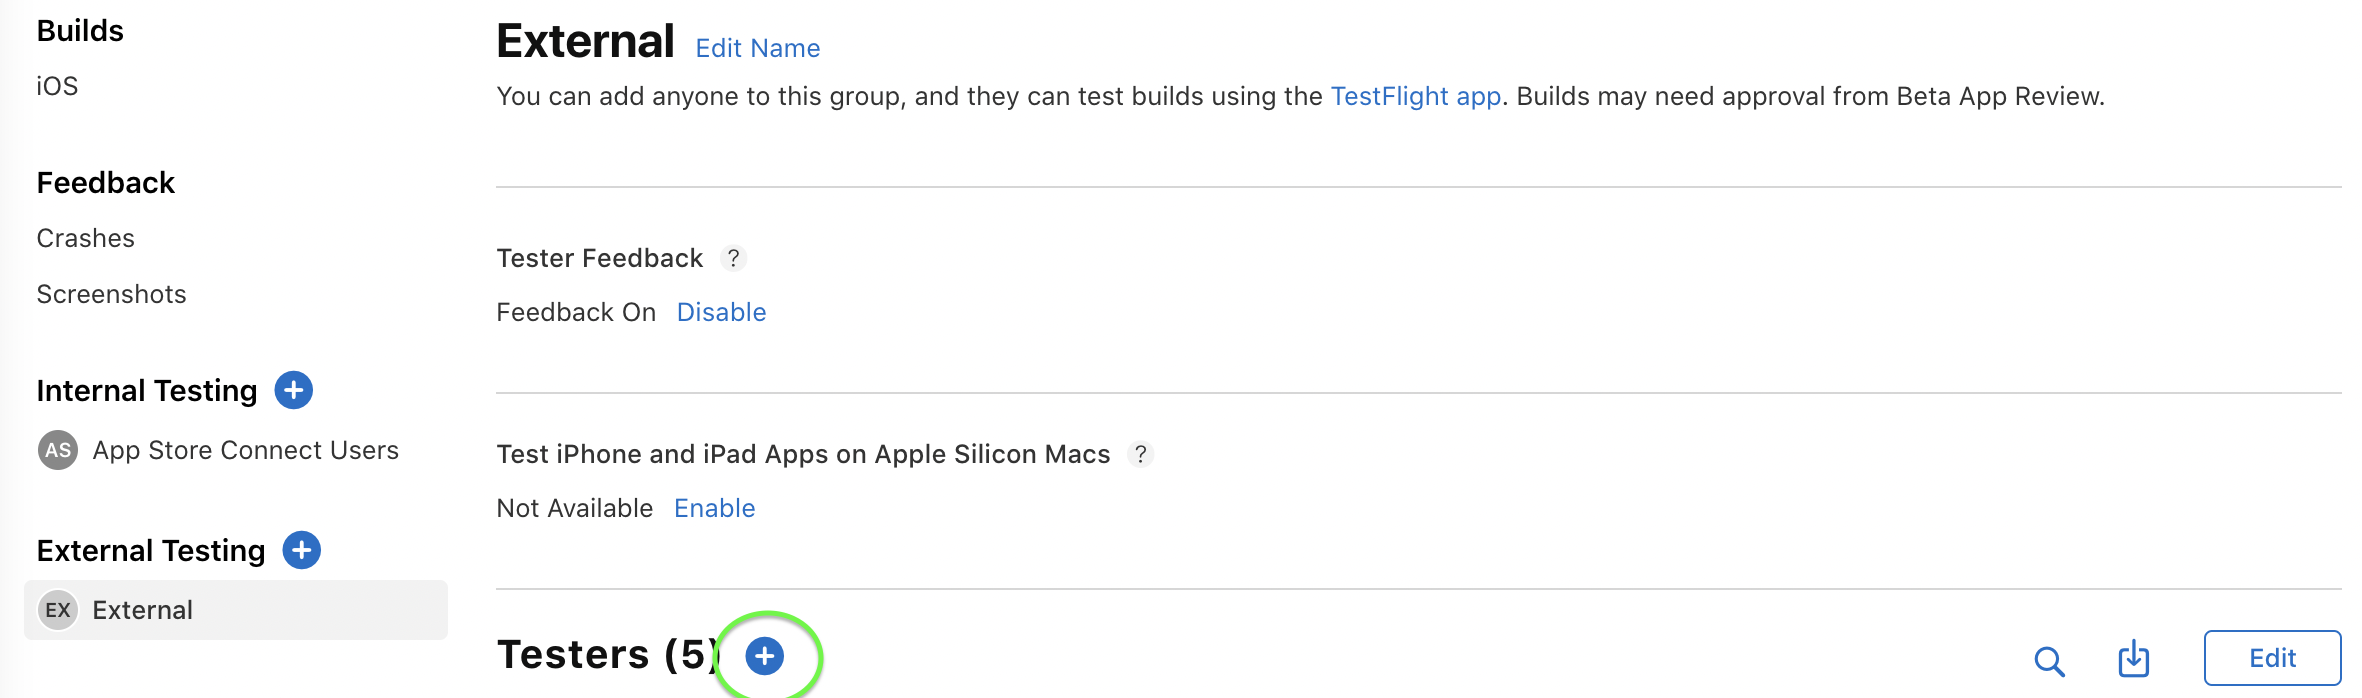
The context menu will open up. That’s where you can add new testers. You can do it in one of the following ways:
- Add new testers – in this option, you manually enter the email address, name, and last name of the tester.
- Add the existing testers – here, you add people who currently test one of your apps or builds.
- Import from the CSV file – that’s where you choose the right CSV file.
After adding these users, you need to choose the build that the selected group of testers must verify. How can you do that? Click the + button next to the Builds section. Then select the version of the app and the build.
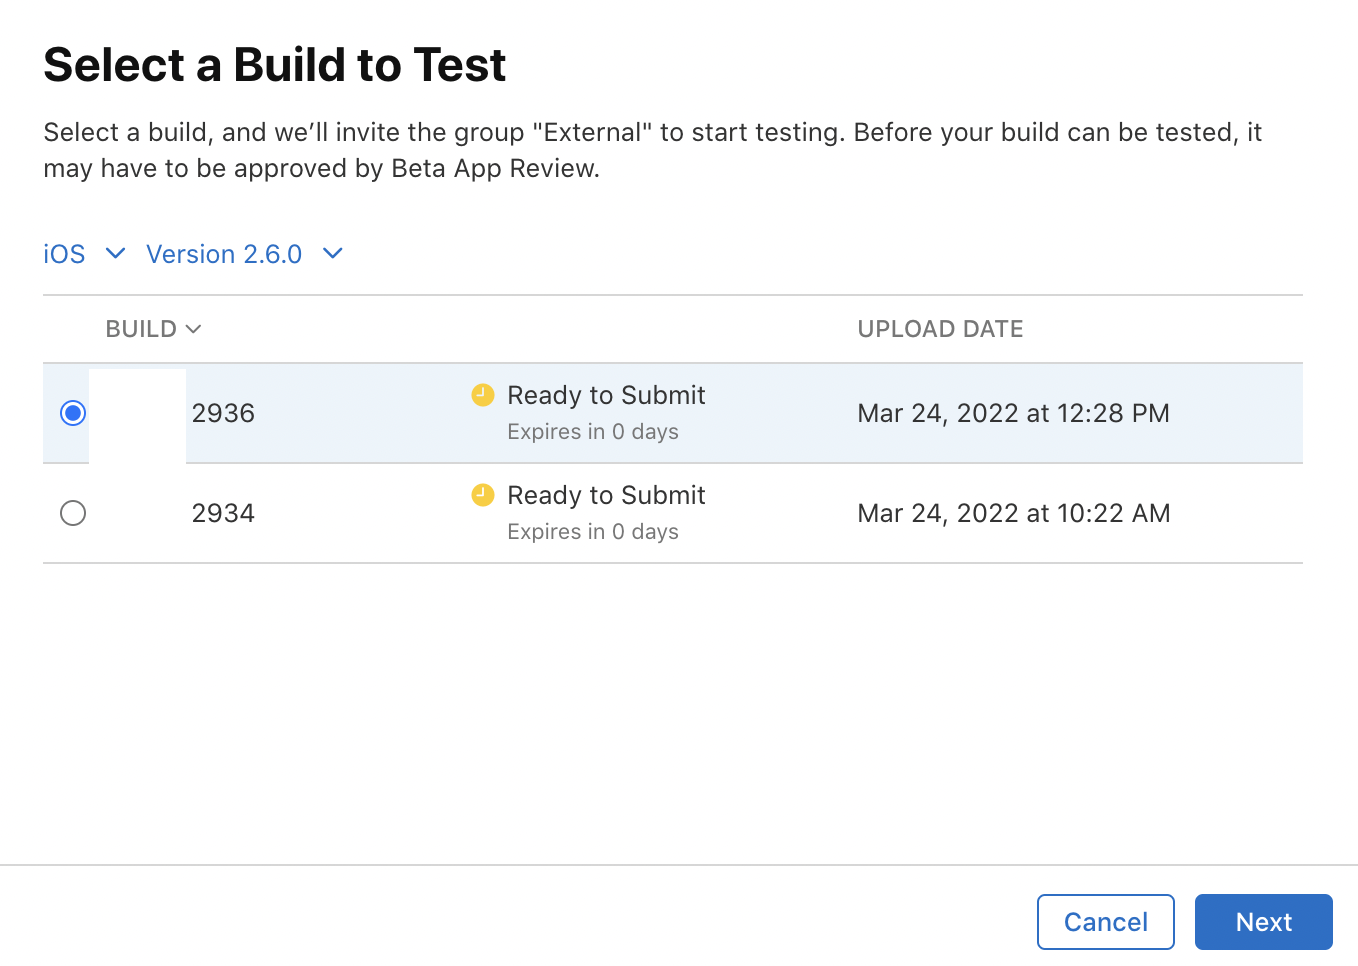
Source: TestFlight
Later, you can write a note informing testers what should they check in this build. Such information will be available for testers in all the groups that have access to this build.
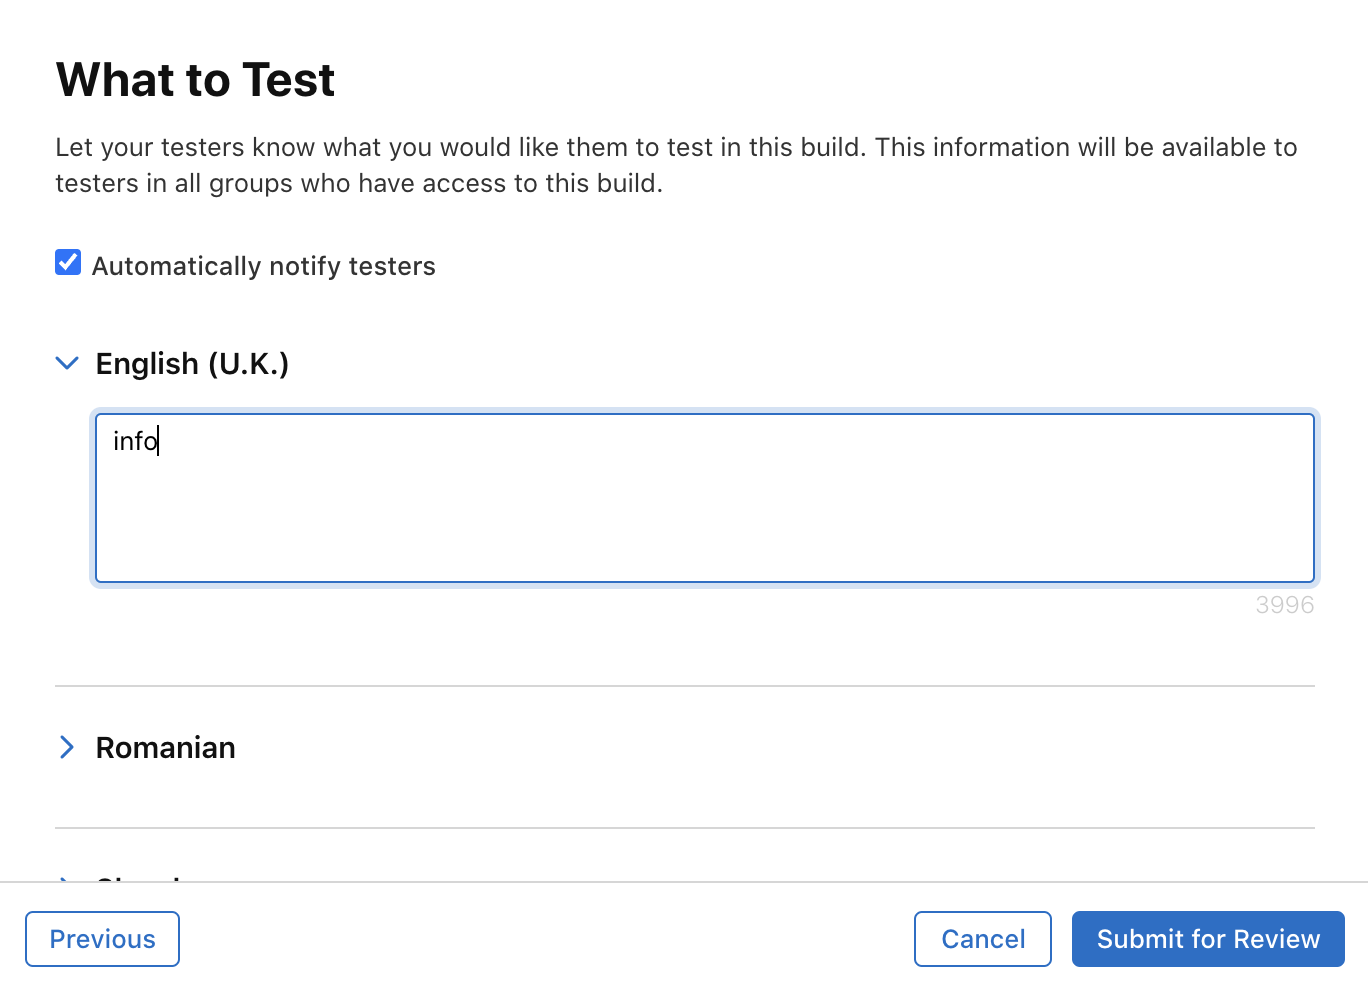
Source: TestFlight
When the build gets approval, it will be sent to review. If Apple won’t report anything, testers will be automatically notified about the possibility to check a new version of the app. You should also receive the confirmation email that the external tests can start.
A build is valid only for 90 days. After this time, you need to send a new one.
Quick app sharing for tests
Now, you know how to add internal and external testers. You can divide them into groups and assign the builds. But what if these tests are supposed to involve a big group of people? Adding many testers via email address takes a lot of time. Luckily, it can be facilitated.
Instead of adding external and internal testers based on the email address, you can create a public link. It will allow everyone who has this link to install the app. This way, you don’t need to know other team members. So, how can you do that?
Instruction
1. After adding a build to your group, the option Turn on the public link should appear. Select it.
2. Confirm that you want to generate a link. Then you’ll get the TestFlight URL that you can share with testers. Link works in exactly the same way as the e-mail with an invitation.
3. When testers open the link on the iOS device, they are asked to install the TestFlight app (if they don’t have it yet). Then, they will be allowed to install Your app.
Among the available options, there’s a possibility to copy and disable the link. You can also set your own limit of people who can download the app with the provided URL. Testers invited via URL count towards the limit of 10 000 testers.
Inviting users with link is a very comfortable method, because it doesn’t require adding testers neither to groups nor to your Apple ID account. Also, there’s no need to know the tester’s email. He or she only needs to tap the URL address.
In the case of external testers and invitations with the link, you should remember that subsequent versions of the app won’t be shared automatically (it only works like this with internal testers). Every new build must be added to a group in which the particular link has been shared.
Managing the apps by testers
Tester – no matter whether it’s an external or an internal one – always has the same goal.
The main purpose of a tester is to find bugs in the app – the sooner it happens, the better. It also applies to the potential errors that might turn out to be critical at the final stage.
User interface tests are equally important. They let you check if the UI elements have been coded according to the specification.
No matter how the testers received a build, they will be invited to display the app in TestFlight. It will enable them to test it on real devices.
Adding the app for tests to TestFlight
Before you begin to check the app, you need to add it to the testing platform. You can do this in two ways, starting by clicking the See in TestFlight button.
Option nr 1
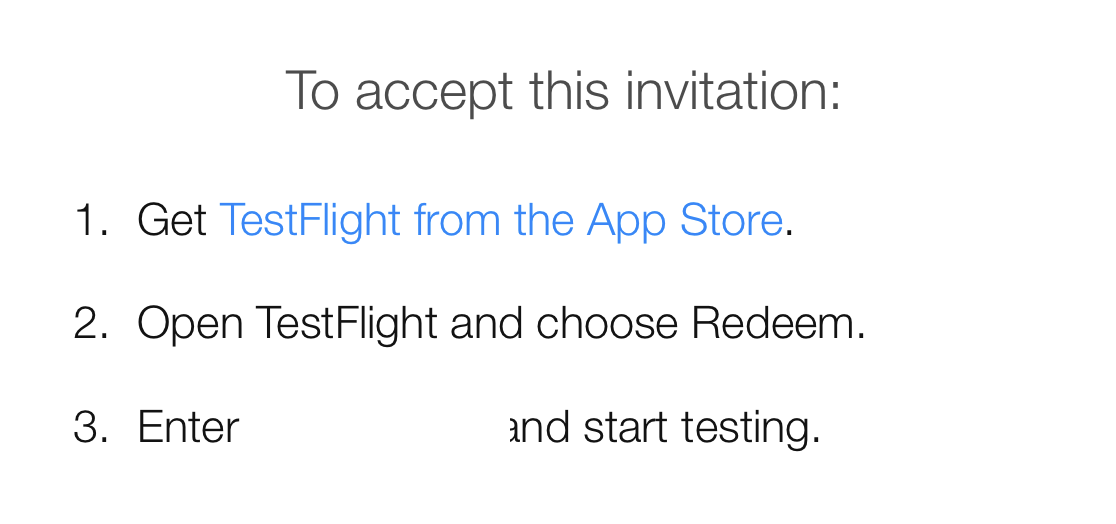
If you haven’t installed the TestFlight app yet, you should see the instructions below.
Source: TestFlight
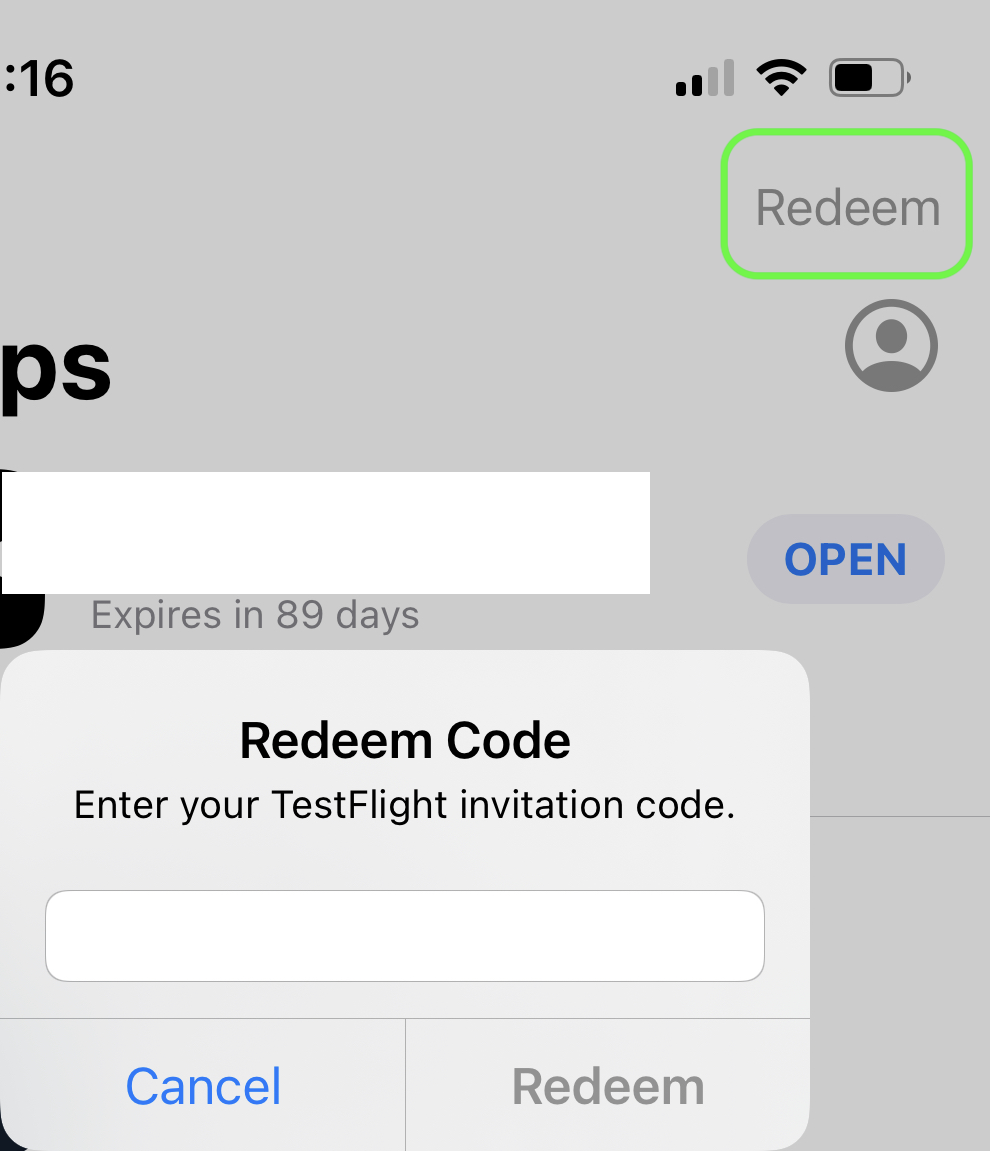
Click the first point, and you’ll be redirected to the App Store where you can download the app for tests. Then you’ll see the code you need to type in TestFlight to add your app to this platform. All you need to do is to choose the Redeem button and enter the code.
Click Open in TestFlight and universal links will redirect you to the app. If for some reason it doesn’t happen, the solution is to copy the link and open it in Safari.
Source: TestFlight
After entering the code and installing the app, you will see its information card and a button that opens the app.
Option nr 2
You already have TestFlight installed and configured? Then just click Open in TestFlight. Next, accept the invitation to this platform with the Apple ID that you currently use in TestFlight.
On the preview of your app, you’ll see the information about it and the Install button. Click it and install your app. Then the new tab will show up with the opening button.
After the installation, the app will be downloaded on the iPhone and it will be placed on the main screen. From now on, you can test it. Next to its name, an orange dot will appear. It tells you that the installation was conducted via TestFlight.
Sharing the feedback
Every tester who uses the TestFlight app can share feedback with the developer. How?
The first available option is to send screenshots. When a tester creates one, a message appears in the file sharing options that says Share Beta Feedback.
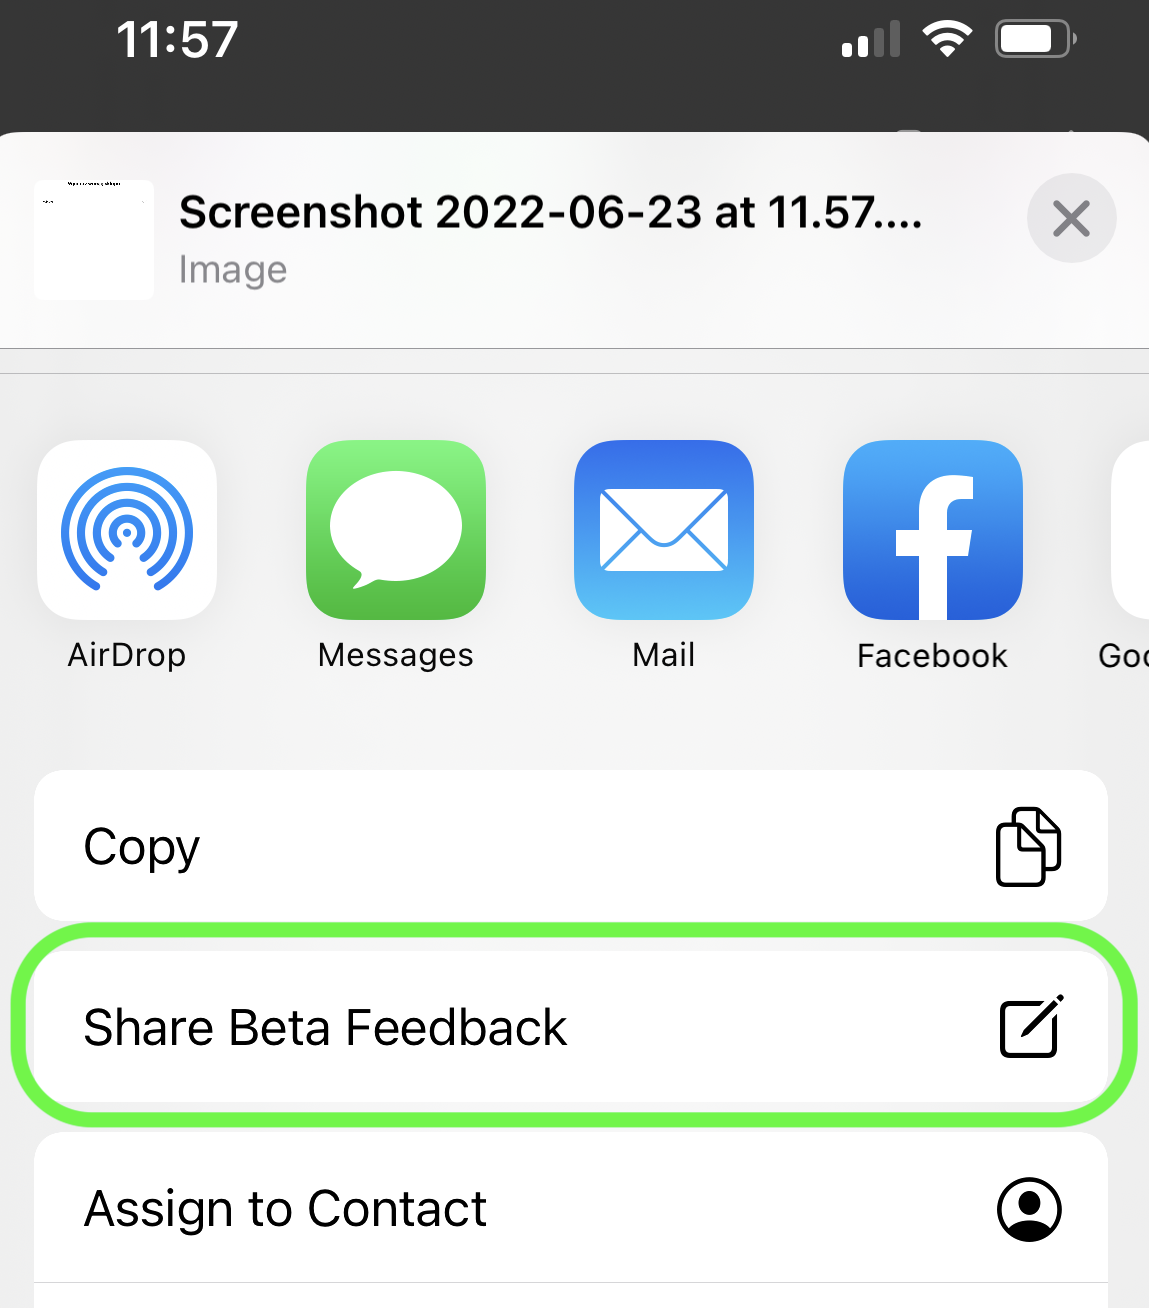
After selecting this option, testers see the new tab. That’s where they can add a note and (optionally) enter their email address.
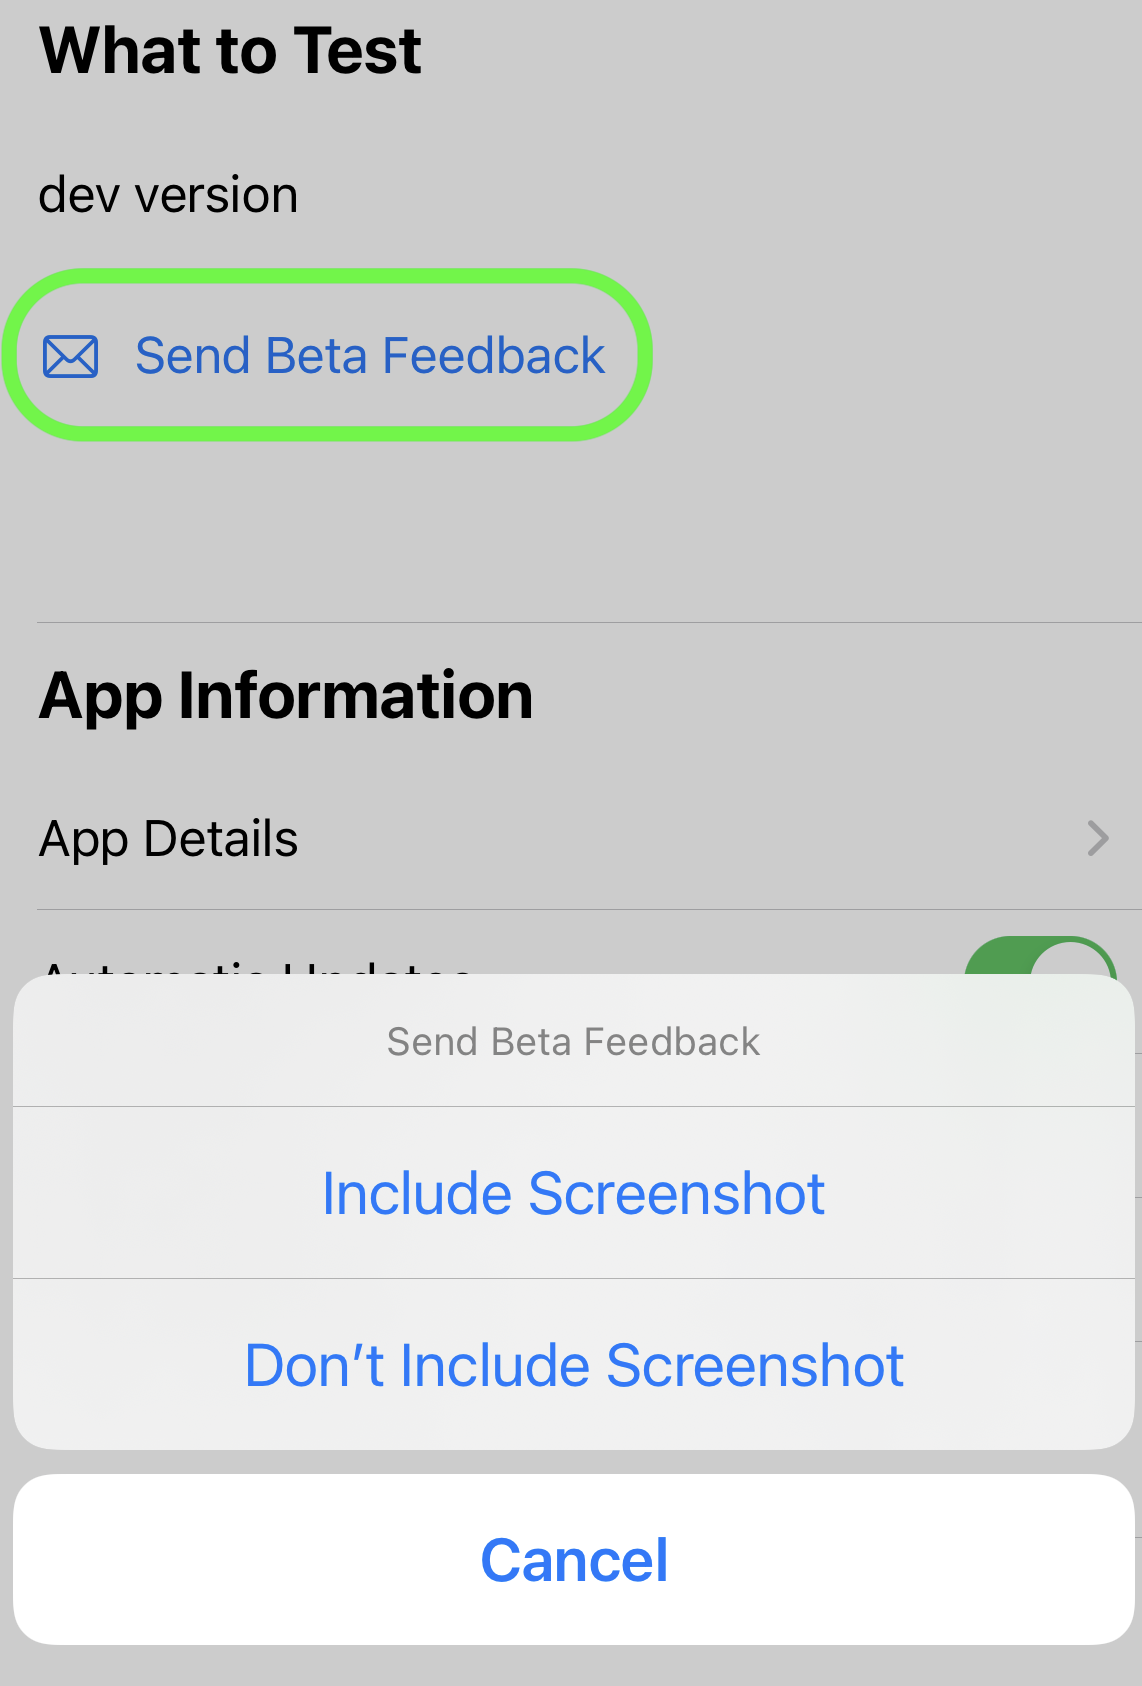
The feedback can also be sent via TestFlight. All it takes is to open the product tab of the tested app and click Share Beta Feedback. Then you’re able to send your feedback and even add a photo that illustrates the problem.
Source: TestFlight
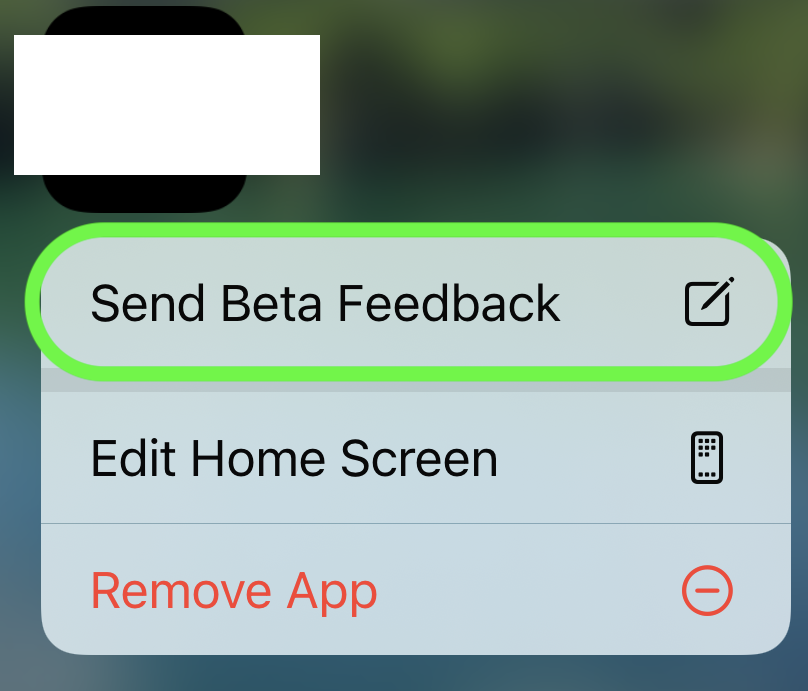
The last option is to share the feedback via a shortcut to the app on the main screen. You just have to tap the app icon for a longer time to open a context menu with the Send Beta Feedback option.
Browsing the feedback on App Store Connect
You can browse testers’ feedback on your App Store Connect account in the TestFlight tab.
From the menu on the left, choose the screenshots section. There you can find the opinions sent by testers (with or without photos).

Source: TestFlight
After selecting the report, you can see detailed data, such as:
- feedback
- info about the iOS user
- info about the tested device
- tester’s email address
- time spend on the app
- iOS version.
Crash reports
The apps installed with TestFlight can report crashes. What does it mean in practice? If necessary, the notification about the crash will appear. It’ll enable testers to send their reports about it.
All these reports are passed over to App Store Connect. You can find them in the TestFlight tab. You just need to open the Crashes section in the menu on the left.
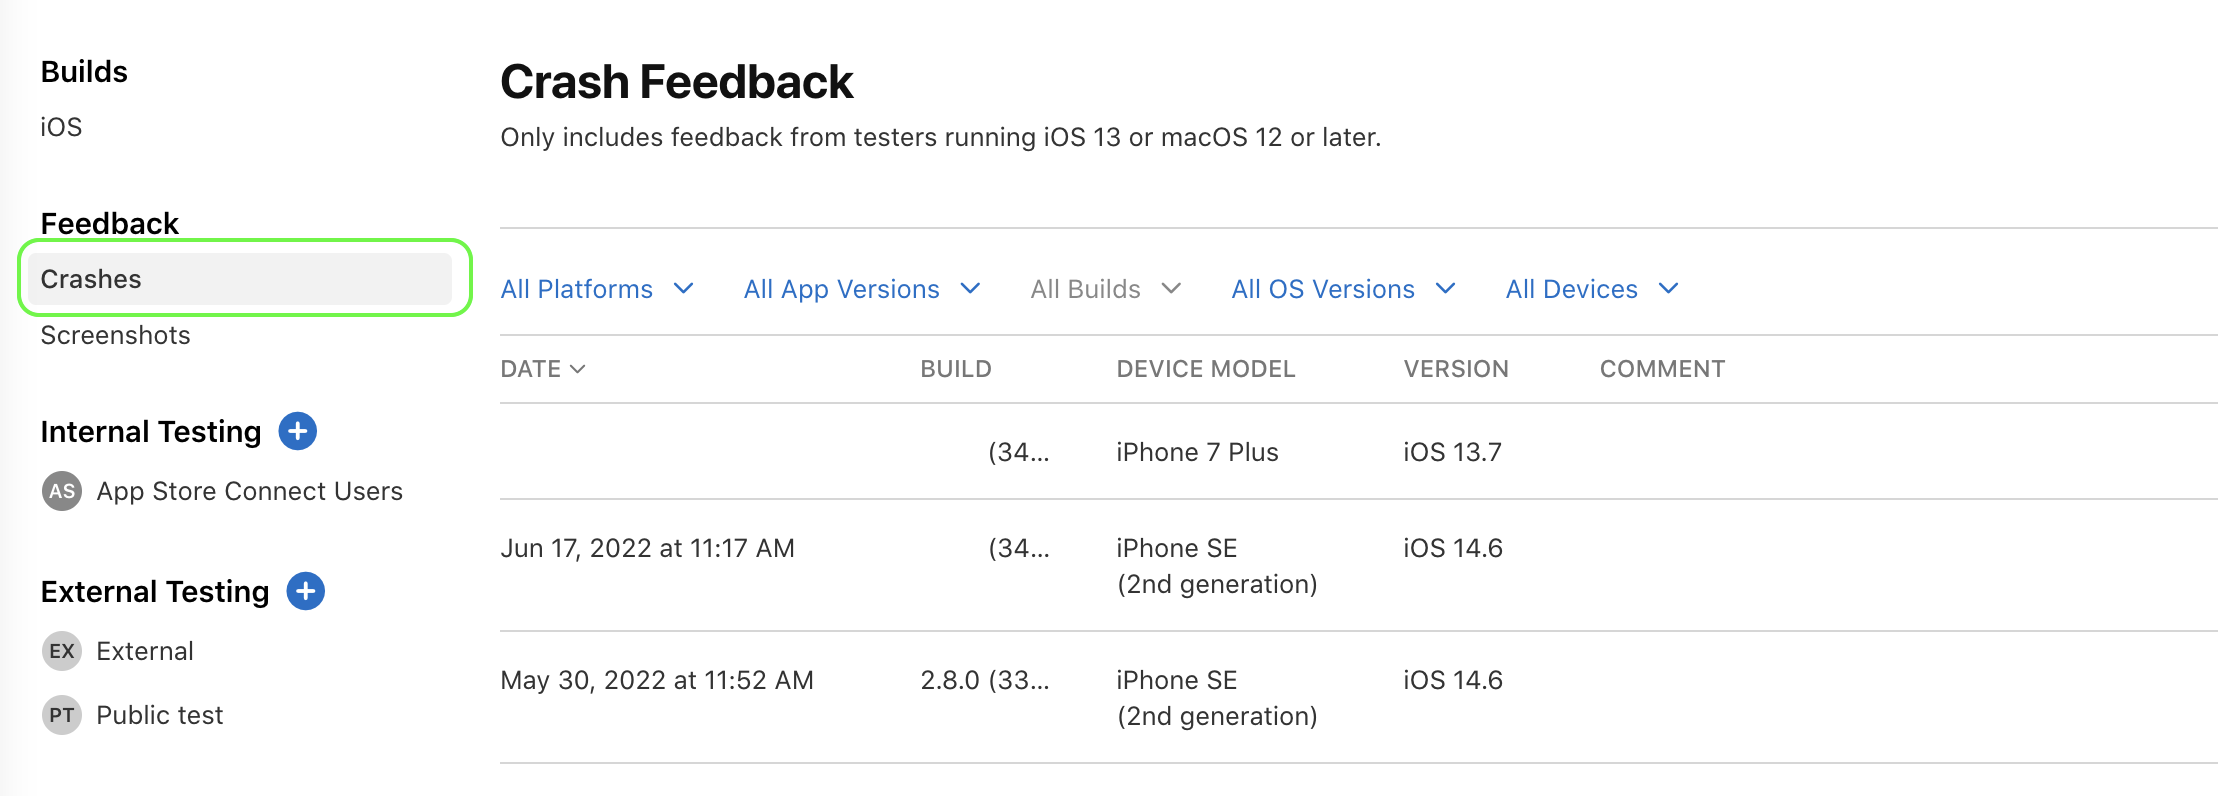
The exemplary Crash Feedback report in TestFlight.
Crash reports contain the same information as the other opinions. In this case, you get an additional option – a possibility to open the app in Xcode. It’s an extremely useful feature that allows developers to quickly find the cause of the malfunction.
Testing the iOS apps with TestFlight
The knowledge of this tool and the testing process itself is important to every team member, including product owners.
With this guide, product owners should be able to perform more tasks related to the tests. It will give them more control over the project. For example, they will be able to:
- Enter the data about the app that is required for tests
- Invite new internal testers
- Create groups of external testers
- Share the app for tests with the link
- Receive the feedback from testers
TestFlight is a solution that doesn’t require using any external platforms. It ensures more safety and optimizes the app development process, so it is worth it to learn how it works.