

The best way to set a connection between a user, provider, and an app? System notifications. They allow users to get the latest news in no time. This solution is easy to implement in apps dedicated to one market. But it gets complicated when the messages must be displayed in many languages. In such cases, the dynamic localization of remote notifications can be a real game-changer.
Note that the solution I describe in this article works best for the apps without a server API that can store information about the language of a system or an app.
Where can you place the content of PUSH notifications?
There are two most popular ways used for storing the content of the messages. First of all, you can place it in .strings files. This solution is nice and easy, providing the translations are defined in advance and compiled with an app.
This is not an option, though, when the notifications are more descriptive. For example, when you want to include news that applies to a particular location. Fortunately, there’s an alternative way you can use in this case.
When the app works in multiple language versions, notifications have to be translated first. This procedure is called localization or internationalization. So, what you need to do is to localize the content of your notifications. And I’m about to show you how.
The extension that makes dynamic localization possible
Notification Service Extension plays a key role here. How does it work? Simply put, it allows you to implement changes in payload before the system displays a notification. This solution enables you to replace the payload with the one that is dedicated to localization (or language) set in the iOS system or in the app itself.
Setting the same language both for the app and the system
It’s easy when the translation of the app is based on a native solution. This means it is based on the language settings defined in the iOS system. In such a case you only need to use the Locale class, so you could retrieve a list of preferred languages or find out what is the system language.
How to set a different language than the one the system uses?
It takes more effort when you want to enable setting a different language of the app than the one defined in the system. That’s because the extension doesn’t have direct access to the app (and its sandbox) and vice-versa. What can you do in such a case?
Another system solution comes to the rescue: App Groups. Precisely, App Group Shared Container. It is a place that can be accessed by the extensions and apps from the same development team. In other words, those that use the same developer certificate for signing the code. In a shared container you can store database files (e.g., CoreData), or UserDefaults, among others.
For the purpose of this article, I used UserDefaults, because in my opinion this solution doesn’t require a lot of additional knowledge. Moreover, I don’t find it necessary to shoot the cannon (i.e., using a database, such as CoreData) at the sparrow (to enable storing ID of a chosen language).
I assume you already have a developer certificate on the Apple Developer platform. If not, create it here, before I move on to the first stage.
Configuration of the environment
App Identifiers, Profiles, App Groups
General remarks
First of all, you need profiles from the Apple Developer platform to run this project. Remote Push Notifications don’t work on simulators, so you need a physical device.
Another issue concerns creating app profiles and IDs. You probably know how to move within the Apple Developer platform, so I won’t delve into details when it comes to generating App Identifiers or App Profile (in this exact order). But if you have doubts, check out the Maintain signing assets section here.
ID registration
Begin with the registration of App Identifiers for the app and the extension. The identifier for the app should have two Capabilities added:
- Push Notifications,
- App Groups.
The identifier for the extension requires only one capability: App Group.
Container registration
To enable the app and the extension to communicate with one another, there must be a link (App Group), namely a shared container. But first, you need to register it in Apple Developer platform. Here’s a short instruction on how to do it:
- Log in to the Apple Developer platform.
- Go to Certificates, IDs & Profiles.
- Move to Identifiers.
- Click the + symbol. You can find it in the upper part of the website, next to the headline of a section.
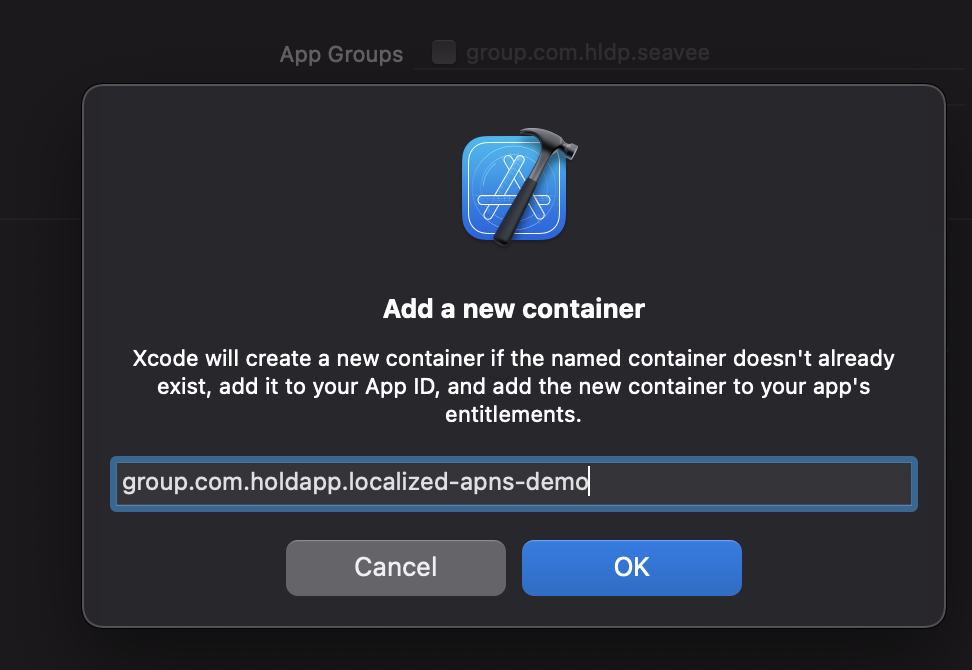
- Select App Groups from a list and fill out the empty fields.
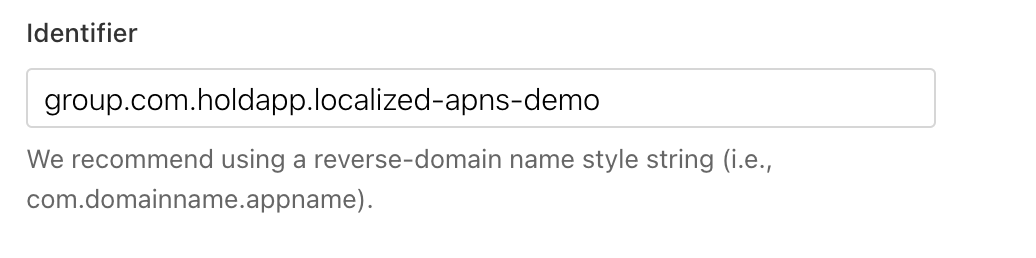
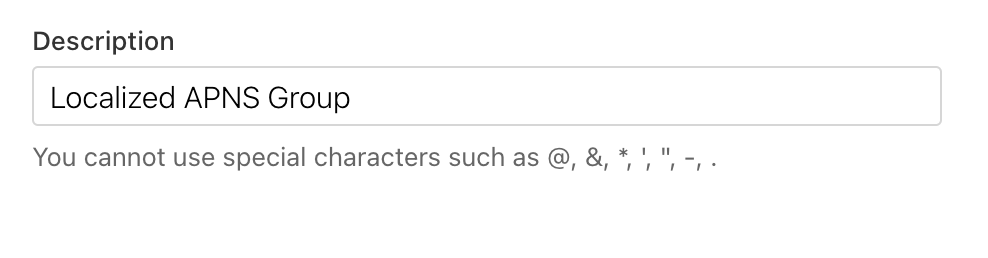
You can type any names you like, but for the Identifier, it’s a good practice to use a template below:
group + reverse domain + app name
When you already have a group, you can add it as a capability for an App Identifier of the app and the extension. There’s an Edit button in the Capabilities section, next to App Groups. Click it and check the group created before. You have to perform the same action for the Identifier of the app and the extension. In the end, generate developer profiles for them.
Implementation step by step
App group registration
First of all, create a new project in Xcode. If you don’t want to write the code yourself, use the resources from Github.
Next, follow the steps below:
- On Xcode, check the target of the main application.
- Check Signing and Capabilities.
- Uncheck Automatically manage signing (if this option is checked).
- In Provisioning Profile section, select the app profile you’ve generated before.
- In the upper left corner, click Capability.
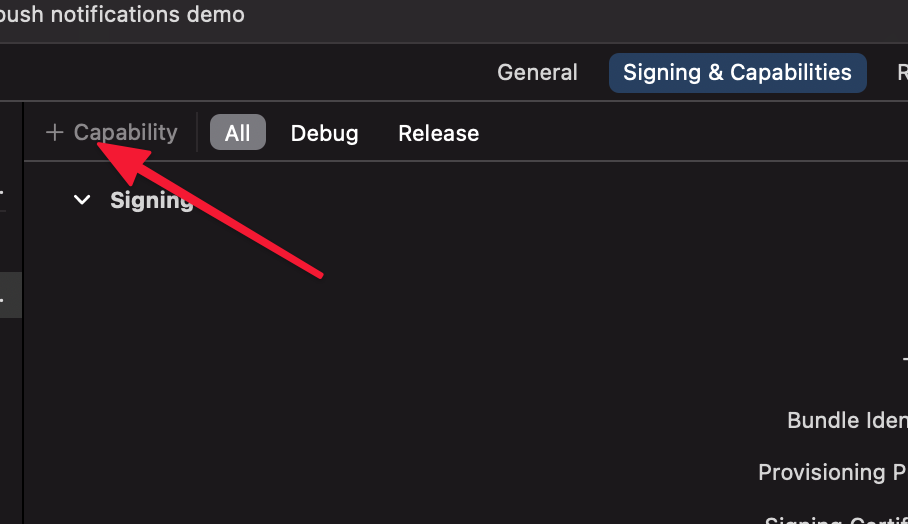 6. Select App Groups from a list.
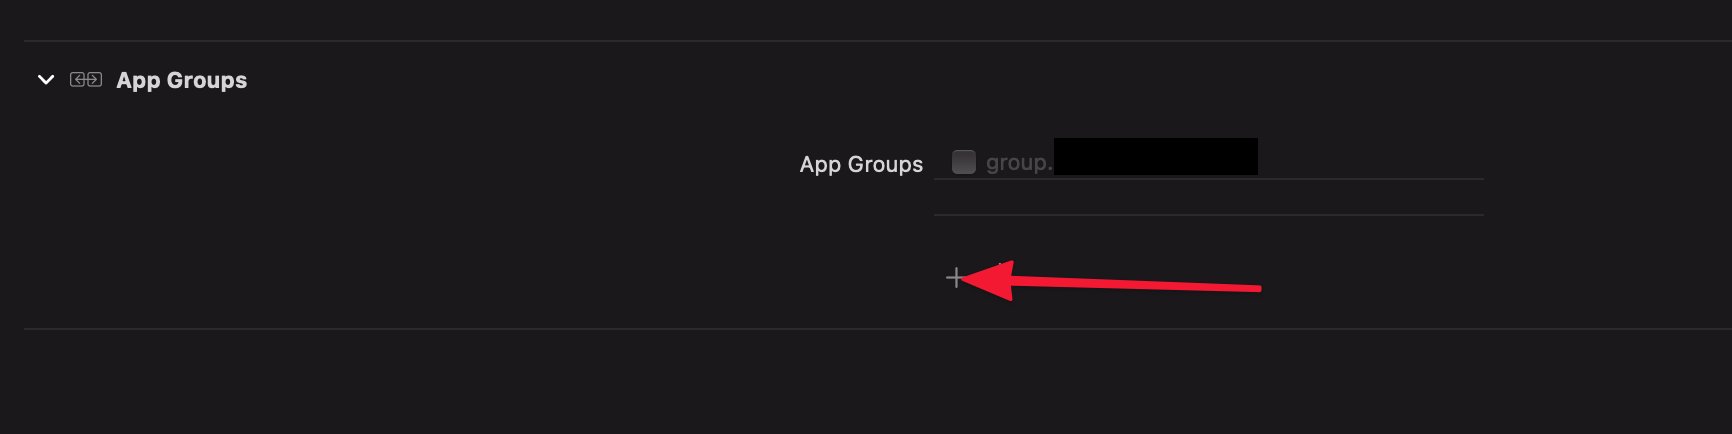
 7. Check the group you’ve created before. If it’s not on the list, click a + symbol. Then enter the ID of a group you’ve created in a previous section.
For example, in my case it looks like this:
Adding the extension
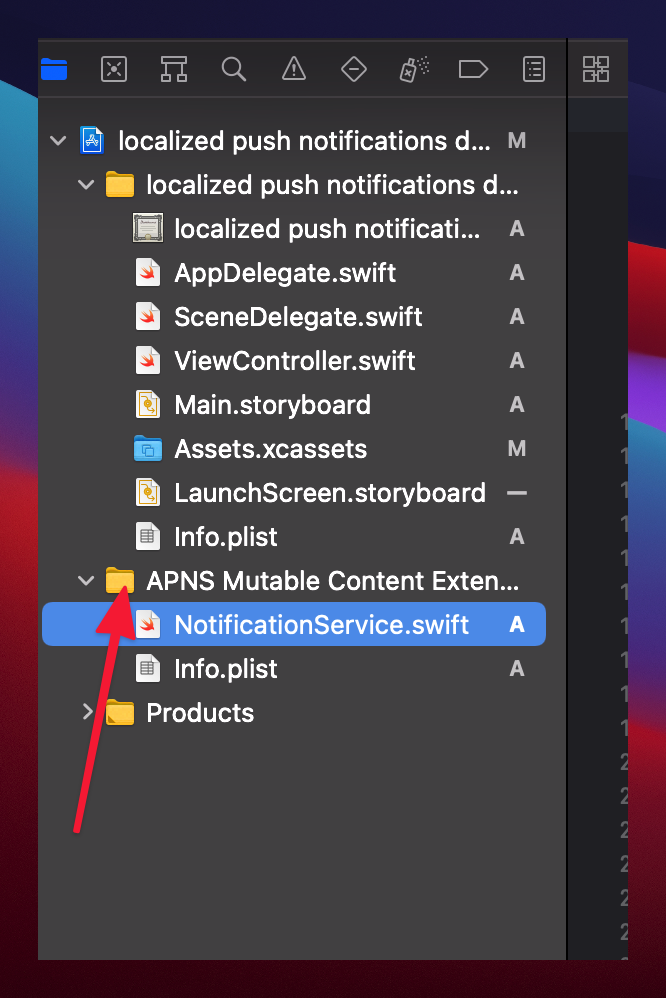
When you have a registered group for the app, you can finally create what you want the most: an extension that allows you to modify a PUSH notification.
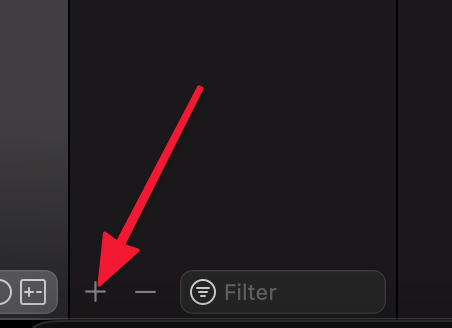
In a Target column click a + symbol. You can find it in the bottom left corner.
Next, in a search tab enter Notification Service Extension.
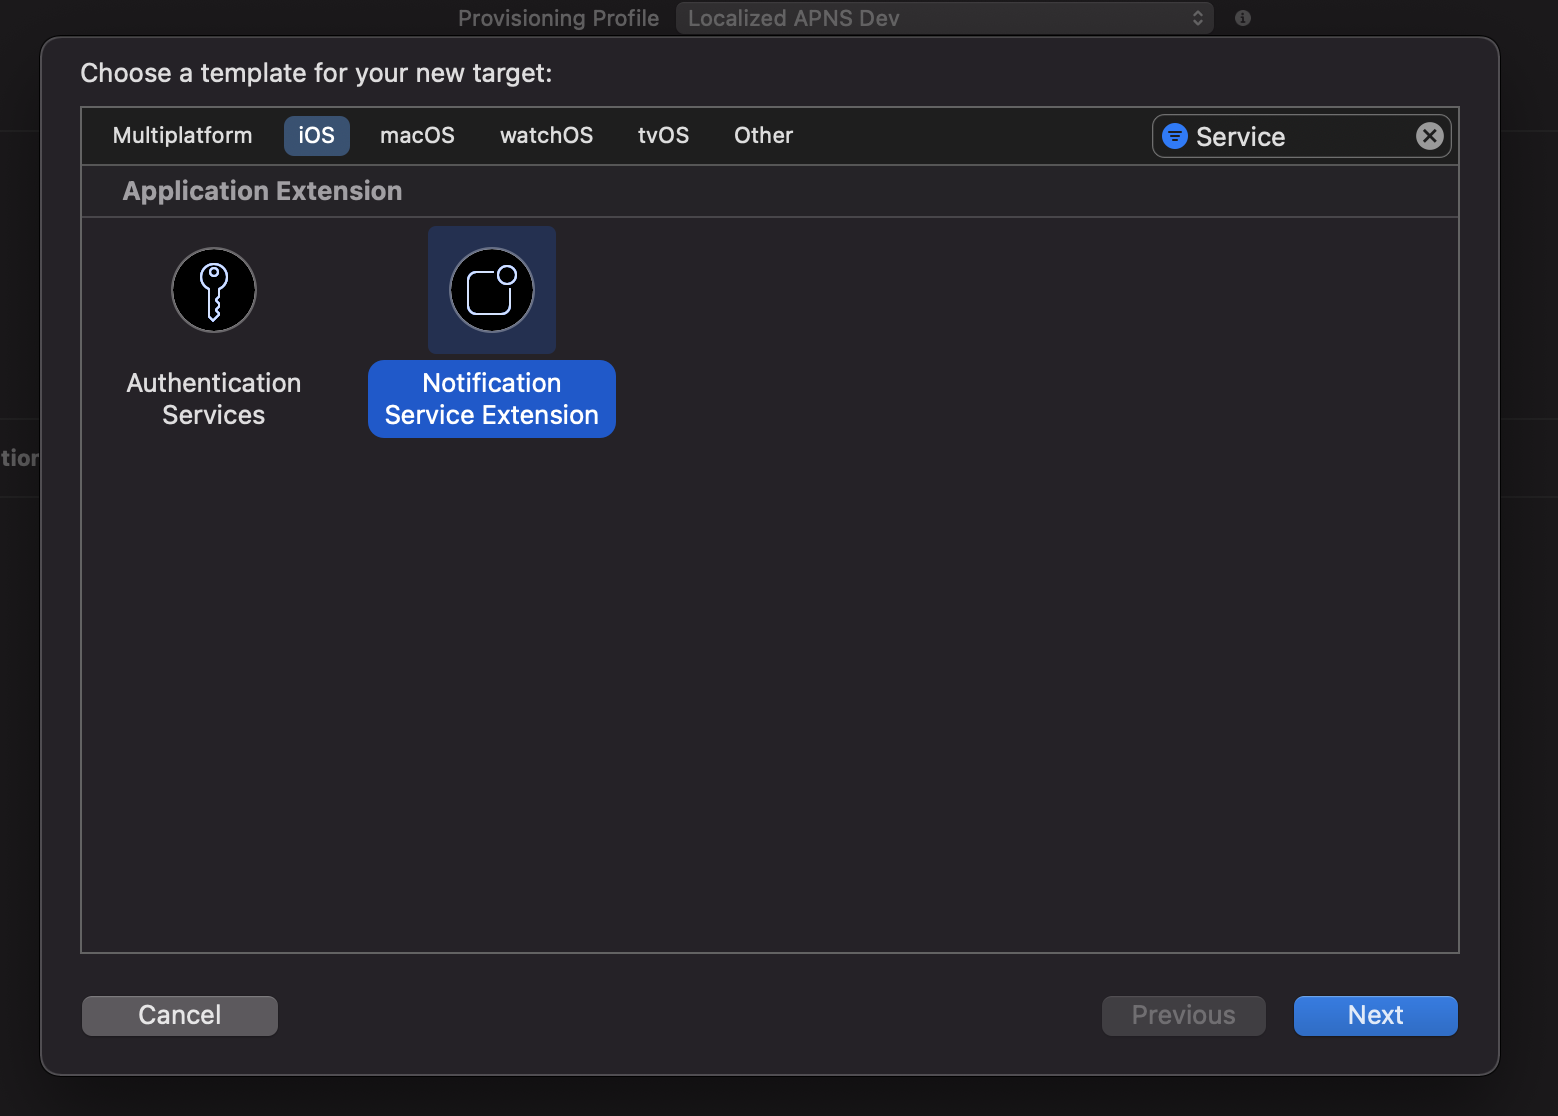
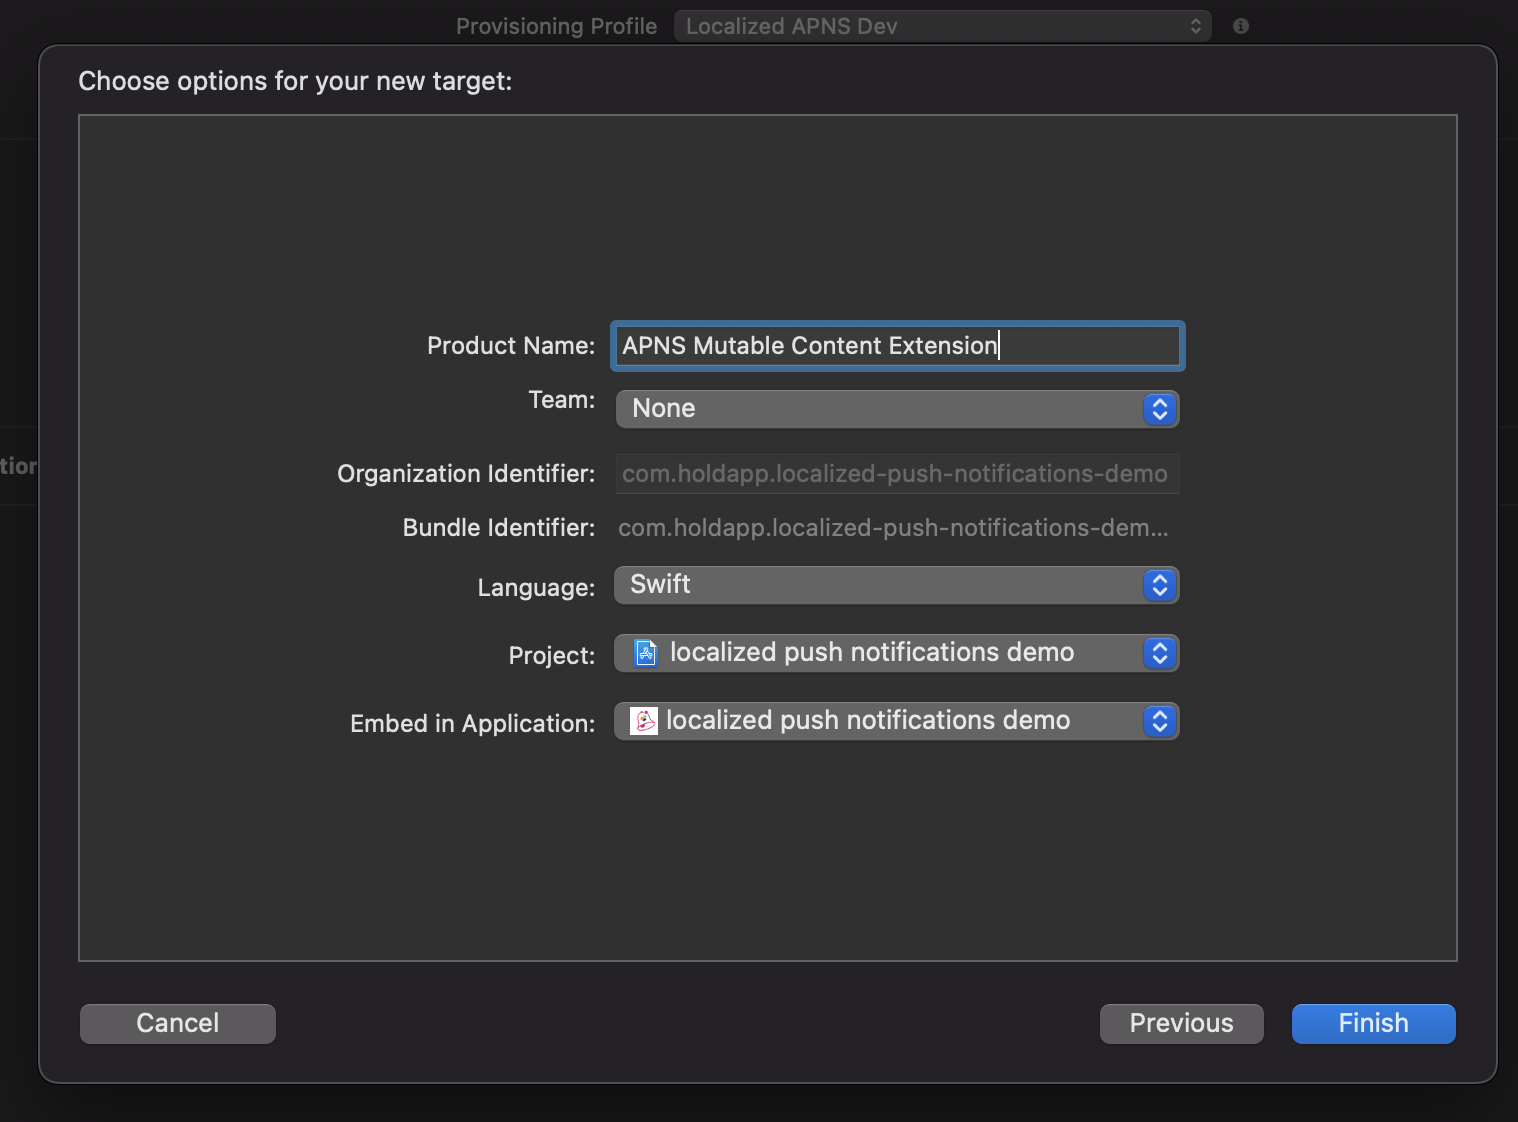
Click Next and enter the name of the extension. Again, you can type anything you want there, but it’s best when the name is associated with a role this extension performs. Otherwise, you won’t be able to tell at the first glance what it is for.
Click Finish. Then you’ll be asked whether you want to activate the extension. Choose the Activate option, and Xcode will generate the files you need.
Setting up the Provisioning Profile & App Group
Now you have the extension, but you still need to set a Provisioning Profile and an App Group, just like you did before, with the main app.
- Check the target of an extension.
- Click Signing and Capabilities tab.
- Uncheck Automatically manage signing (if this option is checked).
- From Provisioning Profile section, select the profile for the extension that you’ve generated before.
- In the upper left corner, click Capability, and then select App Groups from a list.
- Check the list you created. If it’s not on a list, click a + symbol and enter the same group ID that you’ve introduced for the main app.
At this point, it’s best to make sure whether the app builds and installs itself on a device. Additionally, check if you can receive the messages. For this purpose, add a registering code for the remote notification application in AppDelegate.swift.
func application (
        _ application: UIApplication,
        didFinishLaunchingWithOptions launchOptions: [UIApplication.LaunchOptionsKey: Any]?
    ) -> Bool {

    UNUserNotificationCenter
        .current()
        .requestAuthorization(options: [.alert, .sound, .badge]) { granted, error in
      if let error = error {
        print(error)
      } else {
        DispatchQueue.main.async {
            application.registerForRemoteNotifications()
        }
      }
    }

    return true
}
Now, after the registration, it’s time when you can print your token in the console. This function should be added to AppDelegate.swift file.
func application(_ application: UIApplication, didRegisterForRemoteNotificationsWithDeviceToken deviceToken: Data) {
    let deviceTokenString = deviceToken.map { String(format: "%02x", $0) }.joined()
    print("Remote Notification Token: \(deviceTokenString)")
}
Start the app and agree on receiving the notifications. To check whether they work correctly, I use the Push Hero app, available on App Store. It’s easy to use but paid.
If you look for a free solution, use an open-source app Knuff or create your own script for sending the messages. It’s entirely up to you. What’s important, payload needs to include the mutable-content: 1 field. Without this parameter, the extension cannot process the notifications.
Below you can see the example of payload:
{
  "aps" : {
     "mutable-content" : 1,
     "alert" : {
        "title" : "Localized Push Title",
        "body" : "Push payload body"
    }
  }
}
If everything went according to plan, you should see a notification like this one below:

The title includes the word [modified]. It means the extension works correctly.
import UserNotifications

class NotificationService: UNNotificationServiceExtension {

   var contentHandler: ((UNNotificationContent) -> Void)?
   var bestAttemptContent: UNMutableNotificationContent?

   override func didReceive(_ request: UNNotificationRequest, withContentHandler contentHandler: @escaping (UNNotificationContent) -> Void) {
       self.contentHandler = contentHandler
       bestAttemptContent = (request.content.mutableCopy() as? UNMutableNotificationContent)

       if let bestAttemptContent = bestAttemptContent {
           // Modify the notification content here...
           bestAttemptContent.title = "\(bestAttemptContent.title) [modified]"

           contentHandler(bestAttemptContent)
       }
   }

   override func serviceExtensionTimeWillExpire() {
       // Called just before the extension will be terminated by the system.
       // Use this as an opportunity to deliver your "best attempt" at modified content, otherwise the original push payload will be used.
       if let contentHandler = contentHandler, let bestAttemptContent =  bestAttemptContent {
           contentHandler(bestAttemptContent)
       }
   }

}
And finally, the moment you were waiting for – setting up the languages. To make managing the chosen language easier, I created a helper class: LanguageController.swift. It is important that its target would be both the app and the extension because you’ll use this class in two places.
import Foundation

struct Language {
    let code: String
    let name: String
}

final class LanguageController {
    static let shared = LanguageController()

    enum Constansts {
        enum AppGroup {
            static let identifier = "group.com.holdapp.localized-apns-demo"
        }
        enum UserDefaults {
            static let selectedLanguageKey = "SelectedLanguageKey"
        }
    }

    let availableLanguages = [
        Language(code: "en", name: "English"),
        Language(code: "de", name: "Deutsch"),
        Language(code: "uk", name: "Український")
    ]

    var defaultLanguage: Language { availableLanguages.first! }

    private init() {}

    func geLanguage() -> Language {
        guard let appGroupDefaults = UserDefaults(suiteName: Constansts.AppGroup.identifier) else {
            fatalError("Can't find app group with identifier: \(Constansts.AppGroup.identifier)")
        }

        if
            let selectedLanguage = appGroupDefaults.string(forKey: Constansts.UserDefaults.selectedLanguageKey),
            let language = availableLanguages.first(where: { $0.code == selectedLanguage })
        {
            return language
        }

        return defaultLanguage
    }

    func setLanguage(_ code: String) {
        guard let appGroupDefaults = UserDefaults(suiteName: Constansts.AppGroup.identifier) else {
            fatalError("Can't find app group with identifier: \(Constansts.AppGroup.identifier)")
        }

        appGroupDefaults.setValue(code, forKey: Constansts.UserDefaults.selectedLanguageKey)
    }
}
A payload for the notifications will look similar to the one below. Again, there are no rules dictating how to choose names, but remember that all customized keys should be defined at the aps key level.
"aps" : {
      "mutable-content" : 1,
      "alert" : {
         "title" : "Default Message Title",
         "body" : "Default Message Body"
      }
   },
   "localized-message": {
       "en": {
           "title": "Message Title",
           "body": "Message Body"
       },
       "de": {
           "title": "Nachrichtentitel",
           "body": "Nachrichtentext"
       },
       "uk": {
           "title": "Заголовок повідомлення",
           "body": "Тіло повідомлення"
       }
   }
}
In a console, you may see a message like this:
[User Defaults] Couldn't read values in CFPrefsPlistSource<0x281ced500> (Domain: group.com.holdapp.localized-apns-demo, User: kCFPreferencesAnyUser, ByHost: Yes, Container: (null), Contents Need Refresh: Yes): Using kCFPreferencesAnyUser with a container is only allowed for System Containers, detaching from cfprefsd.
In such a case, just ignore it. If you want to know more, you’ll find the information here.
This is the code that enables you to download the message:
extension LanguageController {
    func extractLocalizedMessage(from userInfo: [AnyHashable: Any], for code: String) -> [String: String]? {
        guard
            let messages = userInfo[Constansts.Push.localizedMessageKey] as? [String: Any],
            let messageObject = messages[code] as? [String: String]
        else {
            return nil
        }

        return messageObject
    }
}
With this code, you can implement the support for your notifications in a class that handles the extension.
import UserNotifications

class NotificationService: UNNotificationServiceExtension {

    override func didReceive(_ request: UNNotificationRequest, withContentHandler contentHandler: @escaping (UNNotificationContent) -> Void) {

        let langCode = LanguageController.shared.getLanguage().code

        if
            let mutableContent = (request.content.mutableCopy() as? UNMutableNotificationContent),
            let extractedMessage = LanguageController.shared.extractLocalizedMessage(from: request.content.userInfo, for: langCode),
            let title = extractedMessage[LanguageController.Constansts.Push.titleKey],
            let body = extractedMessage[LanguageController.Constansts.Push.bodyKey]
        {

            mutableContent.title = title
            mutableContent.body = body

            contentHandler(mutableContent)
        } else {
            contentHandler(request.content)
        }
    }

    override func serviceExtensionTimeWillExpire() {}
Keep in mind that even if for some reason you won’t be able to retrieve the translation from a payload, the system will display content from the aps object. That’s why it should be updated every time you send a message.
Notifications play an important role in marketing communication and allow you to keep the users up-to-date. They also encourage them to open the app more often.
If you develop a commercial app that works on several markets, try out this solution. Download the entire code from Github and use it in your project.