In the process of software development, we implement features and test them simultaneously.
The testing stage is mostly about checking if the system runs correctly and detecting errors. This task belongs to QA testers, but they need someone to deliver software to them. This is the software developers’ job. It’s up to them to choose the best method that enables it. For example, with some help from TestFlight.
Learn how to use this platform and upload your iOS app to TestFlight. It will help you manage this process and even automate it in the future.
App testing then vs. now
It used to take much effort to make iOS app testing possible.
The software developers needed the device’s UDID code to register it on the Apple account. Next, they generated a provisioning profile (ad hoc type) that supplies the app with digital signs. Otherwise, they wouldn’t be allowed to use that device for tests.
Later, they added a profile to the app and then passed it over to testers via external platforms (for example, AppCenter). In the end, they had to send a generated file. Then, testers received a notification about a new build.
Unfortunately, every new iOS device had to be registered, and developers had to generate new profiles. This was very time-consuming.
It’s much easier today, with TestFlight. You don’t have to worry about registering devices, a small number of testers, or problems with raising issues. The control over the beta tests is much bigger.
Registration in the iOS Developer Program
There are many software distribution methods, from exporting the app to testing devices to sending it to your App Store Connect account. You can also use TestFlight to share iOS, tvOS, and watchOS builds among testers and collect feedback.
For that purpose, you have to join the Apple Developer Program.
The first step is to register yourself as an Apple developer. It’s free and gives you access to loads of information. However, it doesn’t allow you to send your mobile apps to the App Store. To change that, you need to pay 99 USD.
In the past, there were three programs: iOS, OS X, and Safari. Now, there’s just one and the same annual fee (99 USD) covers all of them.
Creating the Apple Developer account
If you don’t have your Apple Developer account yet, go to the program’s official website. In the upper right corner, tap Account. On the next page, you decide whether you want to create a new Apple ID or use the existing one. If you like, you can save some time and use the Apple ID that you already use to shop at iTunes Connect.
When creating a new Apple ID, you need to:
- Enter your email, password, and security data
- Answer the security questions
- For the first log-in, enter the code sent to your email address
- Accept the legal regulations
Great, now you’re officially an Apple Developer! You have access to libraries and tools, but you still have to join the paid program to send the app to the store.
Joining the Apple Developer Program
Click Join the Apple Developer Program at the bottom of the website. Then, choose Enroll.
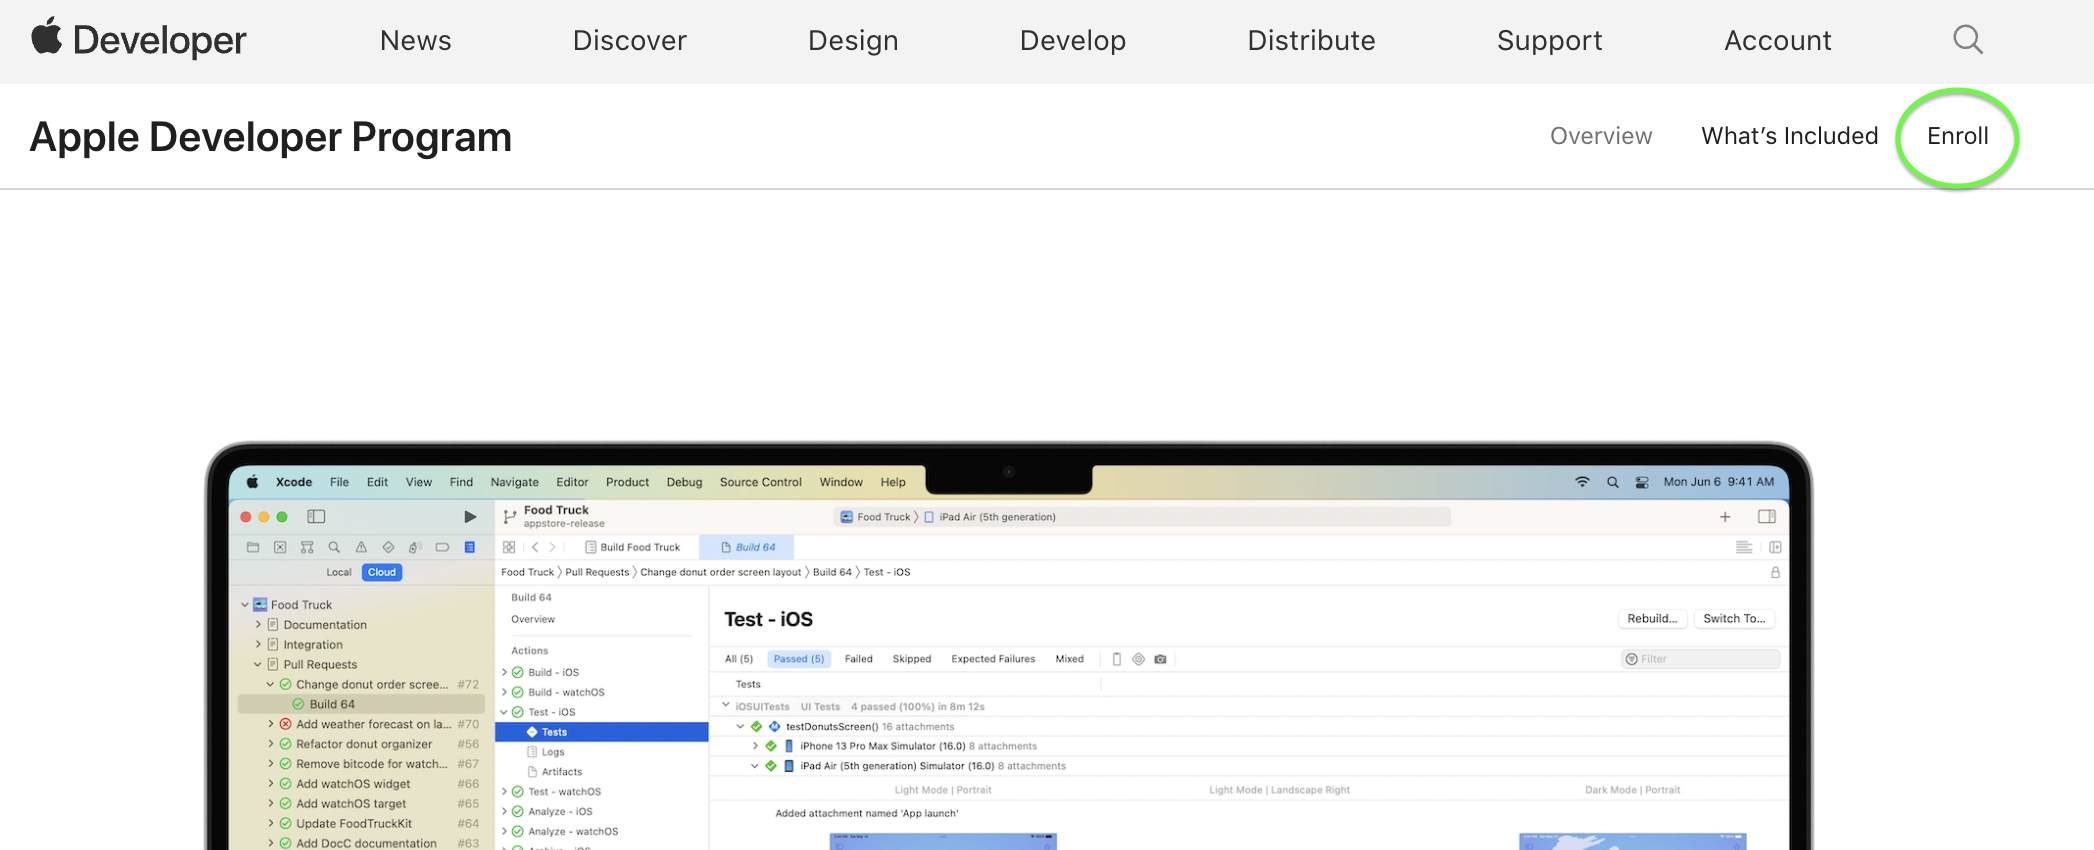
Apple Developer website
On the next page, you can register yourself as a physical person or a company. In the latter case, the process gets a bit more complicated because you need to file documents that confirm your engagement in a company.
There are two main benefits of registering as a company:
- You can invite others to your Apple Developer account. It’s a perfect solution for developers who work together on the same project.
- A Salesman field on the App Store will display the company’s name instead of your name and surname.
To proceed, select Physical person / Exclusive owner and click Continue. Then, accept the legal agreement.
If you haven’t added any payment data before, enter the billing/company information to verify your identity. Apple is going to try to confirm this information at your credit card provider, so make sure the data is correct.
Below, you can select the option that enables automatic renewal of your program membership, so you won’t have to remember about the subscription. There’s also no risk that your apps will become unavailable (they get deleted from the store when the account is inactive).
Select the agreement if you want your membership to be automatically renewed, and then click Purchase.
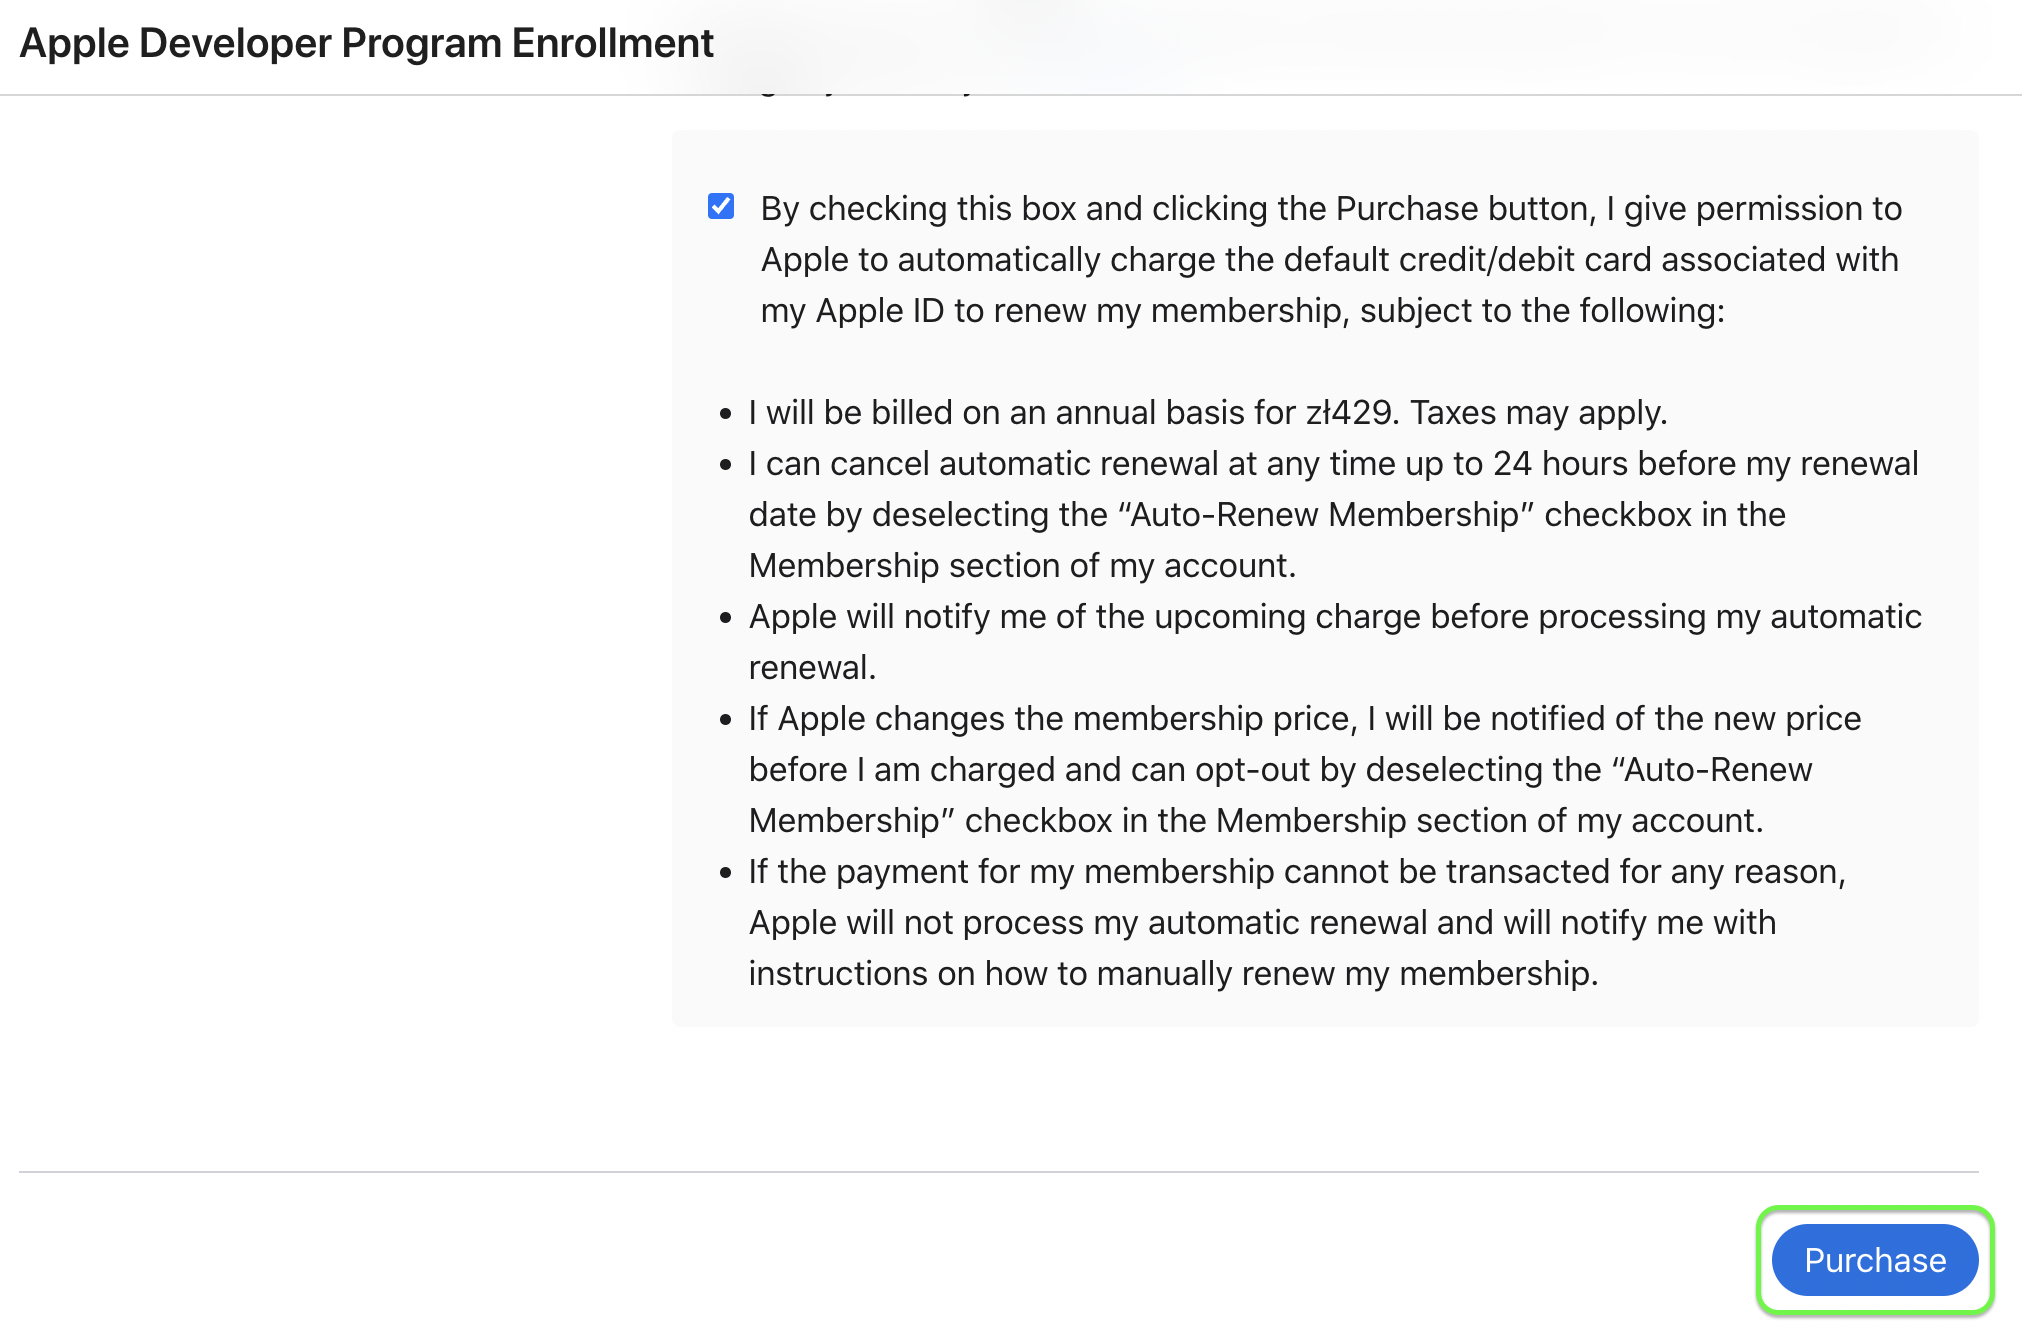
Apple Developer Program enrollment form
After sending the form and paying the fee, you must wait for Apple to process your order.
And that’s it! You’ve managed to join the Apple Developer Program.
Signing the code: profiles and certificates
Create a code signing certificate and a proper provisioning profile.
Code signing certificates make it possible to link iOS apps with Apple Developer’s account.
Provisioning profiles are delivered with the iOS apps so they can be installed on users’ devices.
The developer’s provisioning profile and the certificate that are already in use are dedicated to particular devices. Do you want to share your app with beta testers or users via the App Store? If that’s so, you need a separate sharing profile and distribution certificate.
Signing the code
The first option is to turn automatic signing on. This allows Xcode to create and manage the certificates and profiles and register the new devices for you.
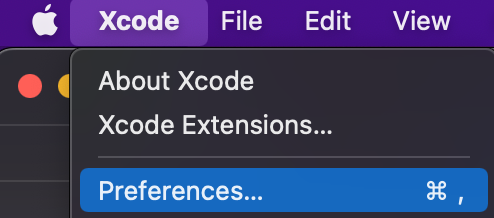
- Add your Developer account to Xcode. From the upper menu, choose Xcode and then Preferences.
- Go to Accounts. In the bottom left corner, click the plus symbol and then choose Apple ID.
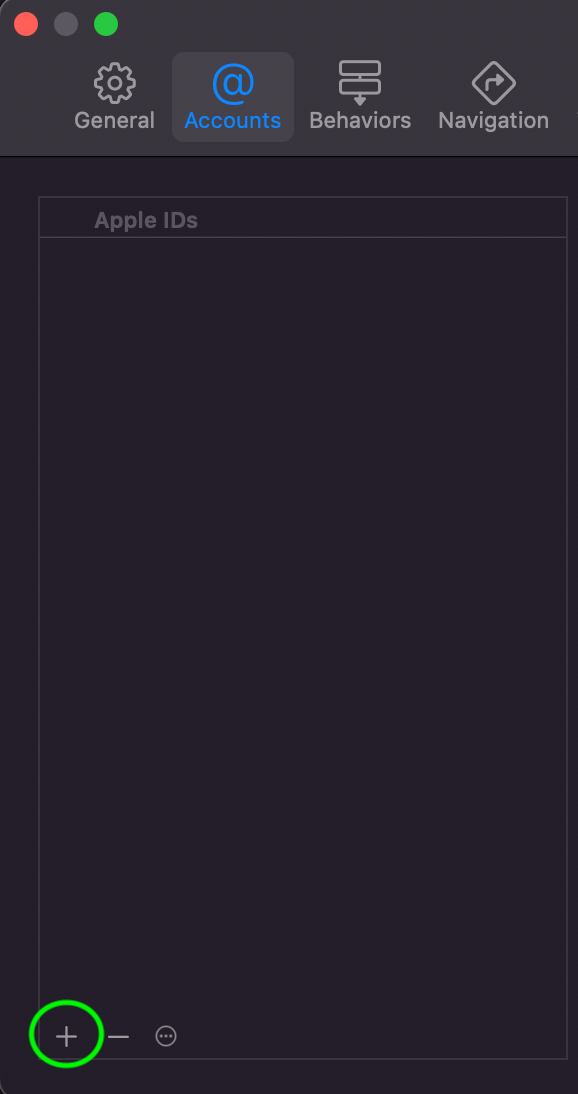
- Enter the Apple ID and password used in the program, and then click Next.
- Turn the automatic signing on. In Xcode, select the goal and go to the General tab.
- In the Signing section, click the field called Automatically manage signing, and then select your team.
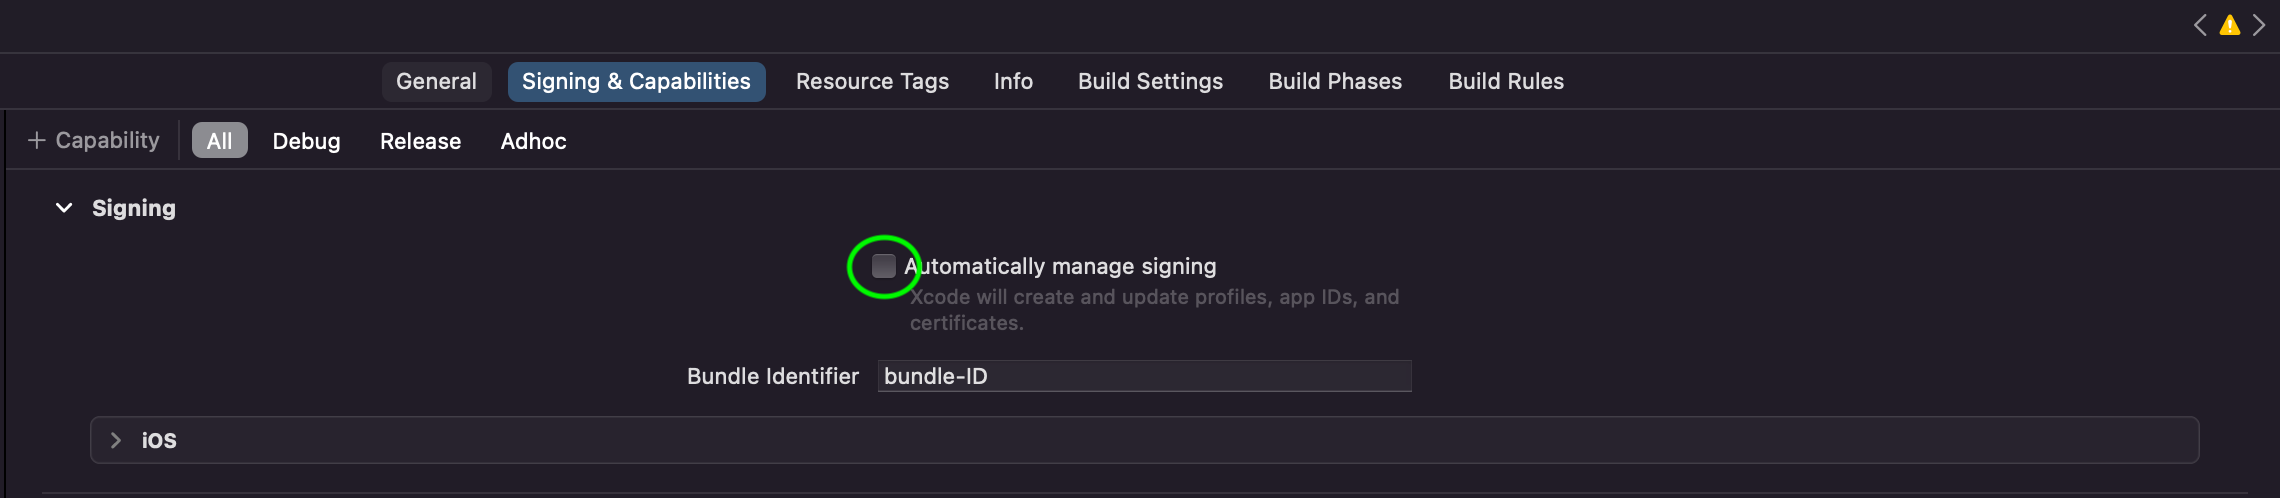
- If you will connect a new device to your Mac, Xcode will automatically detect it and register it in the provisioning profile of your team. It will enable running the apps on this device.
The second option is to manually sign the app. It requires you to create the proper certificates yourself, as well as the profiles and lists of devices. Then you have to add them to the app on your own.
Upload to TestFlight
First, you need to create a new app on App Store Connect.
It’s a set of online tools that enable, for example, previewing the sales and analytics reports. They also allow you to invite users to beta testing with the TestFlight app.
How to add the app to App Store Connect?
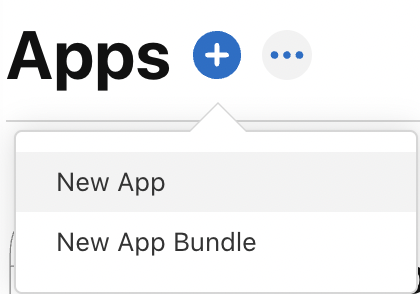
Open the App Store Connect website and choose My Apps.
Next, click + and New App.
In the new window, fill out the necessary data:
- Platforms — You need to choose at least one platform for your product. The iPadOS and watchOS apps are considered a part of the iOS platform.
- Name — The name of your app that will appear in the App Store. It cannot be longer than 30 characters.
- Primary Language — In the case of all users for whom you don’t offer localized info about the product, the App Store will automatically display the data in your primary language.
- Bundle ID — This ID must match the one you use in Xcode. You cannot change it after sending the first build.
- SKU — A unique ID of your app that is not visible in the App Store.
- User Access — You can limit the number of users who see this app in App Store Connect. If you choose full access, all users will receive it – no matter what role they have. Remember that users like Admin, Finance, and Reports cannot have limited access.
Finally, click Create.
Sending the compilation to App Store Connect
I assume that your iOS is configured for a provisioning profile. It has its app ID, and you have already filled out the data on your App Store Connect account.
In this case, after building the app, all that is left to do is send it to App Store Connect. The process of sending the builds may seem complicated, but as soon as you learn it, it won’t be a problem anymore.
You need to take two simple steps:
- Archive your app.
- Send the archive to App Store Connect.
Step 1. Archiving the app
The archive is a build of your app. It includes the information about the debugging that Xcode keeps in an app bundle. It allows the app to be compiled, and you will receive the IPA file that is sent to App Store Connect.
What now? Open the project in Xcode and choose Any iOS Device (arm64) in the device selection window.
Next, select the archiving options in the menu Product -> Archive.
After the successful archiving, the Organizer window will open up with your iOS app. Next, click Distribute app.
Then, you’ll be able to choose a distribution method. You’re interested in the first option, App Store Connect, which is used to distribute the app to TestFlight and the App Store. Click Next.
Now, you should see a selection of the target place. It is where you click Upload. The Export option enables you to export the signed archive. You can use it with other tools. Click Next.
In this view, you select the distribution options. It’s recommended that you choose all of them, as they may all be useful.
- Strip Swift Symbols allows you to reduce the size of the app.
- App’s symbols enable receiving the performance and issue reports.
- Manage versions and build numbers — This option automatically sets the proper parameters. You don’t have to enter the version or build number in the Xcode app.
- App’s bit code is a file that Apple can use to recompile the app for future changes in the iOS system.
Next, you’ll be asked to choose the certificate and provisioning profile. When Xcode completes preparing the archive for distribution, you should see a list with a summary of the information about the app you want to upload. All it takes is to click Send.
If you haven’t created a proper app in App Store Connect or the bundle IDs don’t match, the error message may show up. But when everything goes according to plan, after sending the app to App Store Connect, you will receive a success notification.
From now on, your app will be processed and it may take some time before it will appear on TestFlight. Usually, it takes from several minutes to an hour but it can be longer.
After processing the compilation, you will receive an email, and the beta version of your app will become available on App Store Connect.
Step 2. Sending the iOS app to App Store Connect
In App Store Connect, you manage iOS, iPadOS, macOS, and tvOS apps. Here, you create a page for your product, choose the subscription fees, add screenshots, etc. However, the most important thing now is the possibility to test the software. To do that, you must enter My Apps on the dashboard and choose the app.
On the next window, tap the TestFlight option.
Then, you should see all the compilations that have been sent.
Sending the mobile app to TestFlight. Why should you know this process?
Software developers must know the distribution process because they are responsible for sending the app’s version to tests. Regularly delivered compilations mean regular tests, which directly impacts better product quality.
It’s equally important to be familiar with the TestFlight platform. It’s good to know how to add external and internal testers, what types of beta tests you can run, or how to send reports and feedback.
Over the years, the iOS app distribution system has changed. New external solutions were created that required additional implementations, new accounts, and the continuous addition of new testing devices. The entire process became mundane and less effective.
Today, with TestFlight, this job is easier, and developers have more time to build the apps.