SwiftGen on iOS – Automatic Content Localization. How to Make Your Work with Languages Easier?

You’re developing an iOS app that will have users in several countries? Sooner or later, you’d have to figure out how to enable supporting multiple languages. Content localization is a must if you want everyone to read content in their own language. And this is when SwiftGen comes in handy.
What is content localization?
Content localization makes it possible to display content in an app’s UI in different languages. All the labels, buttons, and other text elements can be translated.
The more languages the app supports, the more people can be interested in it. Nonetheless, localization is a tedious process that requires using so-called magic strings.
Lucky for you, on iOS, there’s a SwiftGen – a tool for automatic Swift code generation for the resources in your project. Previously, we’ve been explaining how to send translated notifications. But from this guide, you’ll find out how to use SwiftGen to create strings – or in other words – texts in the app.
Content localization based on language set up on a device
First of all, texts can be found in a Localizable.strings file. For each language, there’s a separate file with pairs created from a key and value.
You can add pairs manually or use tools that generate them automatically.
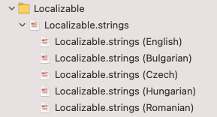
Localizable.string (Hungarian):
“order_info.order_number.title” = “Megrendelési számod:”;

"status" = "Fizetés státusza:";
Localizable.string (Romanian):
"order_info.order_number.title" = "Numărul tău de comandă este";

"status" = "Statusul tranzacției:";
On the left, there’s a name of the string that you want to localize. It’s a key for calling out every string in a code. On the right, you can see the text that you want to associate with a particular key.
Use NSLocalizedString method for localization. It returns a localized string from a table. Xcode generates it when it exports the localizations.
/// - note: Although `NSLocalizedString(_:tableName:bundle:value:comment:)`
/// and `Bundle.localizedString(forKey:value:table:)` can be used in a project
/// at the same time, data from manually managed strings files will be
/// overwritten by Xcode when their table is also used to look up localized
/// strings with `NSLocalizedString(_:tableName:bundle:value:comment:)`.

public func NSLocalizedString(_ key: String, tableName: String? = nil, bundle: Bundle = Bundle.main, value: String = "", comment: String) -> String
Comments in the content localization process
If you’re one of those people who like adding comments in code, I have good news for you. Comments do not impact the translation. Better yet, they show the translator the context concerning the presentation of the localized string.
Feel free to add comments in a code of the app using the NSLocalizedString method in this way:
let loginTitle = NSLocalizedString(“status”, comment: “Order Info status”)It will enable localizing texts depending on the language set up on a device. If a particular language is not supported, then the user will see the default language of the app.

Content localization based on a language selected in the app in a real-time
Sometimes, users can decide what language they want the app to display. In such a case, basic usage of the NSLocalizedString method won’t be enough. A solution can be your own String extension. How to implement it?
extension String {
    private enum Constants {
        static let pathType = "lproj"
    }

  func localized(_ comment: String? = nil) -> String {
    let selectedLanguage = Language.selectedLanguage.localeIdentifier
    guard let path = Bundle.main.path(forResource: selectedLanguage, ofType: Constants.pathType),
          let bundle = Bundle(path: path) else { return self }

    return NSLocalizedString(self, tableName: nil, bundle: bundle, value: .empty, comment: comment ?? .empty)
  }
}
First, you need to choose a local ID. I use a manager that coordinates the language that is currently set up in the app. You can easily find a list of codes on the internet, for example on the Apple website for developers.
Next, you need to find a path to the right file with translations that depends on the currently selected language.
Keep in mind that if the right path can’t be found, your key will show up instead.
Using the extension in a code is very simple:
let loginTitle = “status”.localized(“Order Info status”)And that’s it. Hooray! You have the superpower to change a language of an app in real-time.
Automatic code generation with SwiftGen
The approach that uses the NSLocalizedString method requires placing text strings in a code.
It is not entirely safe – one accidental change in a translation file, and the user sees the key you’ve prepared, instead of the content of the app.
That’s the reason why you need SwiftGen. It enables generating a safe code for the type that can refer to the localized strings.
SwiftGen is the Swift code generator for the resources of your projects, fonts, colors, assets, basic data – or localized strings. It is a tool that allows using variables for referring to the localized strings.
How to add SwiftGen to a project?
There are many ways of implementing SwiftGen, but in this case, I use CocoaPods.
Adding SwiftGen to a mobile app project – a step-by-step guide
1. Add a library to a Podfile file and call out a comment under install in a terminal:
pod ‘SwiftGen’, ‘6.4.0’
2. Create aSwift file. A structure with translations will be placed there.

3. Generate a configuration file for SwiftGen. All it takes is to open the terminal and move on to the project’s main catalog.
4. Type the command below in the terminal:
./Pods/SwiftGen/bin/swiftgen config initThat’s how a configuration file called swiftgen.yml gets generated. You need to add it to the project as a reference to a folder. In this file, all the instructions for SwiftGen will be placed.

This is what the file should look like:
input_dir: MyLib/Sources/
 output_dir: MyLib/Generated/

## Strings
 strings:
   inputs:
     - Resources/Base.lproj
   outputs:
     - templateName: structured-swift5
       output: Strings+Generated.swift
What do variables mean?
input_dir tells SwiftGen that the MyLib/Sources file must navigate to all the file paths that will be added.
output_dir defines exit catalog of the generated Swift files.
inputs says where is the Localizable.strings file in a project.
templateName says what version of the template you want to use.
output informs you about the location of the file in which there are variables referring to the localized strings.
In order to run a script, you need to add a new compilation phase to a project. To make that happen, choose your project in a project’s navigator, enter the Build Phases tab, and add a new script.
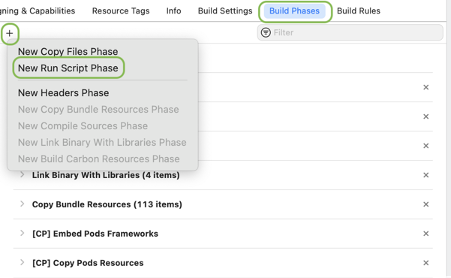
Add the text below to the newly created script.
if [[ -f "${PODS_ROOT}/SwiftGen/bin/swiftgen" ]]; then
  "${PODS_ROOT}/SwiftGen/bin/swiftgen"
else
  echo "warning: SwiftGen is not installed"
fi
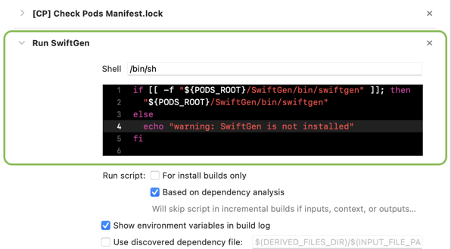
Now, build the app in Xcode to see the generated key-value pairs.
After opening a file defined earlier – Strings+Generated in this case – you’ll see a generated enum called L10n and subtypes that refer to your localized texts.
enum L10n {
   enum Filter {
     enum LastItem {
      /// Last Item!
       static let  info =  Localized.tr("Localizable", "filter.last_item.info")
    }
  }

}
The structure of this file depends on the way you choose to define keys. There are two basic signs used when creating keys: “.” and “_”.
“_” allows keeping a notation in which every next word is written together and starts with a capital letter, as you can see in the case of last_item.
“.” adds a new nesting level.
Everything’s clear? If so, now you can use your structure in a code. There’s no need to type:
let filterTitle = NSLocalizedString(“filter.last_item.info”, comment: “Filter title”)Use this formula, instead:
let filterTitle = L10n.Filter.LastItem.infoIt’s done! Congratulations, you made it to achieve your goal.
The structure above is great when you want to rely on the language of the device. But what if users can change a language directly in the app?
SwiftGen implementation with your own template
Some apps allow users to change the language in real-time. In such cases, the solution described before doesn’t work. It won’t be enough to create a swiftgen.yml file and take advantage of a ready-to-use schema: templateName: structude-swift5.
This time, you need to create your own template.
In this case, you have to add a library to a Podfilefile. Next, download the structured-swift4.stencil file. You can change its name as you wish, for example to myProject_string.stencil.
Add a file to a project. Why? Because in this very file you will make changes towards the script’s behavior. Then, create a Swift file. A structure with translations is located there.

This time you also have to add a new script, but the way it looks is different:
"$PODS_ROOT"/SwiftGen/bin/swiftgen run strings -p "$PROJECT_DIR/FilePath/test_strings.stencil" -o "$PROJECT_DIR/FilePath/Localized.swift" --param enumName=Localized "$PROJECT_DIR/FilePath/Base.lproj/Localizable.strings" 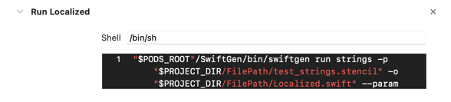
Replace FilePath with a path to:
- a file with a template,
- a file in which there is a structure with translations,
- translations added in the app.
If you’d run SwiftGen now, nothing would have changed. When you want to see the changes, you need to define the stencil template first.
1.
// swiftlint:disable all
// Generated using SwiftGen — https://github.com/SwiftGen/SwiftGen

{% if tables.count > 0 %}
{% set accessModifier %}{% if param.publicAccess %}public{% else %}{% endif %}{% endset %}
import Foundation

// swiftlint:disable superfluous_disable_command file_length implicit_return

// MARK: - Strings

{% macro parametersBlock types %}{% filter removeNewlines:"leading" %}
  {% for type in types %}
    {% if type == "String" %}
    _ p{{forloop.counter}}: Any
    {% else %}
    _ p{{forloop.counter}}: {{type}}
    {% endif %}
    {{ ", " if not forloop.last }}
  {% endfor %}
{% endfilter %}{% endmacro %}
{% macro argumentsBlock types %}{% filter removeNewlines:"leading" %}
  {% for type in types %}
    {% if type == "String" %}
    String(describing: p{{forloop.counter}})
    {% elif type == "UnsafeRawPointer" %}
    Int(bitPattern: p{{forloop.counter}})
    {% else %}
    p{{forloop.counter}}
    {% endif %}
    {{ ", " if not forloop.last }}
  {% endfor %}
{% endfilter %}{% endmacro %}
{% macro recursiveBlock table item %}
  {% for string in item.strings %}
  {% if not param.noComments %}
  /// {{string.translation}}
  {% endif %}
  {% if string.types %}
  {{accessModifier}} static func {{string.name|swiftIdentifier:"pretty"|lowerFirstWord|escapeReservedKeywords}}({% call parametersBlock string.types %}) -> String {
    return {{enumName}}.tr("{{table}}", "{{string.key}}", {% call argumentsBlock string.types %})
  }
  {% elif param.lookupFunction %}
  {# custom localization function is mostly used for in-app lang selection, so we want the loc to be recomputed at each call for those (hence the computed var) #}
2.
  {{accessModifier}} static var
{{string.name|swiftIdentifier:"pretty"|lowerFirstWord|escapeReservedKeywords}}: String { return
{{enumName}}.tr("{{table}}", "{{string.key}}") }
3.
  {% else %}
  {{accessModifier}} static var {{string.name|swiftIdentifier:"pretty"|lowerFirstWord|escapeReservedKeywords}}: String { {{enumName}}.tr("{{table}}", "{{string.key}}") }
  {% endif %}
  {% endfor %}
  {% for child in item.children %}

  {{accessModifier}} enum {{child.name|swiftIdentifier:"pretty"|escapeReservedKeywords}} {
    {% filter indent:2 %}{% call recursiveBlock table child %}{% endfilter %}
  }
  {% endfor %}
{% endmacro %}
// swiftlint:disable explicit_type_interface function_parameter_count identifier_name line_length
// swiftlint:disable nesting type_body_length type_name vertical_whitespace_opening_braces
{% set enumName %}{{param.enumName|default:"L10n"}}{% endset %}
{{accessModifier}} enum {{enumName}} {
  {% if tables.count > 1 or param.forceFileNameEnum %}
  {% for table in tables %}
  {{accessModifier}} enum {{table.name|swiftIdentifier:"pretty"|escapeReservedKeywords}} {
    {% filter indent:2 %}{% call recursiveBlock table.name table.levels %}{% endfilter %}
  }
  {% endfor %}
  {% else %}
  {% call recursiveBlock tables.first.name tables.first.levels %}
  {% endif %}
}
// swiftlint:enable explicit_type_interface function_parameter_count identifier_name line_length
// swiftlint:enable nesting type_body_length type_name vertical_whitespace_opening_braces

// MARK: - Implementation Details
4.
extension {{enumName}} {

  static func tr(_ table: String, _ key: String, _ args: CVarArg...) -> String {

    let selectedLanguage = Language.selectedLanguage.localeIdentifier

    guard let path = Bundle.main.path(forResource: selectedLanguage, ofType: "lproj"),

    let bundle = Bundle(path: path) else { return self }


    return NSLocalizedString(key, tableName: table, bundle: bundle, value: .empty, comment: .empty)

  }
5.
}
{% else %}
// No string found
{% endif %}
Fragments marked as 2 and 4 are the changes in a file.
The first one concerns a change of the key’s structure in a Localized.swift file. It allows you to rely on the computed variables. This way, every time the key is used, you get a properly translated text. It will look like this:
enum Localized {
   enum Filter {
     enum LastItem {
      /// Last Item!
       static var info: String {  Localized.tr("Localizable", "filter.last_item.info") }
    }
  }

}
The second change enables choosing a key that refers to the current language of the app.
It is used in a code the same way as in a previous case:
let filterTitle = Localized.Filter.LastItem.info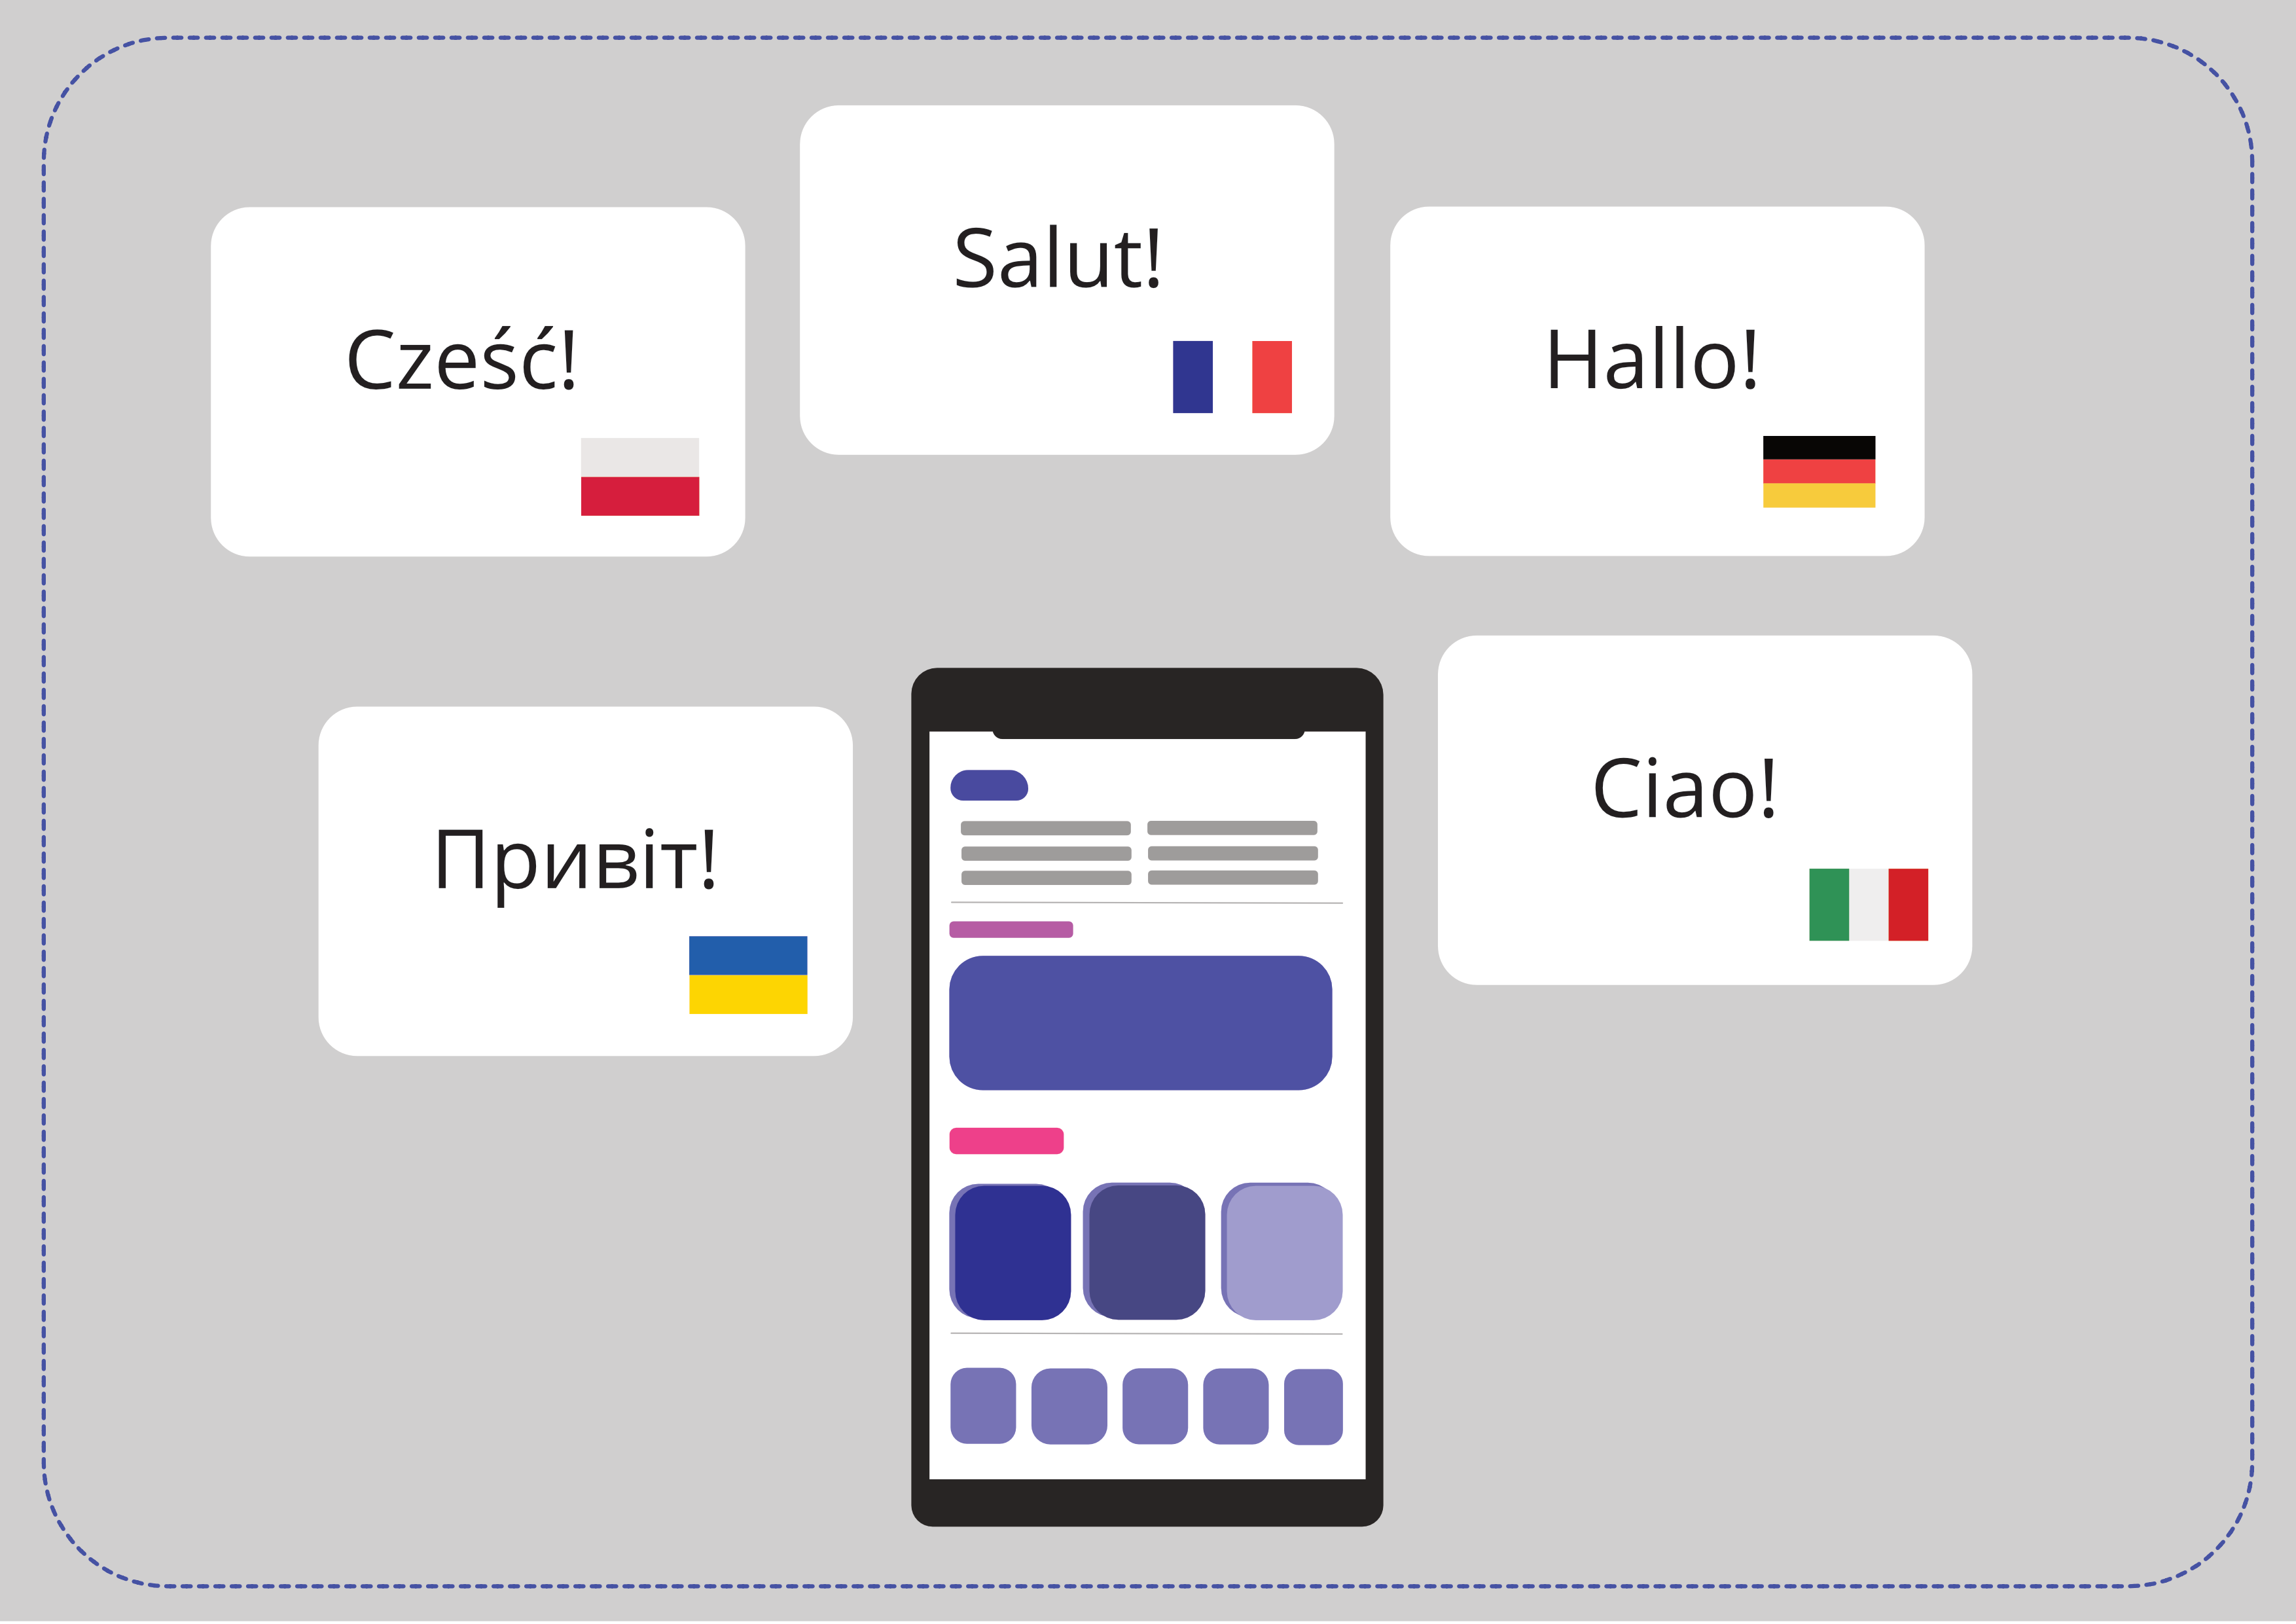
What should you keep in mind when you localize your content?
Sometimes, things don’t go according to plan.
In my case, after the configuration of all elements, it turned out that localization still doesn’t work in real-time. After the change of the language in the app, the content was displayed in the wrong language. Only closing the app was helping.
After a short while, I found out that my enum is to blame.
I stored the content in files in this way:
    private enum Constants {
        static let lastItemKey = Localized.Filter.LastItem.info
    }
This caused a problem with switching the language of the app in real-time. Once assigned, the value wasn’t dynamically calculated later. So, I had to make a small change:
    private enum Constants {
        static var lastItemKey: String { Localized.Filter.LastItem.info }
    }
This way, every time the lastItemKey value is used, it is redefined.
Change of language in real-time – when it’s best to use SwiftGen on iOS?
Delivering content in the native language plays a significant role in mobile apps.
Users like having a freedom of choice. Not being able to change a language in the app sometimes makes them leave and never come back.
At first glance, the mechanism delivered by Apple may seem useful enough. So, why should you bother with the additional configuration and install a new library?
Because SwiftGen is perfect when you need to display content in different languages. It makes it possible to safely and efficiently manage localized strings, so it’s really worth it to take some time for its implementation.