User Interface Design: Step 2 in the App Development Process. Our Approach to the UX/UI Projects

When you want your product to succeed, you have to combine the best user experience with outstanding UI design. And that’s something we need to achieve in this part of the app development process.
When is the right time for designing the UI? What resources do UX/UI specialists need? How long does it take to create a project?
If you’re a product owner who wants to be well-prepared for this stage – let us explain all the important details to you.
Key takeaways
- The success of a product relies significantly on an excellent user experience (UX) that includes a thoughtfully designed user interface (UI).
- UX design ensures that users can navigate through an app easily and find what they need quickly. UI design focuses on making the app visually appealing. It all makes the product attractive, functional, intuitive, and user-friendly.
- It’s best to start with user research and then, take part in the Product Discovery workshops before preparing the UX/UI designs. This way, we can achieve better results, well-adjusted to client’s needs. In certain cases, UX/UI issues are also addressed during the maintenance phase.
- Designers cooperate with software developers on a regular basis to ensure the best results.
- To prepare effective UX/UI designs, it takes resources and info from clients. This includes key performance indicators (KPI), information about the target users’ demographics, motivations, habits, etc., as well as initial concepts and assumptions provided by the client.
User Experience and User Interface design – what are they?
Imagine your app is a map of a treasure island. You want to get the gold as soon as possible, so you need clear-cut instructions. That’s what UX design is for – to make sure that you won’t get lost and that finding every important thing on your way won’t take you long.
UI design aims to make this map look like something you want to pick up and check where it leads to. It also shows you where you are, every step of the way. Otherwise, after a while, you might feel discouraged and that would make you stop pursuing the path.

You need a more detailed definition? We’ve covered the differences between UX and UI design in one of our previous articles.
What’s important for now, is that UX and UI designers should work together. They both want to facilitate using the app and encourage people to discover its content. Their job is to ensure that the product looks attractive, has the features people need, and offers intuitive solutions.
UX and UI design on a project timeline
In the title of this article, we say that preparing UI design is a second stage of the development process. Truth is, it can be but it doesn’t have to. Why?
Some clients begin with creating the user interface designs, so when they finally come to us for the development, they are ready to implement. But it doesn’t happen every time.
So when is the right moment for creating graphical user interfaces?
We suggest conducting user research first, so we could find out who they are, what are their priorities, and what they know about the product or the field you specialize in.
The team could also, for example, begin with taking part in the Product Design workshop and focus on a particular problem you want to solve concerning your app.
Then we start working on the UI design. Somewhere in between (preferably, after the workshop), everyone engaged in a project would gather at the kickoff meeting to talk about the details.
In certain projects, we take care of the UX/UI issues at the maintenance phase, too.

How long does it take to create the designs?
On the usual basis, the UI designer has two weeks after the UX workshop to create the first version of the project. After three iterations – when designers implement the changes based on the client’s feedback – the interface should be ready. It’s not a rule, though. Some projects are too complex for that to work out.
Nevertheless, we can avoid the risk of constant changes in design that postpone the deadlines. If a product owner knows exactly what he/she wants from the very beginning, we don’t have to add unplanned elements as the project evolves. A clear goal and a detailed list of must-have features can save us a lot of time.
Another thing is that the more people you need to ask for approval, the more time it takes to move on with the project. So, it’s best if there’s just one person (preferably, a product owner) who makes such decisions.
What do we need to prepare the design?
The ideas for a good user interface design don’t come out of thin air. We need the resources and data to rely on. Some of them should be provided by the clients or with their help, such as:
- Key Performance Indicators (KPI) and info about business needs – if you can define your success in numbers, it gives us a clue what we should focus on. Such a goal could be to increase sales by 25% or to decrease the number of abandoned carts by 20%.
- Information about the users – we’d like to know more about, for example, their demography, lifestyle, motivations, habits, and problems.
- Initial concepts and assumptions – as a client, you probably have some ideas and a general vision of what the app should look like – we’d like to know your opinion.
- Insights from customer service agents (if you already have a product) – they know what users usually struggle with.
If you think you can’t prepare any information at all, let us help you out. There’s a chance, you already have some of the data but you’re not aware of it. It’s often the case with the insights from web analytics tools.
User interface design process
(01) UX research
Before we get to designing the UI, we would like to understand users’ perspectives. So, at the very beginning, we suggest conducting UX research.
We can choose from various research methods that suit the project best, such as:
- Interviews or surveys – we get in touch with people who represent your target group, identify their problems and ways of solving them.
- Desk research – that includes, for example, reviews on Google Play and App Store, industry reports available online, statistics, etc.
- Usability tests (if you have a product) – such tests help us understand how people currently use your app and what could be improved.
Another source of important information is a Product Design workshop. It’s basically about gathering the company’s experts, sharing the knowledge about the users and the product, interpreting the collected info, and creating data-driven solutions.
(02) Understanding the users
When all the research is done, the UX specialist starts preparing the tools that will help in designing the app. They may be different in every project. But to let you know what you can expect, here are examples of the basic UX tools.
Persona
It represents the target group. We prepare it based on the information collected beforehand. Persona typically consists of a photo, name, job title, bio, problems, and needs or concerns.
What is it for? Persona presents the most important info about users in a nutshell. It’s what we need to have in mind when designing. Such profiles are quite short, so we could remember the most characteristic elements that describe users. This way, it’s easier to create solutions tailor-made for real people.

Customer Journey Map
This tool depicts the user’s actions and emotions from the moment they become aware of the problem to searching and finding the solution.
What is it for? Before users make a purchase in your app or read an article, they must take several steps to get to that point. And you want them to notice you along the way. CJM allows us (among others) to spot the possible touchpoints with your app and moments of friction when the user feels annoyed, or worried. We need to find out how your product can alter that experience.
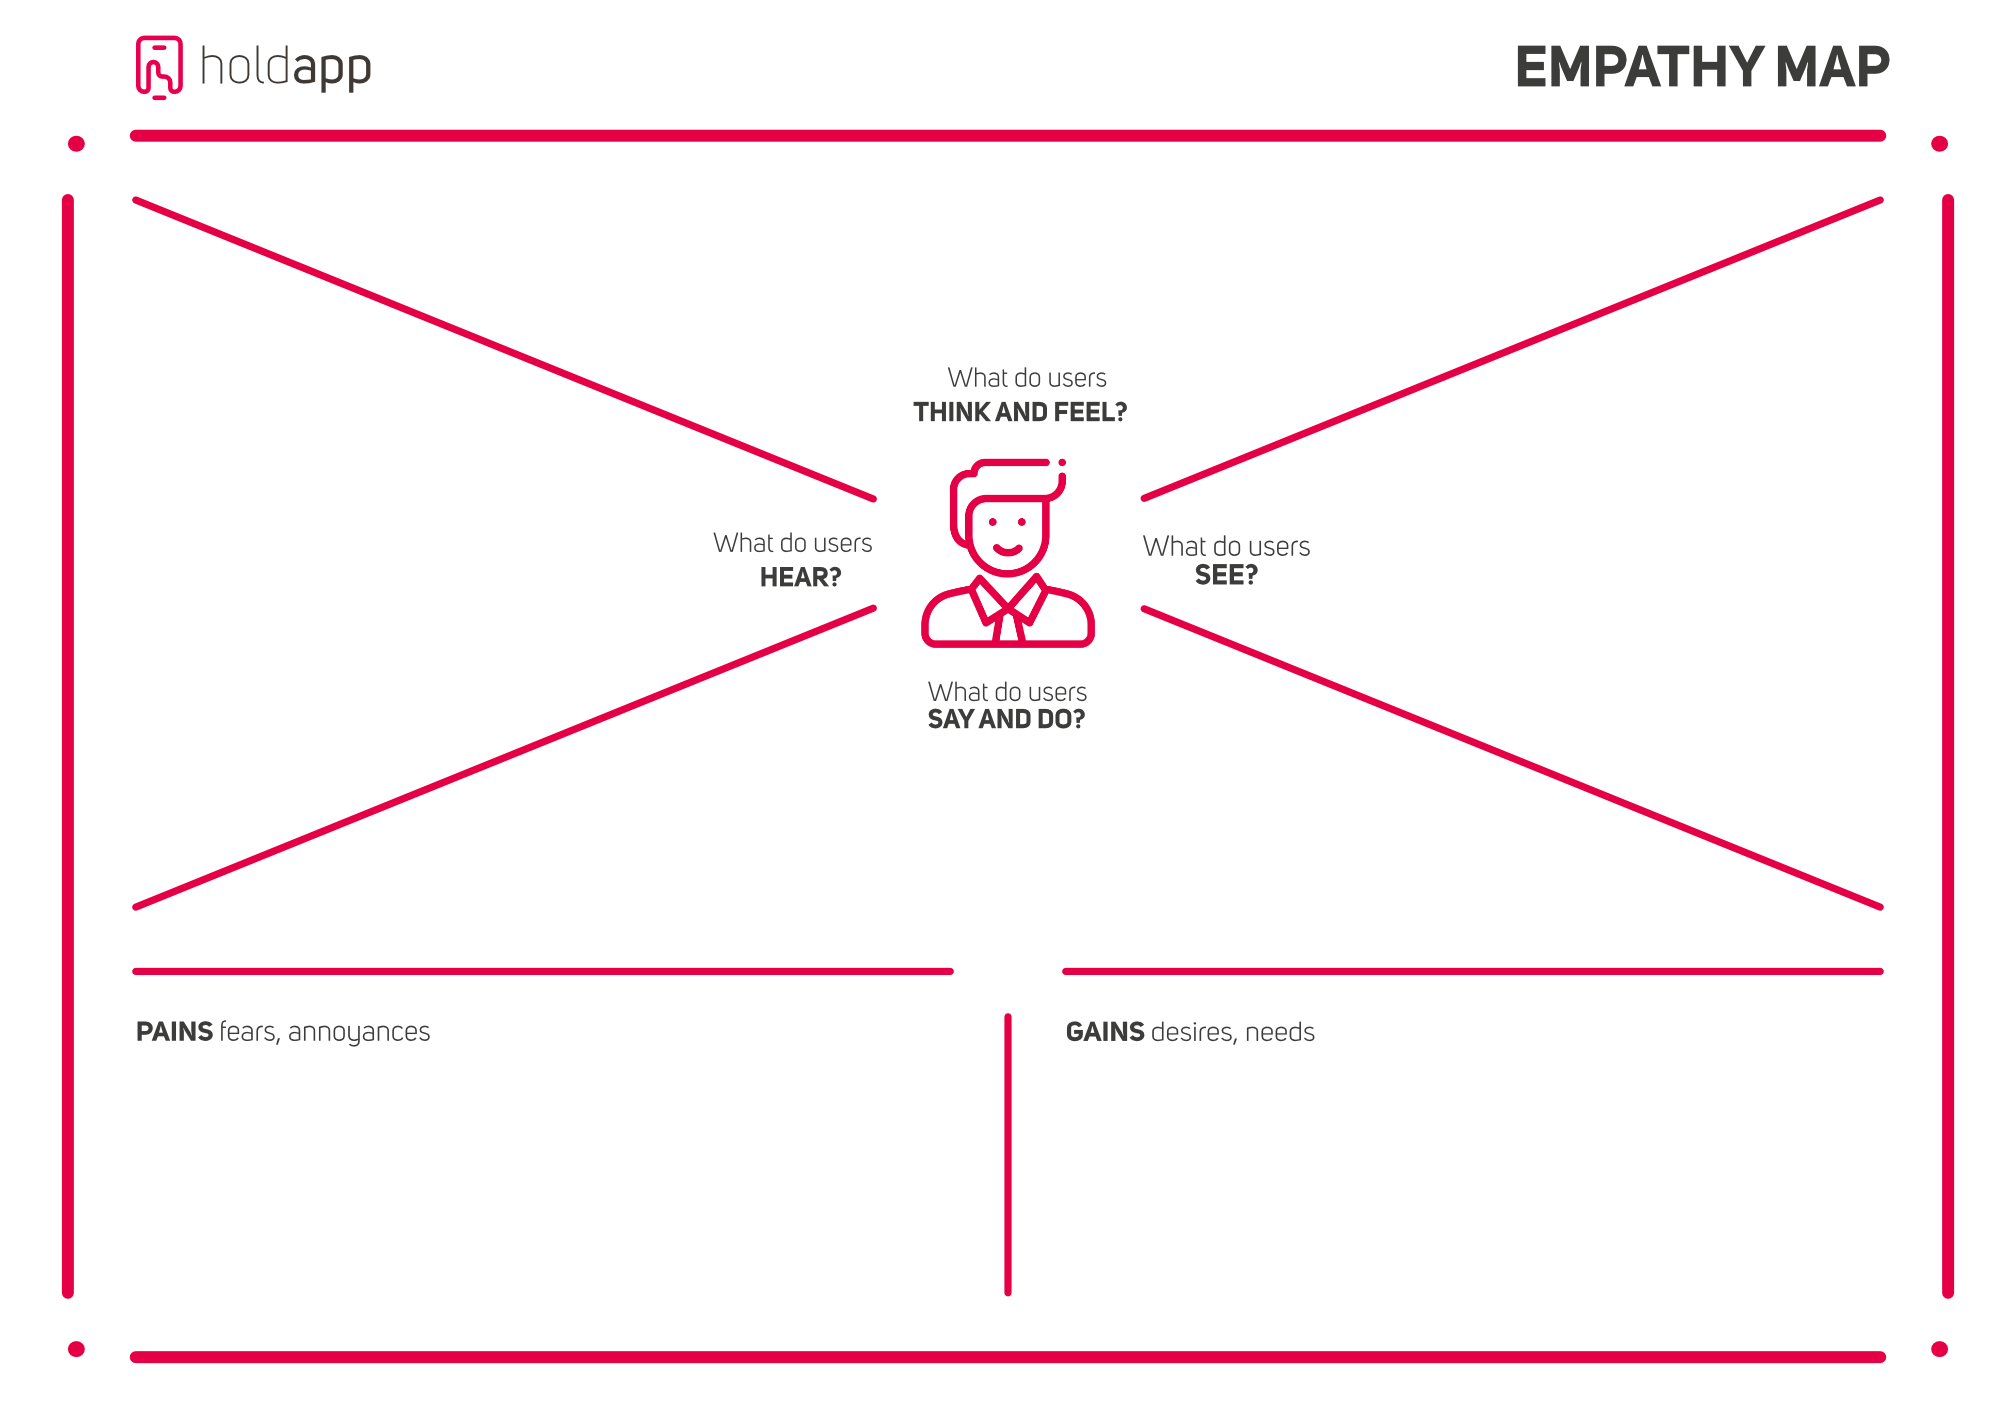
Empathy Map
EMC is a perfect tool to show what actions users perform, what they think, how they feel about it, and what they say.
What is it for? It’s a way of finding out what makes users act in a particular way and what their problems might be.
You can see this map in many different versions, now but it’s been originally created by Dave Gray. The author has updated the Empathy Mapping Canvas a few years ago to make it more even more useful.

The exemplary template of the empathy map.
(03) First draft of the user interface
It’s time for preparing paper wireframes – it’s the initial draft of the app’s design with basic elements. It doesn’t take much time to create and doesn’t require any special tools. A simple pencil will do. With paper wireframes, the UI designer can quickly show the client the first propositions of some views, such as profiles, chats, or product previews.
From now on, a client and a UX/UI designer regularly meet together (once a week, on average). What happens during those sessions?
The designer presents the results of his/her work to a client, explains what has been done and why. Then, the latter verifies them and gives a feedback, so the designer could make changes to the project.
If the new version gets approval, we can move on with the project. But if it doesn’t, a UI specialist needs to try again. The final result must be satisfying to both sides.
(04) Low-fi wireframes
The next step is designing low-fidelity wireframes – a digital version of the basic wireframes but with more UI elements, such as colors, buttons, typography, or text fields. Even though it’s not a complex variant of the design, it makes it easier to see the general direction of the project.
(05) High-fi wireframes – the final version of the design
It’s the most detailed take on wireframes. It has all the views and a complete set of elements. Not just the typography or colors but also the notifications, system status messages, error messages, etc. If this design gets a client’s approval, developers rely on it.
(06) Clickable prototype
It’s basically high-fi wireframes that enable actions. When tapping on buttons, swiping, or filling out forms, users can change the views and discover what the app has to offer. A prototype shows exactly how the product is supposed to look and work. We design prototypes in Figma, Sketch, or Adobe XD.

It’s a good practice to conduct usability tests on the prototypes to check if they are as intuitive and user-friendly as we expect. This little effort at the beginning can save you a lot of time and money later. It decreases the risk that people will get confused while using the app.
A UI design is ready. What happens next?
When we have the final design, the development team starts its implementation. The success of this stage depends heavily on the cooperation between the software engineer and the UX/UI designer.
To make sure that programmers build the app according to a project, the User Interface specialist controls their work and checks if everything looks and performs as intended.
At this point, designers can still make some changes. But if they have been consulting the project with programmers from the start, these alterations shouldn’t be significant enough to slow down the development.
There are some exceptions, of course. For example, when the UI elements that seemed simple turn out to be difficult to implement. Or when there’s a need to add new features long after the start of development. Luckily, it’s not often the case.
What do we do at the maintenance stage?
After the release of the first version of the app, UI designers are less busy, but they still have some tasks on their to-do list. It’s mostly about making small changes. For example? Let’s say, it turns out we have a popup divided into three screens and it slows the user flow down. It means the designer must create a solution that involves only one screen.
Apart from fixing small issues, UI designers also work on the new features that should be implemented in the next version of the app.
We hope that this info makes it a bit clearer what UX/UI design is all about, how designers work, and what product owners can expect from them.
You want our team to prepare a UI design for you? Tell us about your product and we will create the best solutions for your business.
Learn more:


