

The better the app works, the more people want to use it and recommend it to others. Only how can you increase your chances of creating software that works flawlessly?
Conduct tests!
As a product owner, you can manage an app testing process. All you need is a dedicated tool – Firebase App Distribution. Usually, we use it to test Android apps.
From this article, you’ll find out:
- How to configure a testing process
- What stages of tests there are
- How to add new external and internal testers
- How to manage tester permissions
What is Firebase App Distribution?
Firebase offers a tool called App Distribution. It is a platform to share test versions of mobile apps. This solution allows an easy and safe app distribution among the selected people such as testers or client’s team members. Thanks to App Distribution they get a chance to check the software before its official publication.
Basic info
Firebase is available in two plans: free (Spark) and paid (Blaze).
Free plan
- It allows the distribution of up to 30 apps.
- Each of them can have up to 1000 versions. When this limit is exceeded, the oldest builds are deleted.
- Firebase stores the data of the apps for 150 days. When this period is over, they can be automatically deleted.
- The maximum size of a single Android Package Kit (APK) or Android App Bundle (AAB) file on the Android platform is 2 GB.
- The app can be shared with up to 500 testers, including 200 groups.
- Testers can get notifications about the updates.
A paid plan gives access to a tool called Test Lab. It makes it possible to automatically test apps on different devices (Android and iOS).
Benefits of using App Distribution
- Fast sharing the test apps – possible thanks to an intuitive interface.
- Safety – every tester must pass the authentication process. The access requires email authorization.
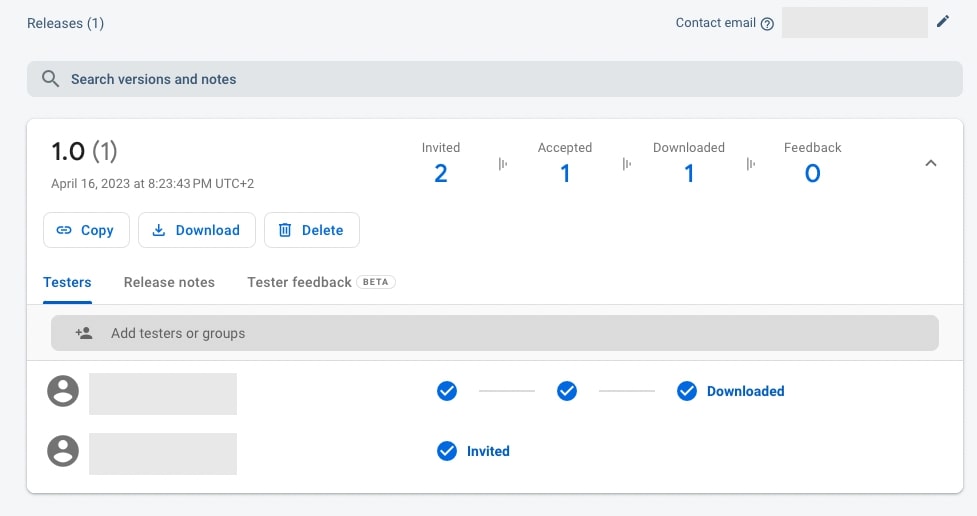
- More control – App Distribution allows you to check who has received an invitation, accepted it, and downloaded the app. In addition, developers can manage access to the app by giving permissions only to selected testers.
- Advanced test management – when App Distribution is integrated with other Firebase tools, such as Crashlytics, it offers you advanced management options that can be used during testing and debugging.
- Easier feedback exchange – this tool allows testers to send opinions, report bugs, and inform about the problems. This way developers can easily collect feedback and make the app better.
How do you add an application to App Distribution?
- In the Firebase console, choose a project in which you want to run tests.
- Go to the App Distribution section and send the APK file. You can send it manually or use an integration with Continuous Integration (CI) system to automate this process.
Managing testers
In App Distribution, a tester is a person invited to check a mobile app. They receive test versions of the app.
A tester can be a member of the project team or someone from the outside – a client or another user who has received a testing invitation.
App Distribution allows you to add or delete testers at any time. What happens after a tester is removed from a group? They lose access to every version of the app they could open exclusively from the group they are no longer in. This means that if a tester is still a member of a different group that also has access to a particular version of the app, then they will be able to see it.
The same thing goes when you delete a group of testers. Its members lose the possibility to test versions they had access to solely through a removed group. It won’t be displayed on the App Distribution page in the Firebase console.
Adding new testers
You can add testers manually by entering their email addresses in the Testers & Groups section in App Distribution.
Adding a tester to a Firebase project
1. Click the Add tester button, next to a search bar.
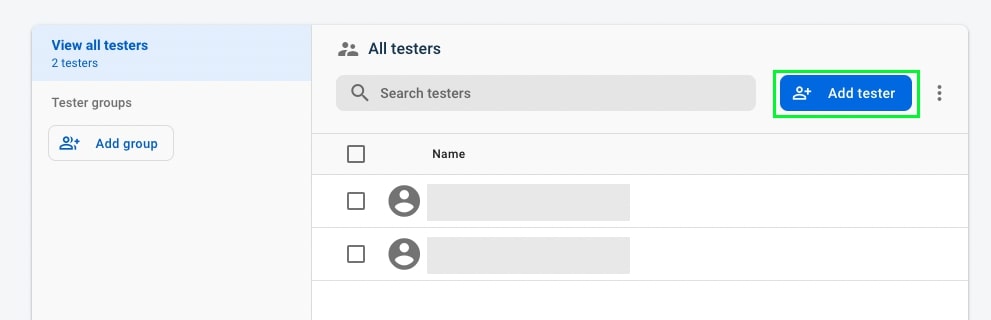
Source: Firebase App Distribution
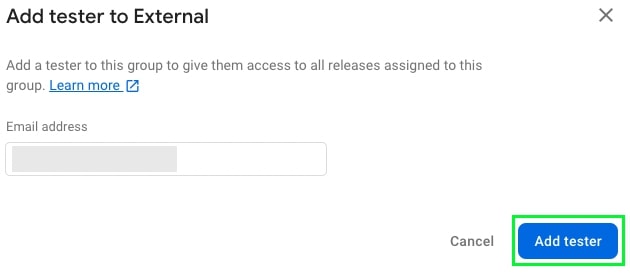
2. Enter a tester’s e-mail address and click Add tester.
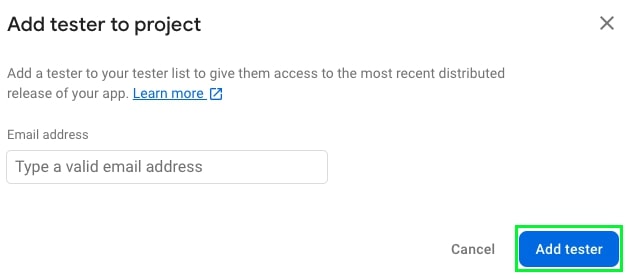
Source: Firebase App Distribution
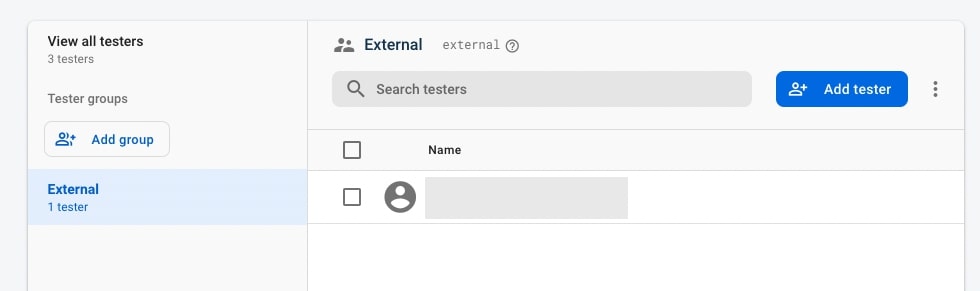
3. A tester has been added to your project.
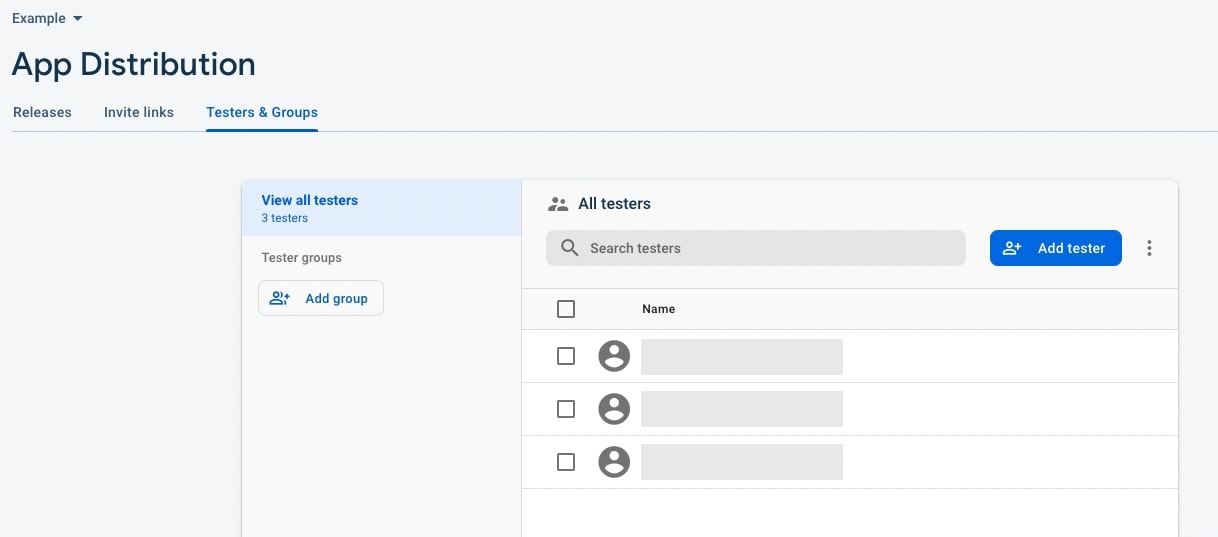
Source: Firebase App Distribution
You can add testers also by importing a CSV file on the Testers & Groups tab:
1. Choose the option Import testers to project.
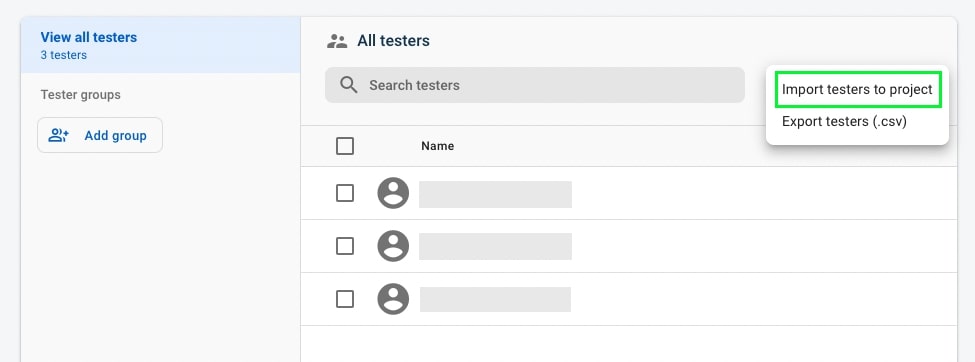
Source: Firebase App Distribution
2. Click Browse and Import to send a CSV file.

Source: Firebase App Distribution
Creating groups and adding testers
After adding a tester to a project, you can also add them to selected groups. Using the groups makes it easier to manage the tester’s access to builds.
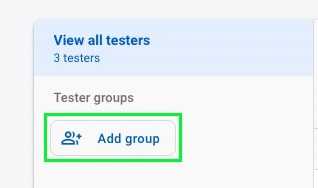
Creating a group
1. Click Add group on the Testers & Groups tab.
Source: Firebase App Distribution
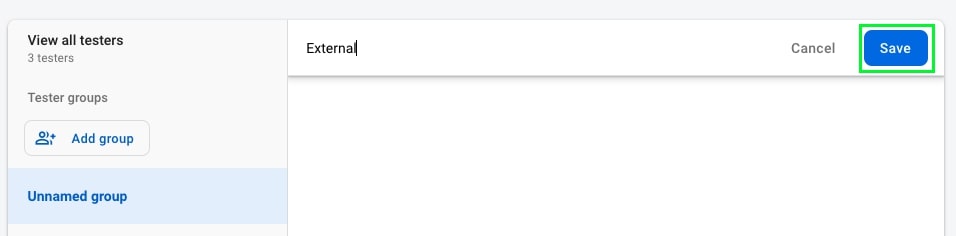
2. Enter the name of the group and click Save.
Source: Firebase App Distribution
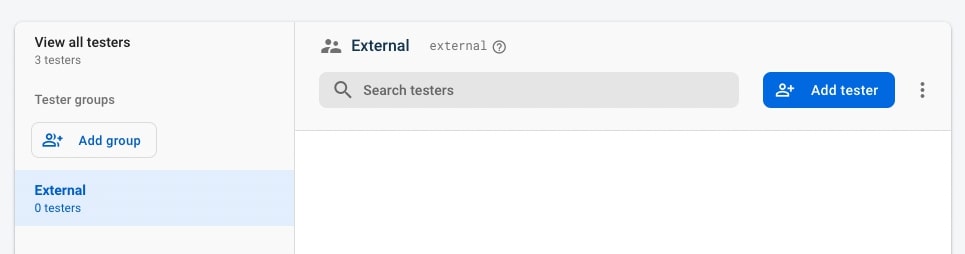
3. A group has been added to your project.
Source: Firebase App Distribution
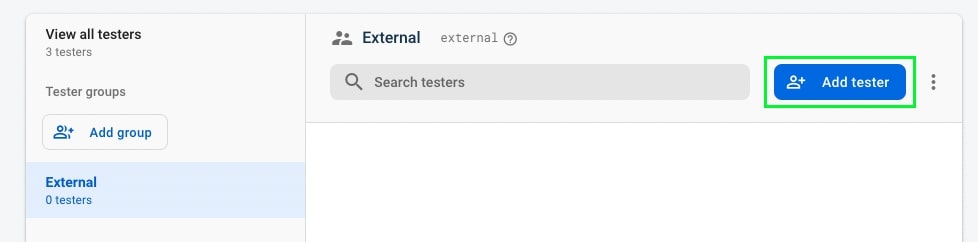
Adding a tester to a selected group
1. Choose a group and click the Add tester button, next to the search bar.
Source: Firebase App Distribution
2. Enter the tester’s e-mail address and click Add tester.
Source: Firebase App Distribution
3. Tester has been added to a group.
Source: Firebase App Distribution
After adding testers to groups, you need to choose a build that they need to test. How do you do this?
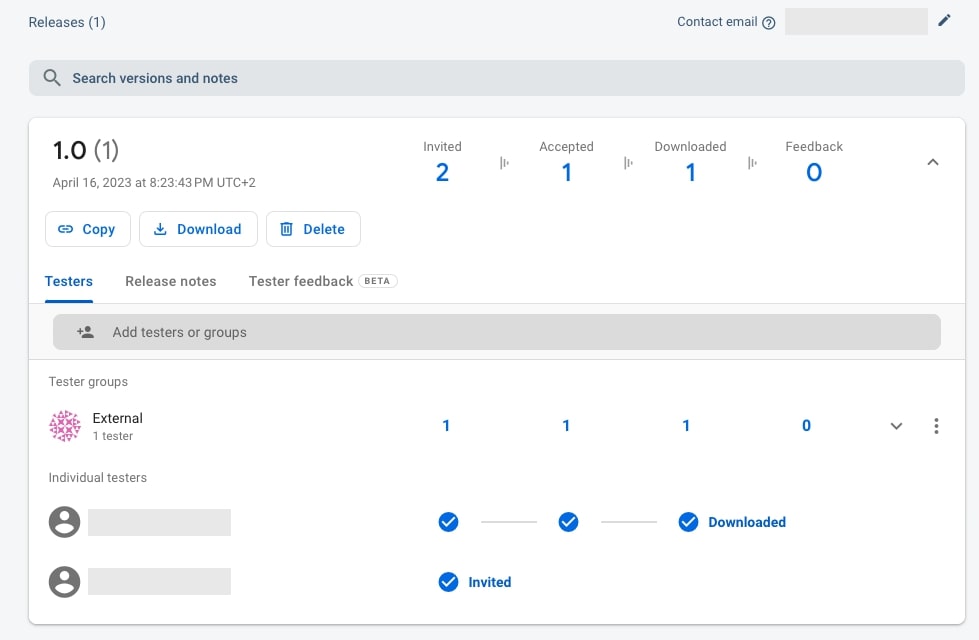
1. Choose a version of the app and a particular build. Then, click Add testers or groups and tick the group.
Source: Firebase App Distribution
2. A group has been added.
Source: Firebase App Distribution
Sharing the app for tests
Invite links are an easy way to increase the number of external testers. They allow users to add themselves to a list of testers. They just need to receive an invite link. It’s a unique URL that enables them to register their email addresses. As a result, they get access to an app.
Invite links come in two types:
- Invitations with no selected group – testers get access only to the latest app version (the one they were invited to test).
- Invitations to a selected group – testers are added to every version of all the apps that the group can access.
You can create an invite link in App Distribution. Remember that it’s optional.
Instruction
1. In the menu on the left, enter the Release & Monitor section and click App Distribution.

Source: Firebase App Distribution
2. Open the Invite Links tab in App Distribution.
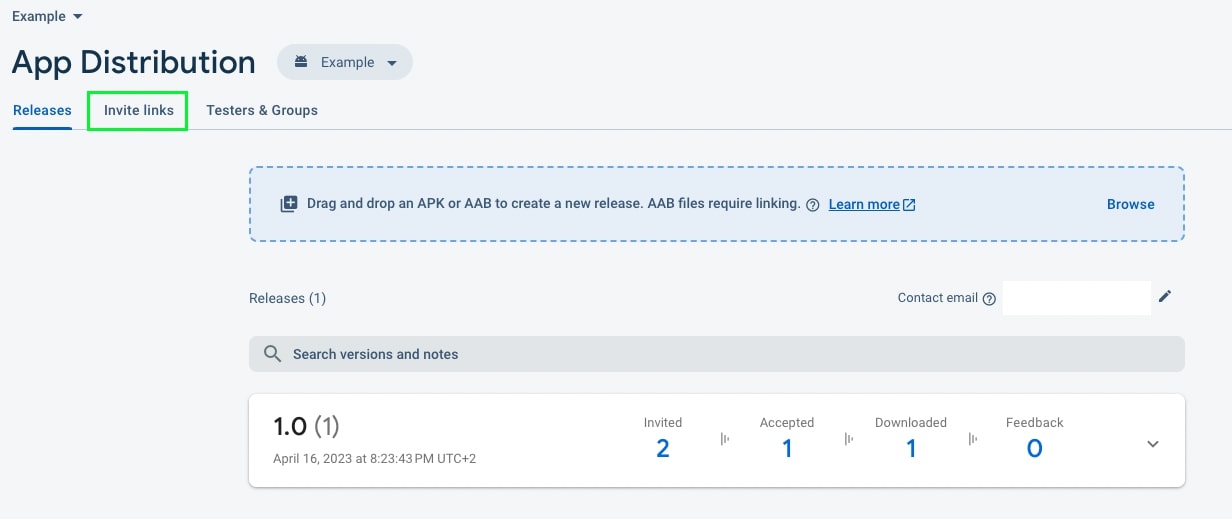
Source: Firebase App Distribution
3. Click Create invite link.
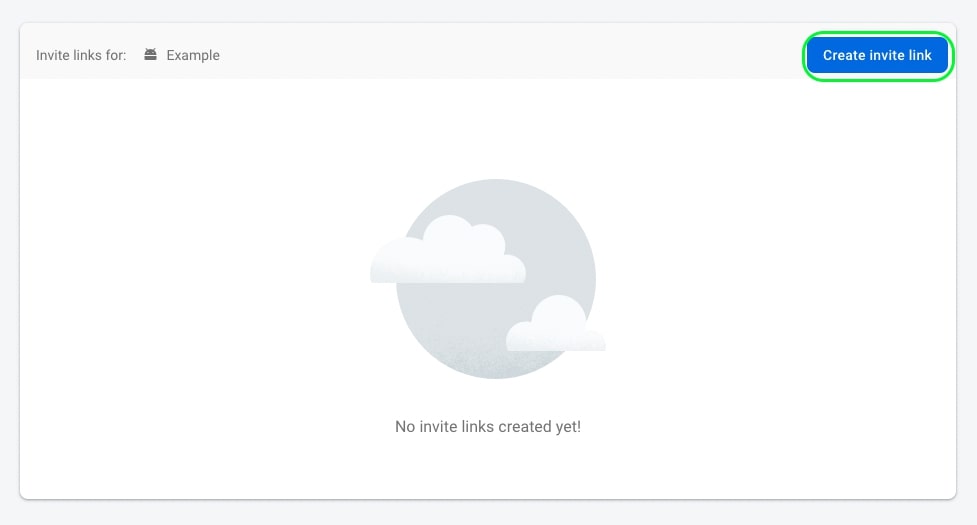
Source: Firebase App Distribution
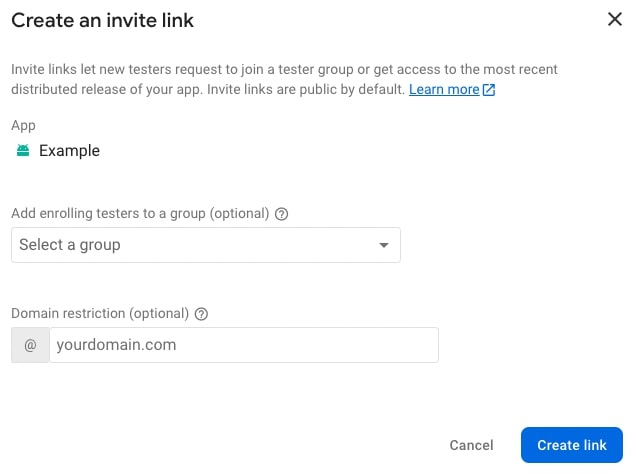
4. If you want to send invitations to a selected group, choose it from the drop-down list. You can enter the domain’s name in the Domain restriction field.
A default option allows every person with access to a link to sign up. To make sure that only people from your organization can test the app, add a domain restriction to an invite link. This way, only users with an email address registered to a particular domain will have access to the app.
5. Now, all you need to do is click Create link.
Source: Firebase App Distribution
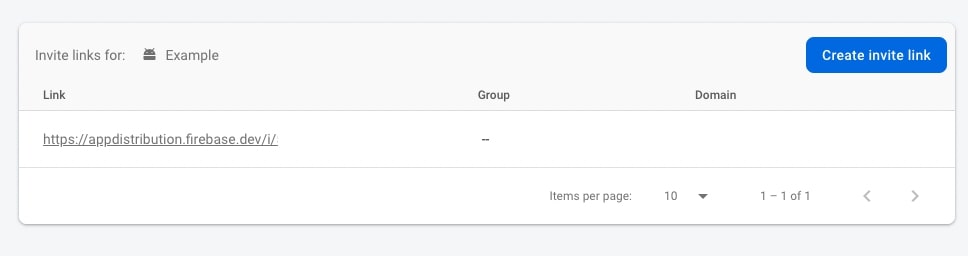
You can find it on the Invite Links tab.
Source: Firebase App Distribution
Managing the apps by testers
Thanks to App Distribution, testers can:
- Download and install test apps
- Tests different features and scenarios
- Report bugs
- Send their opinions and feedback
- Help in identifying potential problems with an app
But to be able to manage the apps, first, you need to get a testing invitation. How to make this happen? Firebase App Tester can help you out. It’s a mobile app that enables testing versions shared through App Distribution.
Adding a test app
1. After receiving the invitation, testers must accept it according to the instructions in the invitation. It may require creating a Firebase account if they don’t have it, yet.
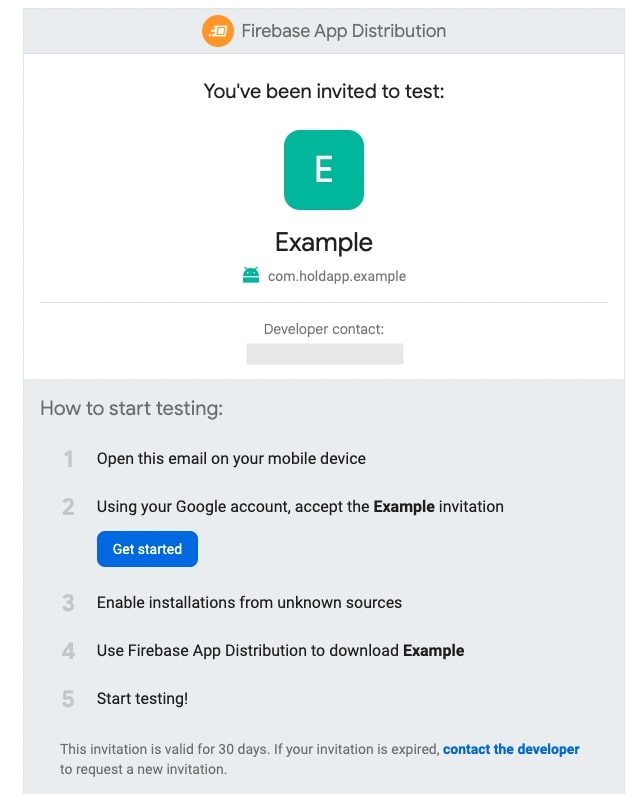
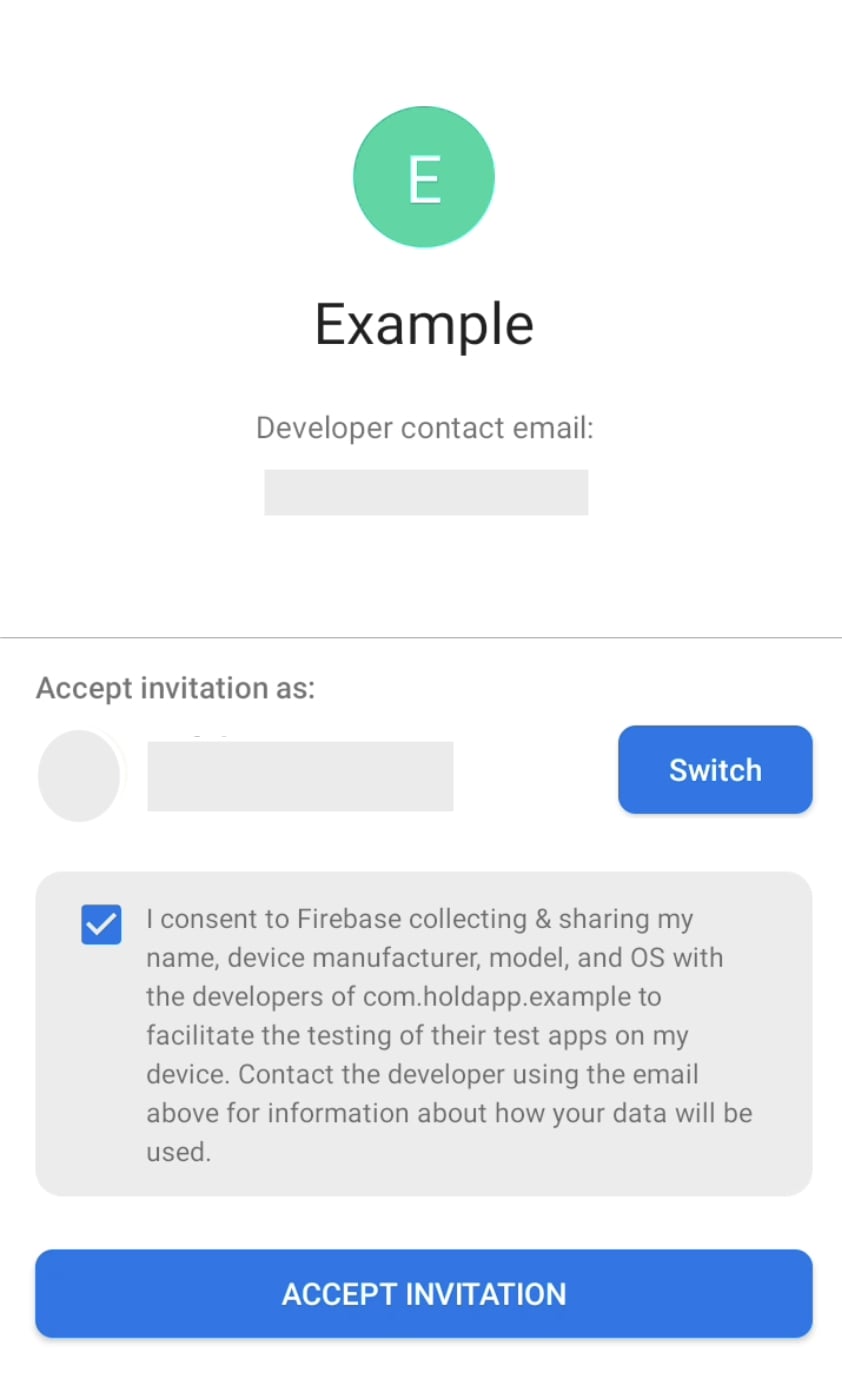
Source: Firebase App Distribution
2. After accepting the invitation, they can download and install the App Tester application on their mobile devices.
3. Next, they need to log in to their Firebase account with the same data they used for accepting the invitation.
4. After logging in to App Tester, users will see a list of available apps. They need to choose the one that requires tests.
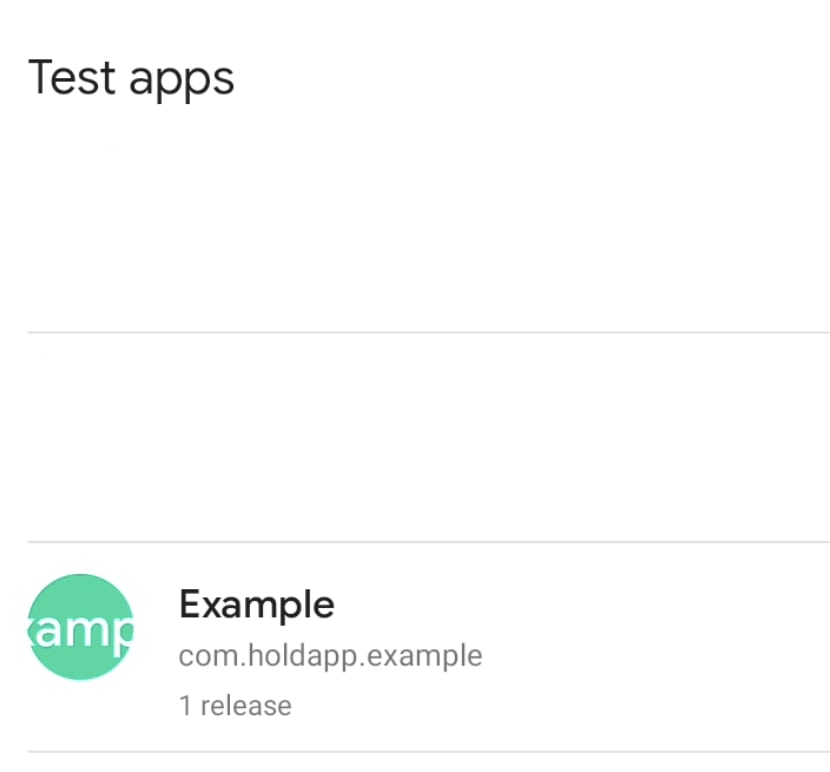
Source: Firebase App Distribution
5. Testers must tap Download to have the app on their devices.
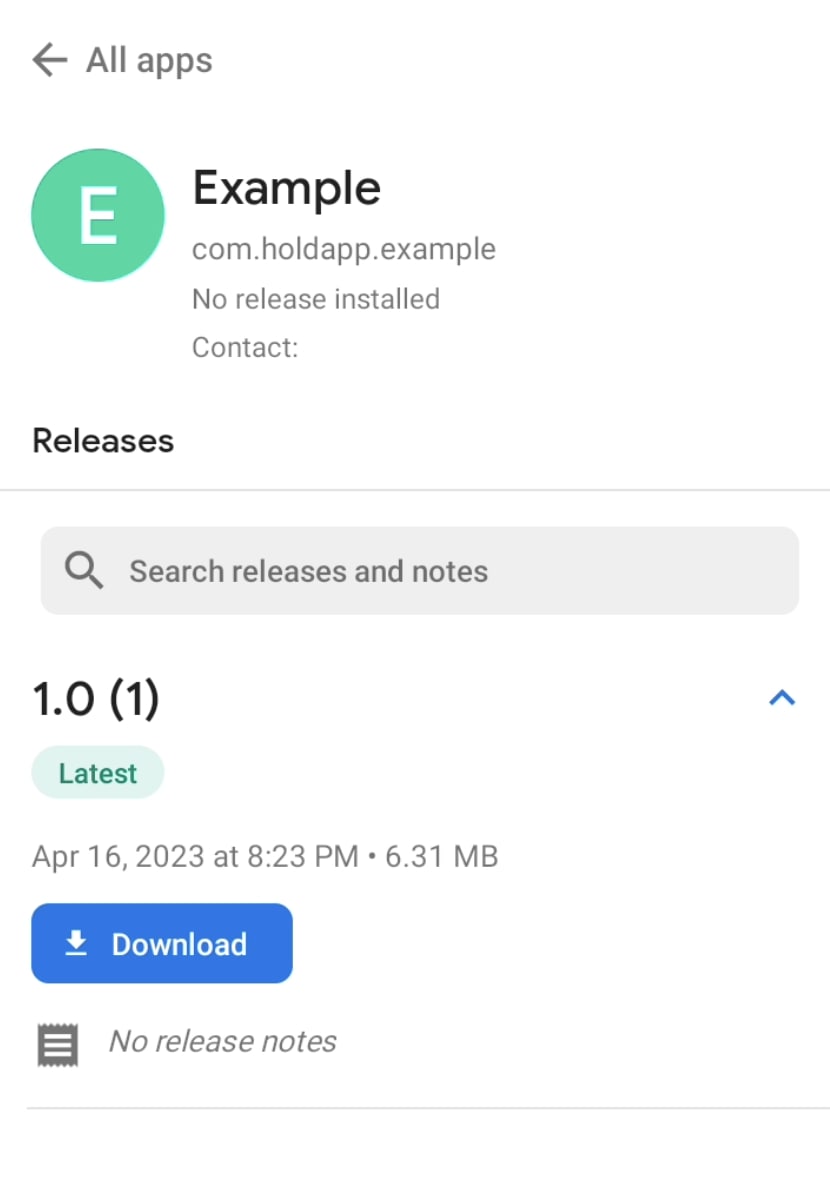
Source: Firebase App Distribution
6. Finally, they tap Install.
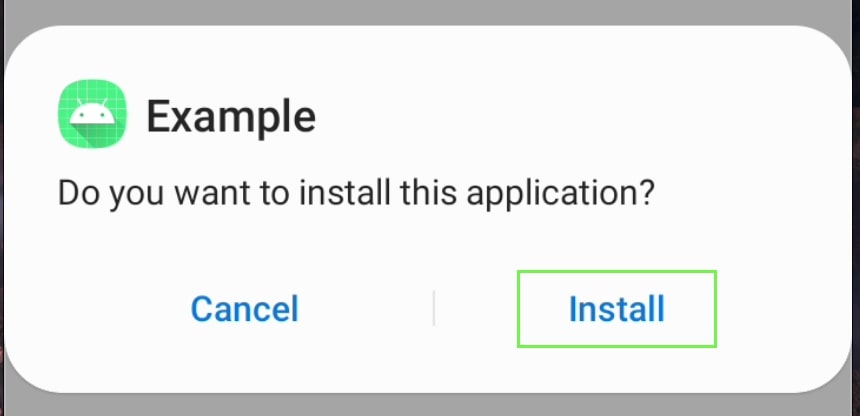
Source: Firebase App Distribution
At this stage, the tests can begin. Users can report the eventual bugs through App Tester and share their comments.
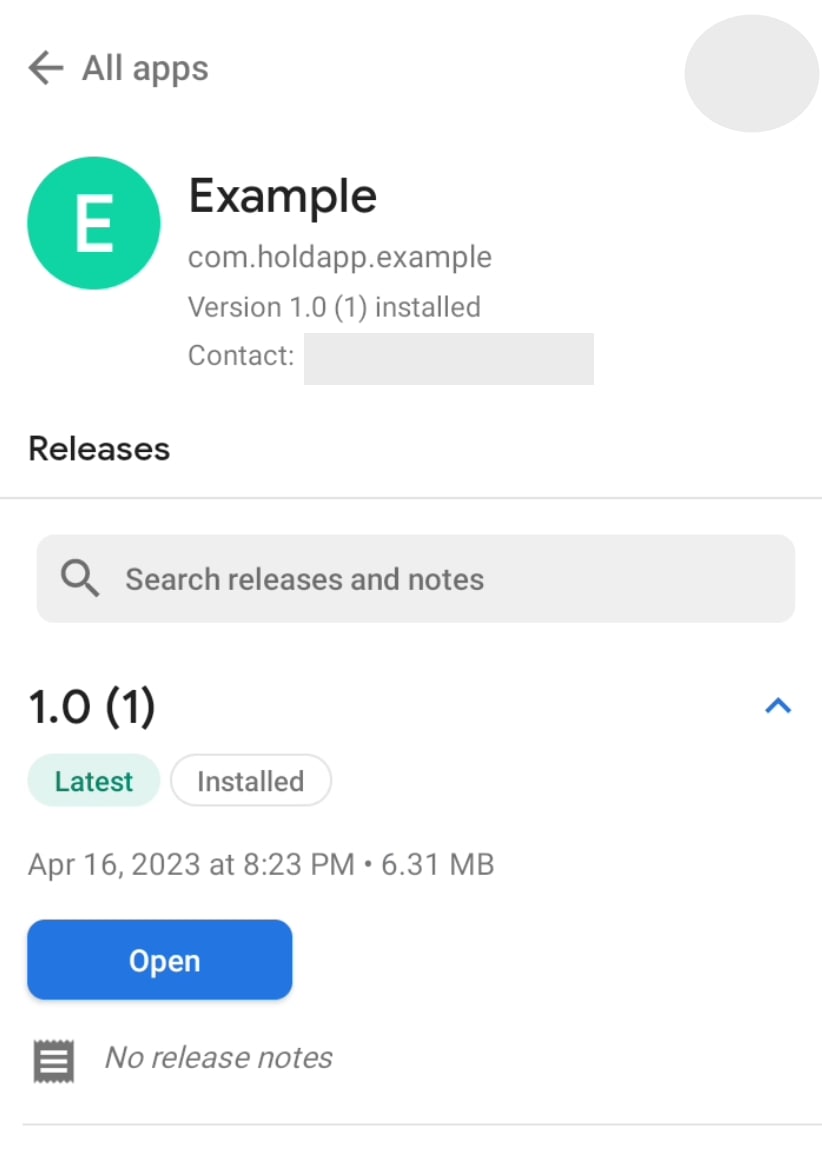
Source: Firebase App Distribution
How to test the app right before its launch and what for?
In the case of Android apps, tests in App Distribution are necessary. It’s not the last stage of the testing process, though. You must also test the product in Google Play Console, right before the launch. What for?
These tests take place within the target environment – Google Play. This means that the app can be downloaded directly from the store. Unlike in App Distribution, where we share the app without involving this platform. Instead, users download App Tester that doesn’t come from the Google Play Store. In order to install it, you need to change the settings on your smartphone and allow downloading apps from unknown sources.
Types of tests in Google Play
Google Play enables running different types of tests before the final product launch:
- Internal tests – for a small group of testers from your organization. You can add up to 100 testers per app and launch up to 5 versions a day.
It’s best to first add a build to the Google Play console and run internal tests. If this process is completed successfully, you can start further tests.
- Closed tests – a testing path for a bigger group of testers outside your organization. You can add up to 2000 testers per app and launch up to 3 versions a day.
- Open tests – a solution for a big group of testers who can find the app on Google Play and sign up for tests. There are no limitations regarding the number of such testers. You can launch up to 5 versions a day.
After these tests are completed and when the app has positively passed the review, it can be publicly available on the Google Play store.
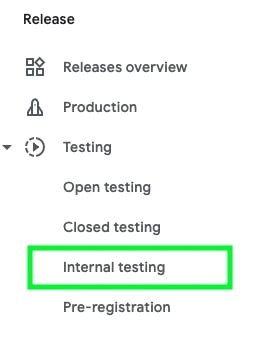
Android pre-release distributions for tests in Google Play Console
1. In the left navigation panel, choose Internal Testing (below Release).
Source: Google Play Console
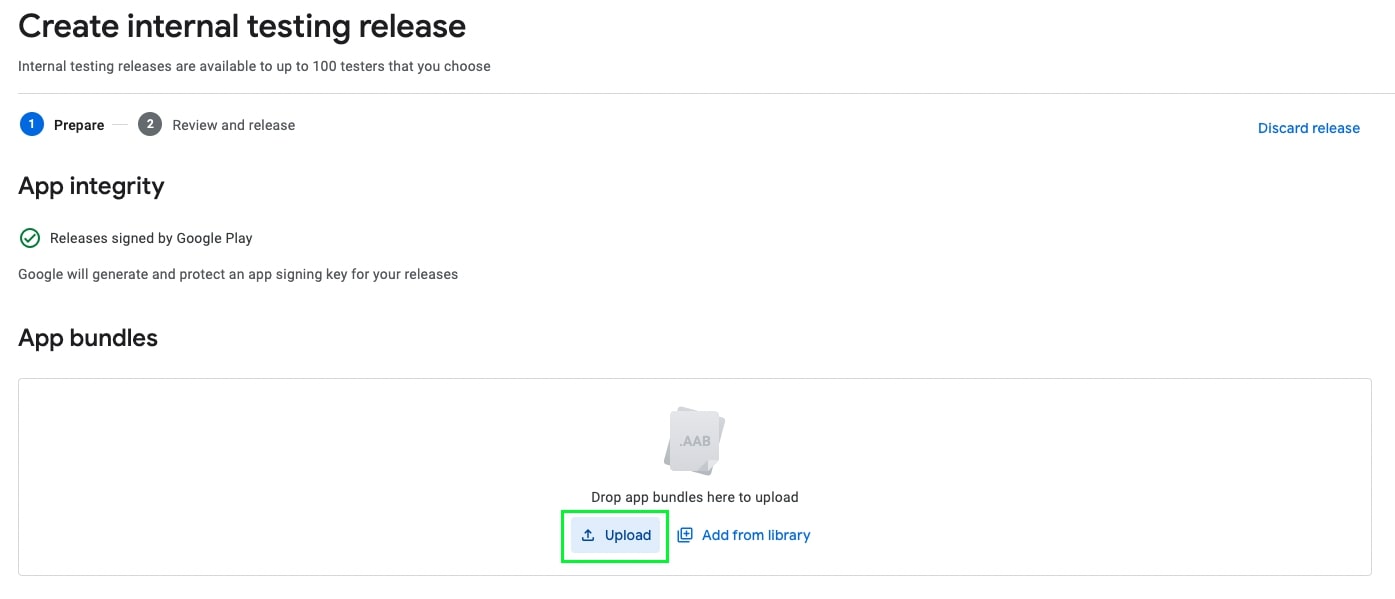
2. Click Create new release in the Internal Testing section.

Source: Google Play Console
3. Click Upload to send the Android Package Kit or Android App Bundle file with a test app.
Source: Google Play Console
4. After sending the final app version, ask testers to check it on their devices. You just need to send the invitations to their e-mail addresses. It will enable them to test features as part of various scenarios, report bugs, and share their comments with you.
Testing with App Distribution gives you an opportunity to ensure the high quality of your software. I hope that with these tips you’ll know how to identify errors in the app and collect the info that will allow you to make it even better.