

Let’s say you implement a screen responsible for downloading a large amount of data. But there’s a problem: how to keep the users occupied when the files are getting sent?
If displaying animations was the first solution that came to your mind – welcome to the club! If you have any doubts or you’re not sure how to start creating animations in Flutter, this article should help you out.
Key takeaways
- Adding animations to mobile apps is crucial for engaging users and creating a positive user experience. Flutter’s flexibility and capabilities create many possibilities for creating captivating animations.
- There are two types of animations in Flutter: implicit and explicit animations.
- Implicit animations use built-in widgets and are based on variables available in a widget.
- Explicit animations require defining the animation behavior using AnimationController.They offer more possibilities, but managing their state can be more complex.
- Staggered animations, a subtype of explicit animations, are used for creating complicated animations with elements that change in a defined sequence or overlap.
- If you want to display very complicated animations, use the Rive tool. You can easily create and embed Rive animation in the Flutter application. The Duolingo app is an excellent example of a mobile app that uses Rive animations to enhance user experience and make the app more engaging.
Why should you add animations to mobile apps?
A neat, nice-looking interface is not enough to make users interested anymore. So, what can you do to encourage people to try out your solution?
Make sure the users have a feeling of control. They must know that their actions have an impact. Every time users do something, the app should send them feedback. This way, they can quickly learn how to use your product and will be more likely to open the app in the future.
What other benefits can the animations offer? They draw the user’s attention to a specific place, for example, with info about the sale. They also ensure smooth transitions between the sequential screens. It increases the chance of building a positive user experience. Especially if the animations are related to the products you offer and their design is coherent with your branding materials.
How does Flutter help to create animations?
Flutter is a perfect tool to build efficient animations that are also visually attractive. The only limitation is your imagination. So, now we’ll discuss how to add an animation to your cross-platform app.
Types of animations in Flutter
Animations (or rather their types) can be divided into explicit animations and implicit animations. What is the difference between them?
Implicit animations
When the animation is based only on a variable available in a widget (such as color or size), you can choose an implicit animation. This means that you use Flutter’s built-in widgets, for example, AnimatedContainer, AnimatedOpacity, AnimatedCrossFade, and many others.
Animation is created every time when the given value changes.
Explicit animations
In the case of explicit animations, you need to define how they should behave all by yourself. These animations use AnimationController. Their asset is that they offer more possibilities than the implicit type and yet keep all its functionalities.
I have to point out that AnimationController is not a widget. Remember to delete it from the memory in a dispose method.
The tricky part, however, is to manage the state of the animation on your own. For this reason, we use explicit animations mostly when we need to build complex solutions.
Staggered animations
What should you do when your job is to create a complicated animation? For example, with the elements that need to change in a defined sequence or overlap? The answer is to use staggered animations, a subtype of explicit animations.
Let me explain to you how you can do this based on the example from the Flutter documentation and the animation you can see below (it’s also available on YouTube). It works like this – first, the widget shows up on a screen, it grows wider and then higher. What’s more, the widget changes its position on a screen and places itself in the center. Next, the rectangle turns into a wheel and changes its color to orange. In the end, the animation starts to run backward.
Source: Stagger Demo; https://docs.flutter.dev/development/ui/animations/staggered-animations (CC BY 4.0)
The implementation of this animation requires defining the sequence of the displayed animations. It’s good to start off by writing down what happens in particular frames of your animation.
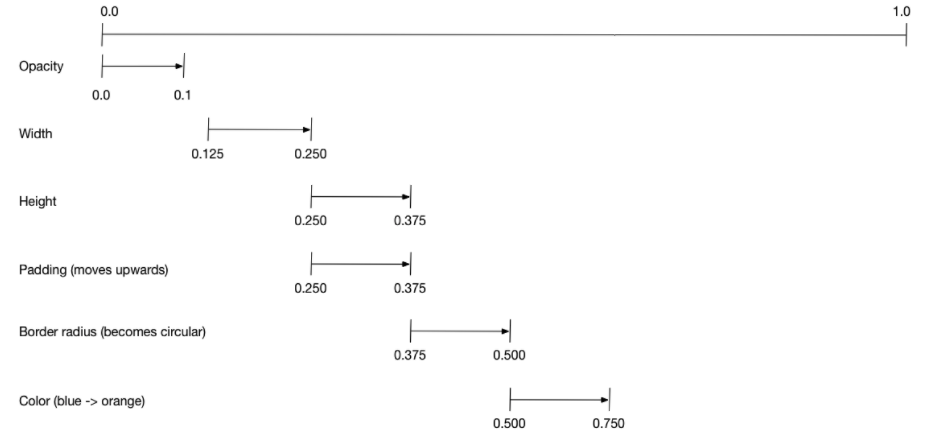
Source: https://docs.flutter.dev/development/ui/animations/staggered-animations (CC BY 4.0)
Animating a jumping rectangle
When you decide what you want to do, write down your plan.
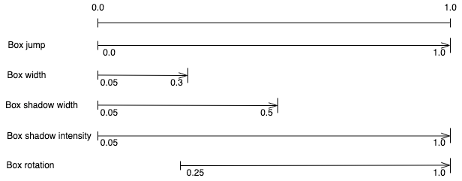
Example of the animation plan
Now you’re ready to code.
Start building Flutter animation by creating a BouncingAnimationWidget of the StatefulWidget type. For that purpose, use SingleTickerProviderStateMixin. It’s a mixin that controls refreshing the animations. It ensures a Ticker that allows Flutter’s engine to keep 60 frames per second when displaying the animations. Next, you declare the AnimationController – the one to manage it all.
Keep in mind For many objects of AnimationController that are used here, it is required to extend the state with the TickerProviderStateMixin mixin to ensure the animation will work correctly.
class BouncingAnimationWidget extends StatefulWidget {
 const BouncingAnimationWidget({Key? key}) : super(key: key);
 @override
 State<BouncingAnimationWidget> createState() =>
     _BouncingAnimationWidgetState();
}
class _BouncingAnimationWidgetState extends State<BouncingAnimationWidget>
   with SingleTickerProviderStateMixin {
 late final AnimationController _controller;
 @override
 void initState() {
   super.initState();
   _controller = AnimationController(
     duration: const Duration(milliseconds: 500),
     vsync: this,
   );
 }
@override
 Widget build(BuildContext context) {
   return Scaffold();
 }
 @override
 void dispose() {
   _controller.dispose();
   super.dispose();
 }
}
It’s time to create an object to animate – a rectangle with a shadow.
Stack(
         alignment: Alignment.center,
         children: [
           _boxShadow(context),
           Align(
             alignment: Alignment(0.0, _boxJumpHeight.value),
             child: _animatedBox(context),
           ),
         ],
       ),

Widget _boxShadow(BuildContext context) => Container(
       width: 180,
       height: 15,
       decoration: BoxDecoration(
         borderRadius:
             BorderRadius.all(Radius.elliptical(180, 15)),
         boxShadow: [
           BoxShadow(
             color: Colors.black.withOpacity(0.15),
             spreadRadius: 5,
             blurRadius: 4,
             offset: const Offset(0, 3),
           ),
         ],
       ),
     );

 Widget _animatedBox(BuildContext context) => Container(
         width: 160,
         height: 50,
         color: Colors.white,
       );
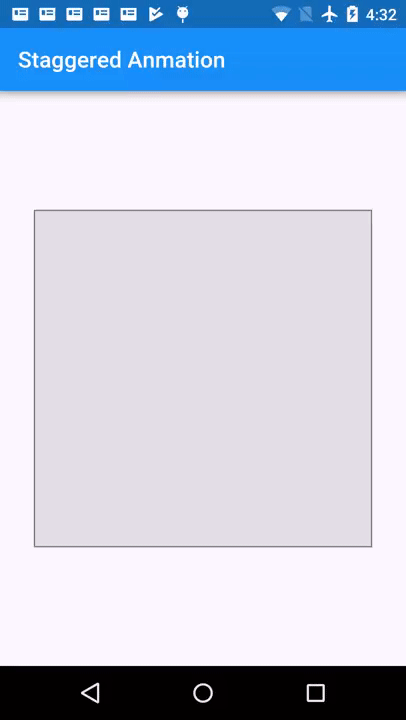
A static object currently looks like this:

Now, declare the animations by adding them in particular intervals.
void _initJumpAnimation() => _boxJumpHeight = Tween<double>(
       begin: -0.07,
       end: -0.5,
     ).animate(
       CurvedAnimation(
         parent: _controller,
         curve: const Interval(
           0.0,
           1.0,
           curve: Curves.easeInOut,
         ),
       ),
     );

 void _initBoxRotationAnimation() => _boxRotationAngle = Tween<double>(
       begin: 0,
       end: 360,
     ).animate(
       CurvedAnimation(
         parent: _controller,
         curve: const Interval(
           0.25,
           1.0,
           curve: Curves.ease,
         ),
       ),
     );

 void _initBoxWidthAnimation() => _boxWidth = Tween<double>(
       begin: 160,
       end: 50,
     ).animate(
       CurvedAnimation(
         parent: _controller,
         curve: const Interval(
           0.05,
           0.3,
           curve: Curves.ease,
         ),
       ),
     );

 void _initBoxShadowWidthAnimation() => _boxShadowWidth = Tween<double>(
       begin: 180,
       end: 50,
     ).animate(
       CurvedAnimation(
         parent: _controller,
         curve: const Interval(
           0.05,
           0.5,
           curve: Curves.ease,
         ),
       ),
     );

 void _initBoxShadowIntensityAnimation() =>
     _boxShadowIntensity = Tween<double>(
       begin: 0.15,
       end: 0.05,
     ).animate(
       CurvedAnimation(
         parent: _controller,
         curve: const Interval(
           0.05,
           1.0,
           curve: Curves.ease,
         ),
       ),
     );
When you already have the animations, add a possibility to run them along with the rotation of the rectangle. The static values should change to the ones controlled by the particular animations.
Now, the widget should look like this:
class BouncingAnimationWidget extends StatefulWidget {
 const BouncingAnimationWidget({Key? key}) : super(key: key);


@override
 State<BouncingAnimationWidget> createState() =>
     _BouncingAnimationWidgetState();
}

class _BouncingAnimationWidgetState extends State<BouncingAnimationWidget>
   with SingleTickerProviderStateMixin {
 late final AnimationController _controller;
 late final Animation<double> _boxJumpHeight;
 late final Animation<double> _boxWidth;
 late final Animation<double> _boxShadowWidth;
 late final Animation<double> _boxShadowIntensity;
 late final Animation<double> _boxRotationAngle;

 @override
 void initState() {
   super.initState();
   _controller = AnimationController(
     duration: const Duration(milliseconds: 500),
     vsync: this,
   );
   _initJumpAnimation();
   _initBoxWidthAnimation();
   _initBoxShadowWidthAnimation();
   _initBoxShadowIntensityAnimation();
   _initBoxRotationAnimation();
 }
 // Insert init functions from the last paragraph here
 @override
 Widget build(BuildContext context) => AnimatedBuilder(
       builder: (context, _) => _buildAnimation(context),
       animation: _controller,
     );

 Widget _buildAnimation(BuildContext context) => GestureDetector(
       onTap: _playAnimation,
       child: Stack(
         alignment: Alignment.center,
         children: [
           _boxShadow(context),
           Align(
             alignment: Alignment(0.0, _boxJumpHeight.value),
             child: _animatedBox(context),
           ),
         ],
       ),
     );

 Future<void> _playAnimation() async {
   try {
     await _controller.forward().orCancel;
     await _controller.reverse().orCancel;
   } on TickerCanceled {
     // the animation got canceled
   }
 }

 Widget _boxShadow(BuildContext context) => Container(
       width: _boxShadowWidth.value,
       height: 15,
       decoration: BoxDecoration(
         borderRadius:
             BorderRadius.all(Radius.elliptical(_boxShadowWidth.value, 15)),
         boxShadow: [
           BoxShadow(
             color: Colors.black.withOpacity(_boxShadowIntensity.value),
             spreadRadius: 5,
             blurRadius: 4,
             offset: const Offset(0, 3),
           ),
         ],
       ),
     );

 Widget _animatedBox(BuildContext context) => Transform(
       alignment: Alignment.center,
       transform: _boxRotation(_controller.status),
       child: Container(
         width: _boxWidth.value,
         height: 50,
         color: Colors.white,
       ),
     );

 Matrix4 _boxRotation(AnimationStatus animationStatus) {
   // This will ensure that rotation will be in the same direction on reverse
   if (animationStatus == AnimationStatus.reverse) {
     return Matrix4.identity()..rotateZ(-_boxRotationAngle.value * pi / 180);
   } else {
     return Matrix4.identity()..rotateZ(_boxRotationAngle.value * pi / 180);
   }
 }

 @override
 void dispose() {
   _controller.dispose();
   super.dispose();
 }
}
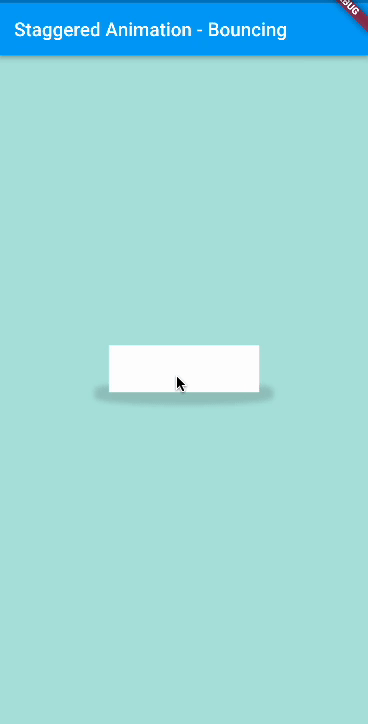
After making changes to statical values and adding rotation to a rectangle, you get the following result:
But what if you want to fill your UI with interactive animations?
Rive animations
As I suggested before, animations are great and should become part and parcel of every app (more or less).
But what if your client and the designer need a very complicated animation? You can solve this problem in two ways – either you take up a challenge and implement the animations in the code, or you can use Rive.
Rive is a powerful tool for creating interactive animations. It allows you to embed them directly in apps written with Flutter, Swift, or Kotlin, among others. Using the editor available in a browser, you can build the animations and upload them to the app from the internet. You can also add them to assets.
Integrating Rive is very easy to do. You can find many guides made by the Rive community and ready-to-use examples of animations online, for example, on the Rive platform. Besides that, there is little to no code you need to write! You can think of Rive as a low-code animation tool for creating interactive graphics!
Using Rive animations in the Flutter app
After making the animations, you need to use the package prepared by the Rive creators. Open a new project and add a Rive animation file to it. Next, add Rive Flutter dependency, create a widget that will download the animation (from the file or the web) and build it.
class HoldappLogoRiveWidget extends StatefulWidget {
 const HoldappLogoRiveWidget({Key? key}) : super(key: key);

 @override
 State<HoldappLogoRiveWidget> createState() => _HoldappLogoRiveWidgetState();
}

class _HoldappLogoRiveWidgetState extends State<HoldappLogoRiveWidget>
   with SingleTickerProviderStateMixin {
 Artboard? _riveArtboard;

 @override
 void initState() {
   super.initState();
   rootBundle.load('assets/holdapp_logo.riv').then((data) {
     // Load the RiveFile from the binary data.
     final file = RiveFile.import(data);

     // The artboard is the root of the animation
     // and gets drawn in the Rive widget.
     final artboard = file.mainArtboard;
     var controller =
         StateMachineController.fromArtboard(artboard, 'State Machine 1');
     if (controller != null) {
       artboard.addController(controller);
     }
     setState(() => _riveArtboard = artboard);
   });
 }

 @override
 Widget build(BuildContext context) => Scaffold(
       backgroundColor: Colors.white,
       body: _riveArtboard != null
           ? Rive(artboard: _riveArtboard!)
           : const Center(
               child: CircularProgressIndicator(),
             ),
     );
}
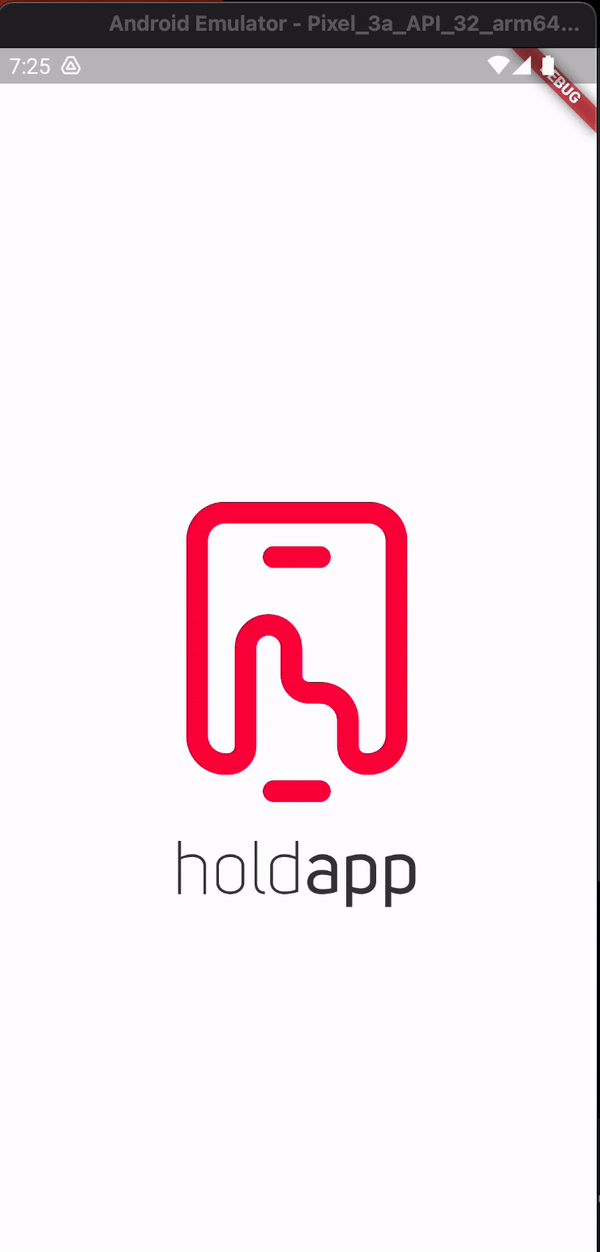
As you can see, it doesn’t take much to add a Rive animation to a Flutter app. It looks like this:
Methods of animation
I have to point out that the platform supports three methods of animation:
- One-shot – one-time display of the animation
- Ping-pong – infinite display of the animation in a sequence from a start to an end
- Loop – infinite display of the animation from the beginning
Rive allows you to change the way the animation is displayed from the code level. Thanks to the State Machine, Rive animations allow you to make an impact on which animation should be played by the State Machine enabling you to use interactive animations.
For example, tapping the button changes a night animation to a day animation. At the same time, it changes the way it works in the State Machine of the Rive animation file (from day to night). Another example could be following the cursor and reacting to its movement, as it is presented here.
The entire code and the animation file are available on Github.
Duolingo is a perfect example of an app that uses State Machine with excellent results. The team chose the Rive tool to create its lip sync option, which adjusts the mouth movement of Duolingo characters according to what they say. You can read more about this project on their blog.
Complex animations in Flutter – Rive as a solution
The latest version added a high-level API for creating nested artboards capable of handling even more user inputs. Rive editor is becoming a more and more powerful tool for design and animation.
If you have any questions regarding Rive animations and Flutter apps or are looking for a team that will add engaging animations to your app – send us a message. We’ll discuss your project and tell you how our Flutter team can help.
Find out more: