

With the release of Android Studio version 2.2, Google has given developers a lot of new features. One of them is Espresso Test Recorder. What is it and how it makes running tests easier?
Espresso Test Recorder
Espresso is a framework for writing UI tests for our applications. It is a part of Android Support Testing Library. With Espresso Test Recorder creating tests is much easier and faster than writing them yourself.
Our task is to perform actions as if using the application in a usual way and then add assertions that evaluate whether the application is working properly. At the end of the so-called recording, generated is a test code launched in the same way as a test you would have written.
Set up
To get started with Test Recorder, we need to add the following dependencies to our app/build.gradle file:
androidTestCompile 'com.android.support.test.espresso:espresso-core:2.2.2'
androidTestCompile 'com.android.support.test:runner:0.5'
In the same file, add the following in the android.defaultConfig section:
testInstrumentationRunner "android.support.test.runner.AndroidJUnitRunner"Test recording
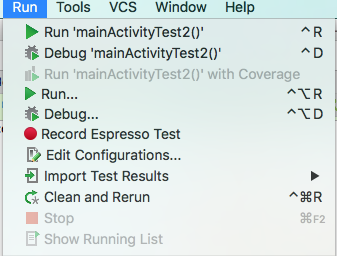
After such preparation we can start recording the test. From the top menu choose Run -> Record Espresso Test.
Select the device on which you want to run the application, it can be both an emulator or a physical device.
At this point it is worth noting that, for tests recording to work properly, we need to turn off animations in the development options.
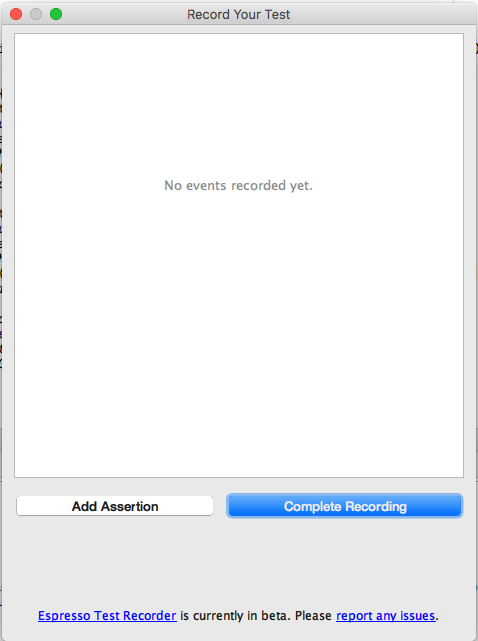
We should now see a window containing all the interactions and assertions that we have done / added. At the beginning it will obviously be empty.
Recording
Select the device on which you want to run the application, it can be both an emulator or a physical device. At this point it is worth noting that, for tests recording to work properly, we need to turn off animations in the development options. We should now see a window containing all the interactions and assertions that we have done / added. At the beginning it will obviously be empty.
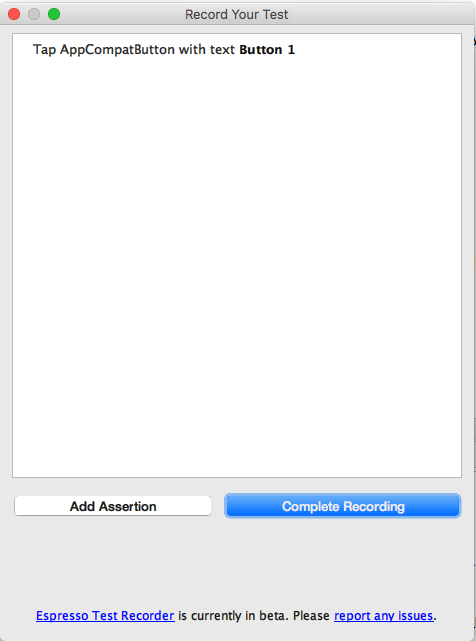
After each performed interaction the list will be updated.
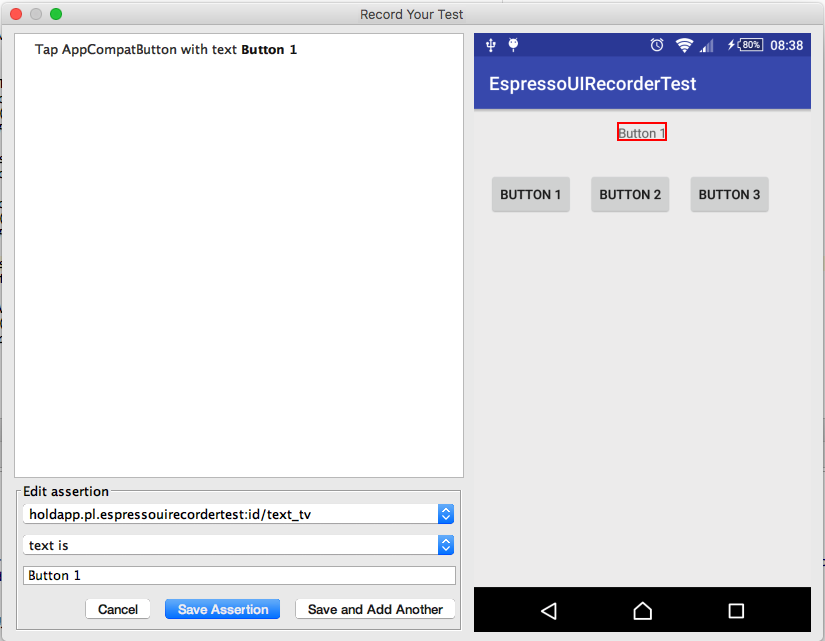
At any time we can select any view and then add an assertion assessing whether or not it is in proper condition, by clicking on the button “Add Assertion”. Unfortunately, the choice of assertions is not very wide, and is confined to, “exists” or “does not exist”, for all the views, in addition to the “text is” for TextView and its subclasses.
After performing all actions and adding all the assertions, we can click “Complete Recording” button. Upon completion of the recording, generated will be a code file for our test.
@RunWith(AndroidJUnit4.class)
public class MainActivityTest3 {

    @Rule
    public ActivityTestRule<MainActivity> mActivityTestRule = new ActivityTestRule<>(MainActivity.class);

    @Test
    public void mainActivityTest3() {
        ViewInteraction appCompatButton = onView(
                allOf(withId(R.id.button_1), withText("Button 1"),
                        withParent(allOf(withId(R.id.activity_main),
                                withParent(withId(android.R.id.content)))),
                        isDisplayed()));
        appCompatButton.perform(click());

        ViewInteraction textView = onView(
                allOf(withId(R.id.text_tv), withText("Button 1"),
                        childAtPosition(
                                allOf(withId(R.id.activity_main),
                                        childAtPosition(
                                                withId(android.R.id.content),
                                                0)),
                                0),
                        isDisplayed()));
        textView.check(matches(withText("Button 1")));

    }

    private static Matcher<View> childAtPosition(
            final Matcher<View> parentMatcher, final int position) {

        return new TypeSafeMatcher<View>() {
            @Override
            public void describeTo(Description description) {
                description.appendText("Child at position " + position + " in parent ");
                parentMatcher.describeTo(description);
            }

            @Override
            public boolean matchesSafely(View view) {
                ViewParent parent = view.getParent();
                return parent instanceof ViewGroup && parentMatcher.matches(parent)
                        && view.equals(((ViewGroup) parent).getChildAt(position));
            }
        };
    }
}
Espresso Test Recorder is definitely an interesting and promising tool. Unfortunately, mainly due to the limitations associated with a small number of assertions to be used, at the moment it does not allow for creating more complex tests. However, I encourage you to check how it works and track its progress. In the future, it can even completely replace the traditional way of creating UI tests.